FISCHBEIN
®
F SERIES PORTABLE SEWING MACHINES
OPERATOR’S MANUAL
REV. H 9/2011
8. Screw the throat plate
securely to the
machine.
9. Follow the
instructions in the
adjustment section to
properly position the
feed dog before
tightening the socket
cap screw.
10. Reassemble the
looper cover to the
machine.
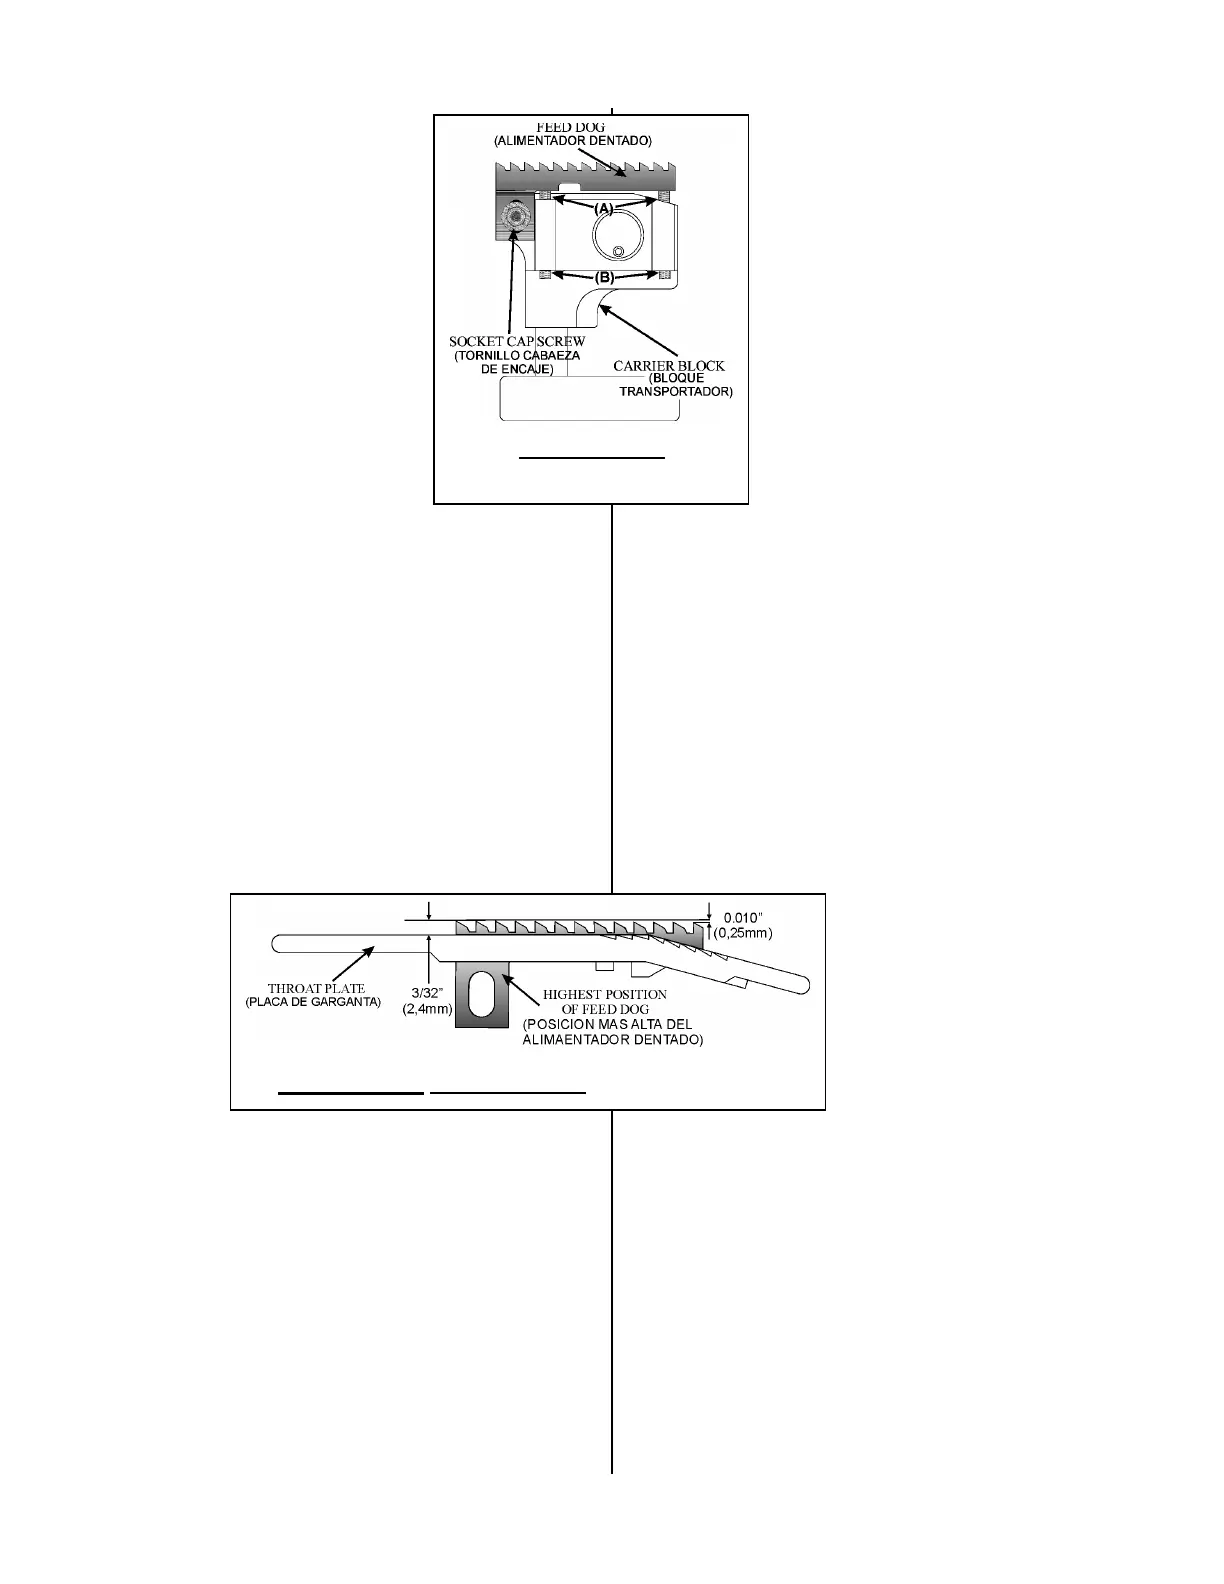
ADJUSTING THE FEED DOG
1. The feed dog height is controlled by two
adjustable set screws (A). (Illustration
26) These screws should be adjusted so
that the top of the feed dog is 3/32 inch
(2.4mm) above the throat plate, when it
is at its highest point of its cycle.
(Illustration 27)
2. The leading edge of the feed dog should
be 0.010 inches (0.25 mm) lower than
the trailing edge. Use fischbein gauge
11494 if necessary to set the feed dog
height.
3. Once the orientation of the feed dog has
been set, lock the upper set screws (A)
into position using the lower set screws
(B). (Illustration 26)
4. Tighten the socket cap screw.
(Illustration 26)
5. Assemble the looper cover to the
machine.
8. Atornille bien asegurada
la placa de garganta a la
máquina.
9. Siga las instrucciones de
la sección de ajustes para
colocar el alimentador dentado
de manera correcta antes de
apretar el tornillo con cabeza
encaje.
10. Coloque de nuevo la
cubierta del ojo guía a la
máquina.
AJUSTANDO EL ALIMENTADOR
DENTADO
1. La altura del alimentador dentado es
controlada por dos juegos de tornillos
ajustables (A). (Ilustración 26) Estos
tornillos deberán ajustarse de manera
que el tope del alimentador dentado
este 3/32 pulgadas (2.4mm) por
encima de la placa de garganta, en el
punto más alto del ciclo (Ilustración
27).
2. El borde delantero
del alimentador
dentado deberá estar
0.010 pulgadas (0.25
mm) más bajo que el
borde trasero. Si es
necesario, use el
calibrador Fischbein
11494 para establecer
la altura del alimentador dentado.
3. Una vez que se haya colocado la
orientación del alimentador dentado,
asegure el juego de tornillos superior
(A) en posición, utilizando el juego de
tornillos inferior (B). (Ilustración 26).
4. Apriete los tornillos de cabeza de
encaje. (Ilustración 26)
5. Colóquele la cubierta del ojo-guía a la
máquina.
Illustration 26
(Ilustración 26)
Illustration 27 (Ilustración 27)