FISCHBEIN
®
F SERIES PORTABLE SEWING MACHINES
OPERATOR’S MANUAL
REV. H 9/2011
5.9 NEEDLE
NEEDLE MAINTENANCE
The needle is held in the needle bar by using
the needle bar nut. The nut should be adjusted
with the 3/8 inch wrench provided.
Periodically check the needle bar nut to make
certain that it is tight and that the needle is not
loose or dull. Be careful not to strip the
threads or the nut surface. Do not use pliers.
REPLACING THE NEEDLE
1. Unplug the machine and place on a
workbench in the orientation shown in
the system illustration, page 10.
2. Raise the presser
foot with the lifting
lever (Illustration
24, page 30) and
rotate the machine
pulley manually
until the needle bar
is at its highest
position.
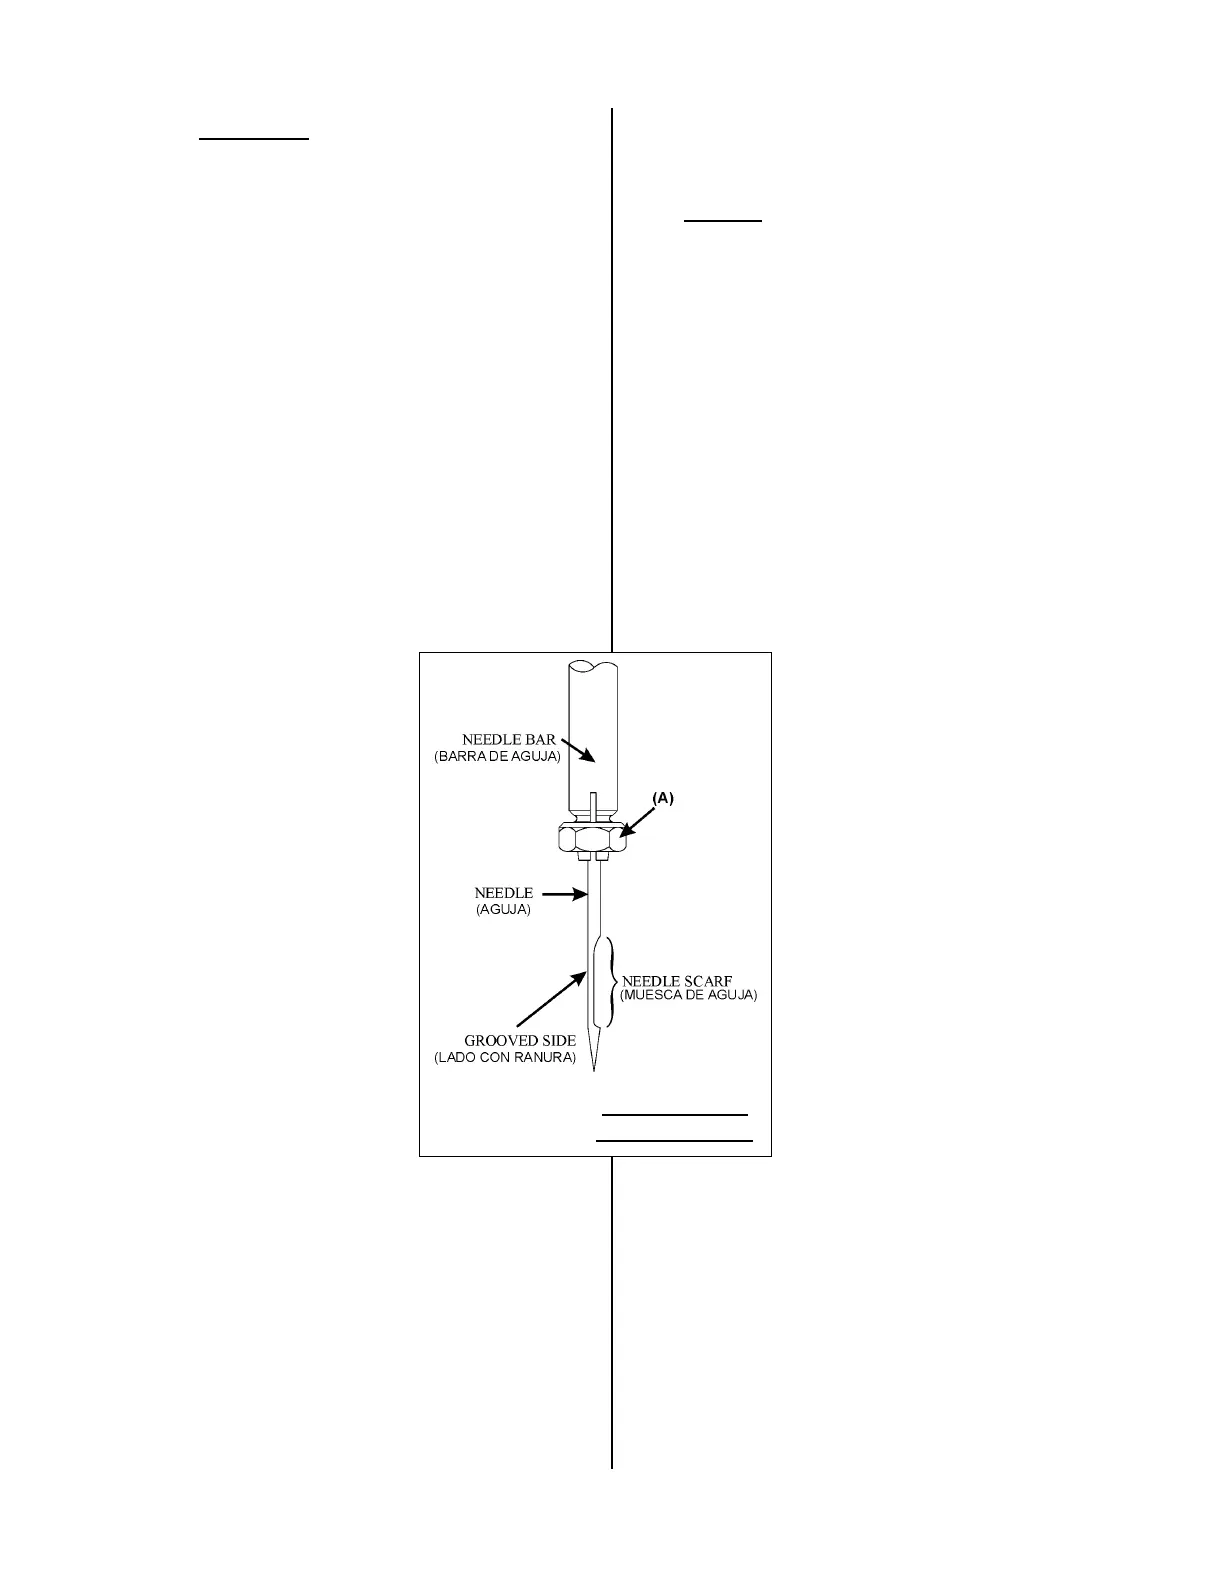
3. Loosen the needle
bar nut (A) with the
3/8 inch wrench.
(Illustration 34)
4. Remove the needle.
5. Fully insert the new
needle in the needle bar. Always use
genuine Fischbein D5 needles. Looking
from the bottom side of the machine, the
needle’s long groove should face you
and the needle scarf should be on the
back.
5. Coloque de nuevo las tapas
sujetadoras de escobilla (A)
5.9 Aguja
MANTENIMIENTO DE LA AGUJA
La aguja está sostenida en la barra de
aguja mediante la tuerca de barra de
aguja. Esta tuerca debe ajustarse con la
llave suministrada de 3/8.
Periódicamente vevíse la tuerca de la
barra de aguja para asegurarse de que
esté bien apretada y que la aguja no esté
suelta o sin filo. Tenga cuidado de no
limar el tornillo o la superficie de la tuerca.
No utilice alicates.
REEMPLAZANDO LA AGUJA
1. Desconecte la
máquina y colóquela en una
banca de trabajo en la
orientación mostrada en la
ilustración del sistema,
página 10.
2. Levante el pie prensador
con la palanca (Ilustración
24, página 30) y rote la
polea de la máquina
manualmente hasta que la
barra de aguja este en la
posición más alta.
3. Afloje la tuerca de la
barra de aguja (A) con la
llave de 3/8 (Ilustración 34).
4. Remueva la aguja.
5. Inserte totalmente la aguja nueva en
la barra. Use siempre las agujas
genuinas de Fischbein D5. Viendo desde
la parte inferior de la máquina, la ranura
larga de la aguja deberá mirar hacia
usted y la muesca de la aguja deberá
estar atrás.
Illustration 34
(Ilustración 34)