FISCHBEIN
®
F SERIES PORTABLE SEWING MACHINES
OPERATOR’S MANUAL
REV. H 9/2011
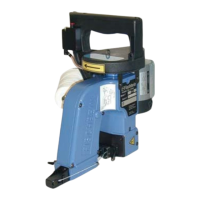
6. The groove edges should be parallel to
the face of the machine bottom. To
check this, place the machine so that the
bottom of the machine is pointing up
towards the ceiling. [You may wish to
remove the pulley cover and handle.
(Illustration
21, page 28)]
Place a coin or
small flat
object on the
groove. The
face of the
coin should be
parallel with
the bottom
face of the machine (Illustration 35).
The fischbein gauge 11491 can also be
used instead of a coin to get the right
orientation of the needle.
7. Tighten the nut (A) to clamp the needle
in place. The nut is designed so that it
does not require excessive force to
tighten.
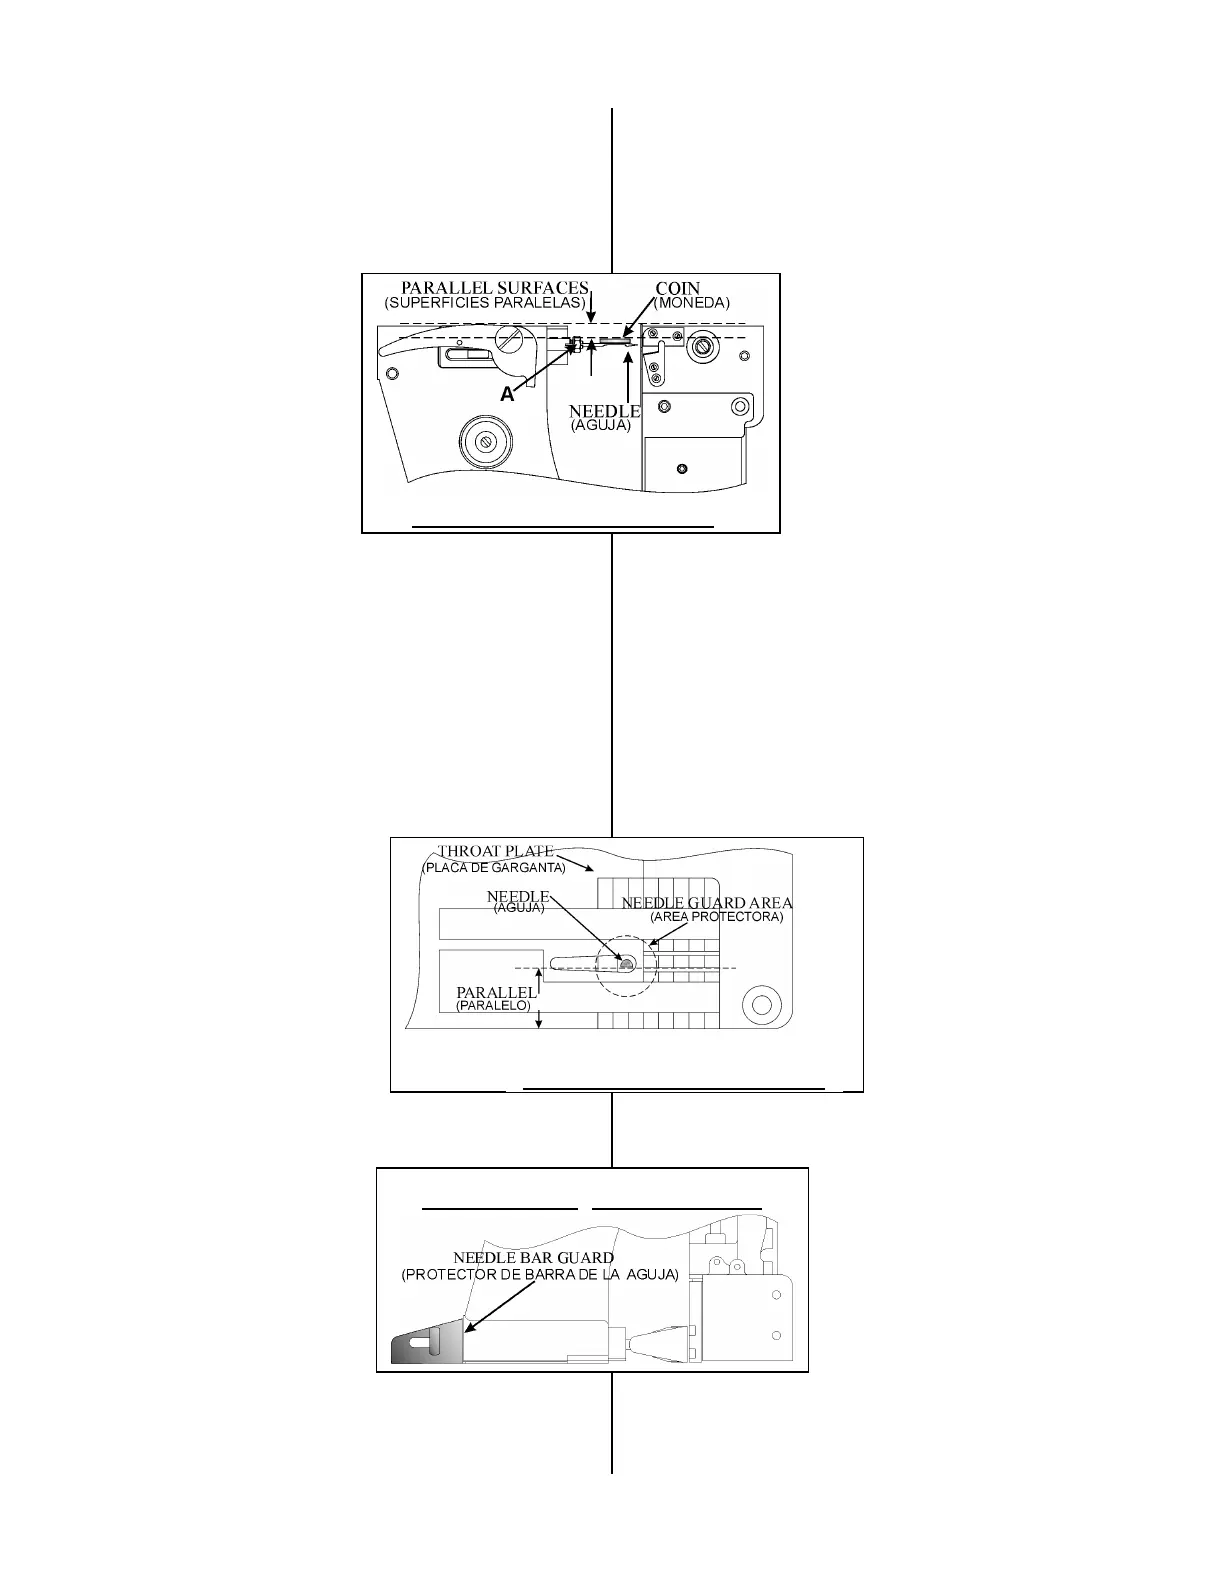
8. Lower the presser foot.
9. Check to see if
the needle is
passing through
the middle of the
needle guard on
the throat plate
and presser foot.
10. Thread the
machine.
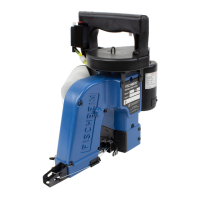
NEEDLE ADJUSTMENTS
Needle Height
versus Looper
1. Always adjust
the needle
height after the
looper stroke
adjustments has
been made. See the Looper Stroke
Adjustment and Looper Clearance
adjustment (pages 36-38).
6. El filo de la ranura deberá estar
paralelo con la parte inferior de la
máquina. Para revisar ésto coloque la
máquina de manera que la parte
inferior esté hacia arriba. [Usted
podrá quitar la cubierta de la polea y
el mango si lo desea.
(Ilustración 21,página 28)]
Coloque una moneda u
objeto pequeño y plano
sobre la ranura. La cara de
la moneda deberá estar
paralela con la cara inferior
de la máquina.
(Ilustración 35)
7. Apriete la tuerca (A) para sujetar la
aguja en su lugar. La tuerca está
diseñada de manera que no requiera
fuerza excesiva para apretarse.
8. Baje el pie prensador.
9. Revíse si la aguja está pasando por
la mitad del protector de aguja de la
placa de garganta y pie prensador.
10. Enhebre la
máquina.
AJUSTES A LA
AGUJA
Altura de Aguja
contra Ojo Guía
1. Siempre ajuste la altura de la aguja
después de que el ajuste del tiempo
del ojo guía se haya
realizado. Ver Ajuste de
Tiempo del Ojo Guía y
Ajuste de Distancia del
Ojo Guía (Páginas 36-
38).
Illustration 35 (Ilustración 35)
Illustration 36 (Ilustración 36)
Illustration 37 (Ilustración 37)