FISCHBEIN
®
F SERIES PORTABLE SEWING MACHINES
OPERATOR’S MANUAL
REV. H 9/2011
2. Remove the needle bar
guard. (Illustration 37)
3. Turn the machine pulley
in a clockwise direction
until the looper begins to
come forward, toward the
needle (which is
beginning to move
upward).
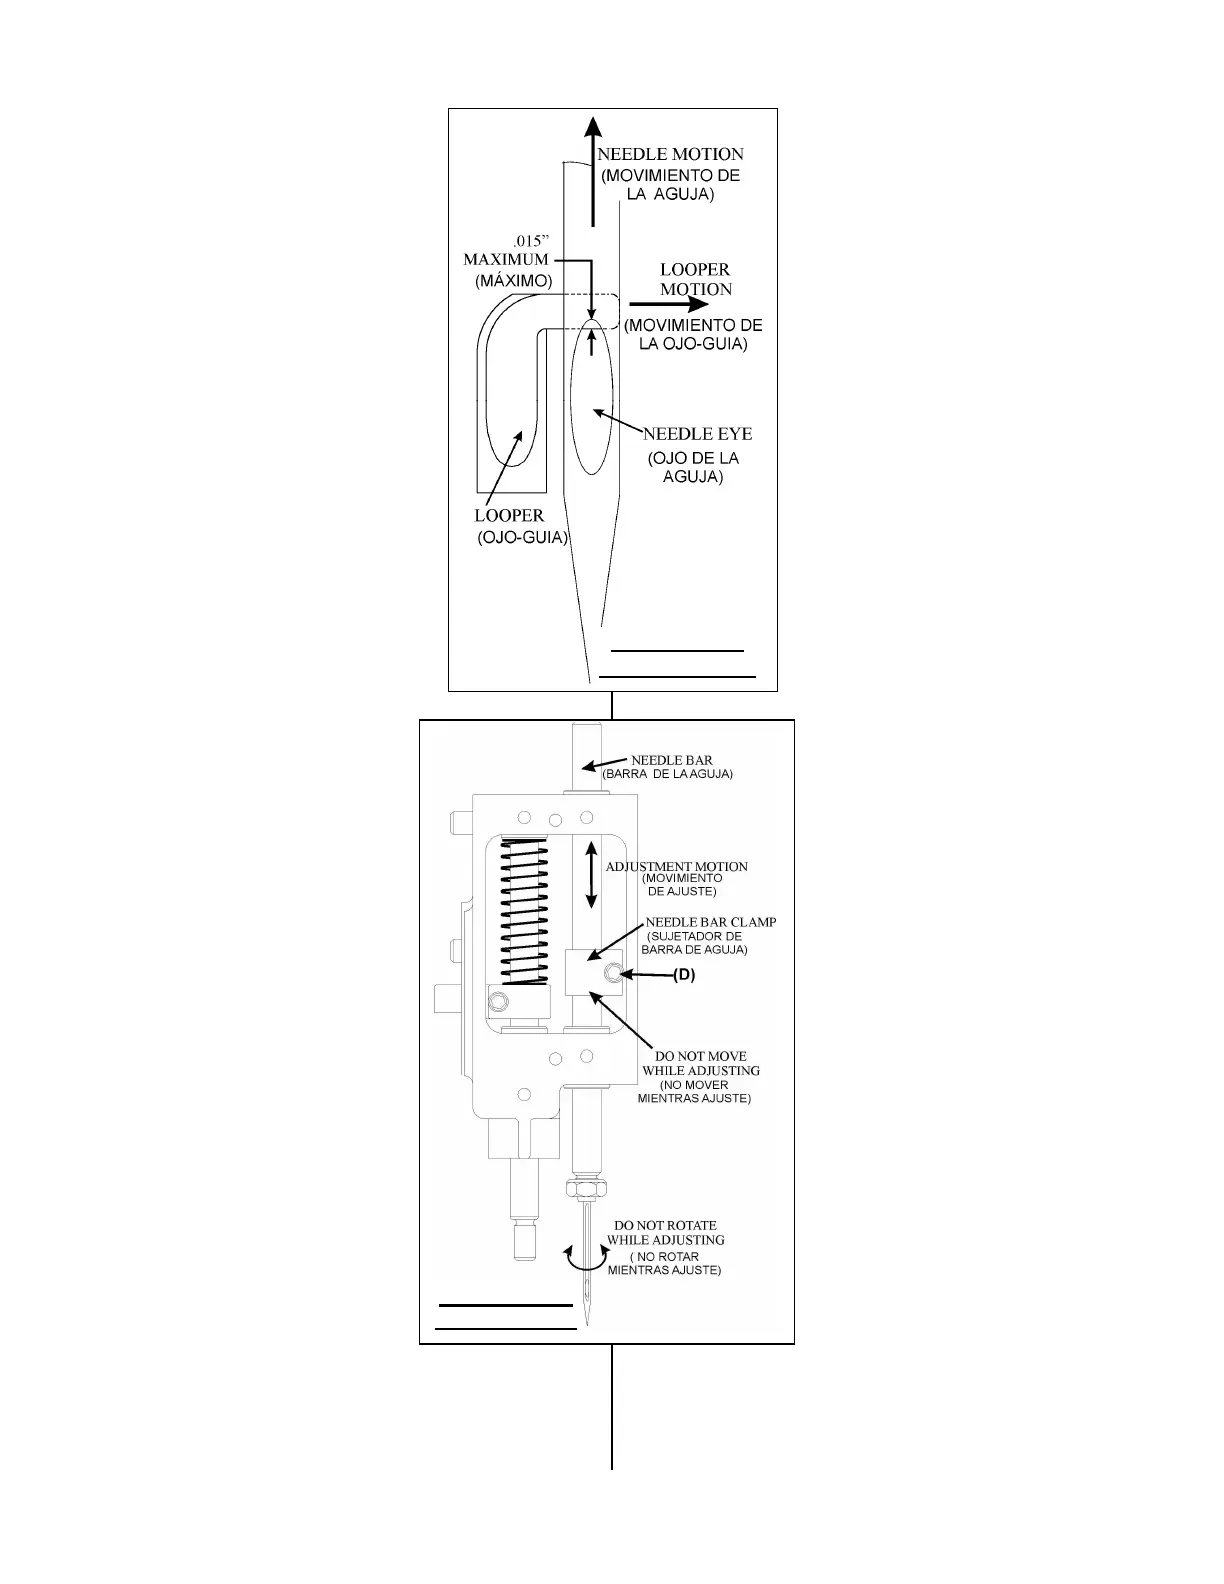
4. As the looper passes
behind the needle, the
point of the looper
(moving to the right)
must line up, flush with
the right edge of the
needle, as the bottom
edge of the looper hook
is seen .015 inches down
from the top of the needle
eye. (Illustration 38)
If an adjustment is
necessary, perform the
following steps:
1. Slightly loosen the
screw (D) on the
needle bar clamp
assembly.
(Illustration 39)
2. Move the needle bar
up or down until you
reach the adjustment
shown in
Illustration 38.
3. Be sure that you
DO
NOT ROTATE THE
NEEDLE BAR OR THE
MACHINE PULLEY
as
you are performing
this step.
4. When the proper setting is reached,
tighten the screw (D).
2. Retire el protector de
barra de aguja. (Ilustración
37).
3. Gire la polea de la
máquina en el sentido del
reloj hasta que el ojo-guia
comience a venirse hacia
adelante, hacia la aguja (la
cual esta comenzando a
moverse hacia arriba).
4. Mientras el ojo-guía
pasa por detrás de la
aguja, la punta del ojo Guía
(moviéndose hacia la
derecha) deberá comenzar
a pasar por el borde
derecho de la aguja,
(0,8mm) mientras que la
parte inferior del Ojo-Guía
se ve a través de la parte
superior del Ojo de la
aguja. (Ilustración 38)
Si algún ajuste es
necesario, realice lo
siguiente:
1. Afloje ligeramente el
juego de tornillo (D) en el
conjunto sujetador de la
barra de aguja.
(Ilustración 39)
2. Mueva la barra de la
aguja hacia arriba y hacia
abajo hasta lograr el
ajuste que se muestra en
la Ilustración 38.
3. Asegúrese de NO
ROTAR LA BARRA DE LA
AGUJA O LA POLEA DE
LA MÁQUINA mientras
realiza este paso.
4. Cuando la colocación apropiada se
ha logrado, apriete el juego de tornillo
(D).
Illustration 38
(Ilustración 38)
Illustration 39
(Ilustración 39)