FISCHBEIN
®
F SERIES PORTABLE SEWING MACHINES
OPERATOR’S MANUAL
REV. H 9/2011
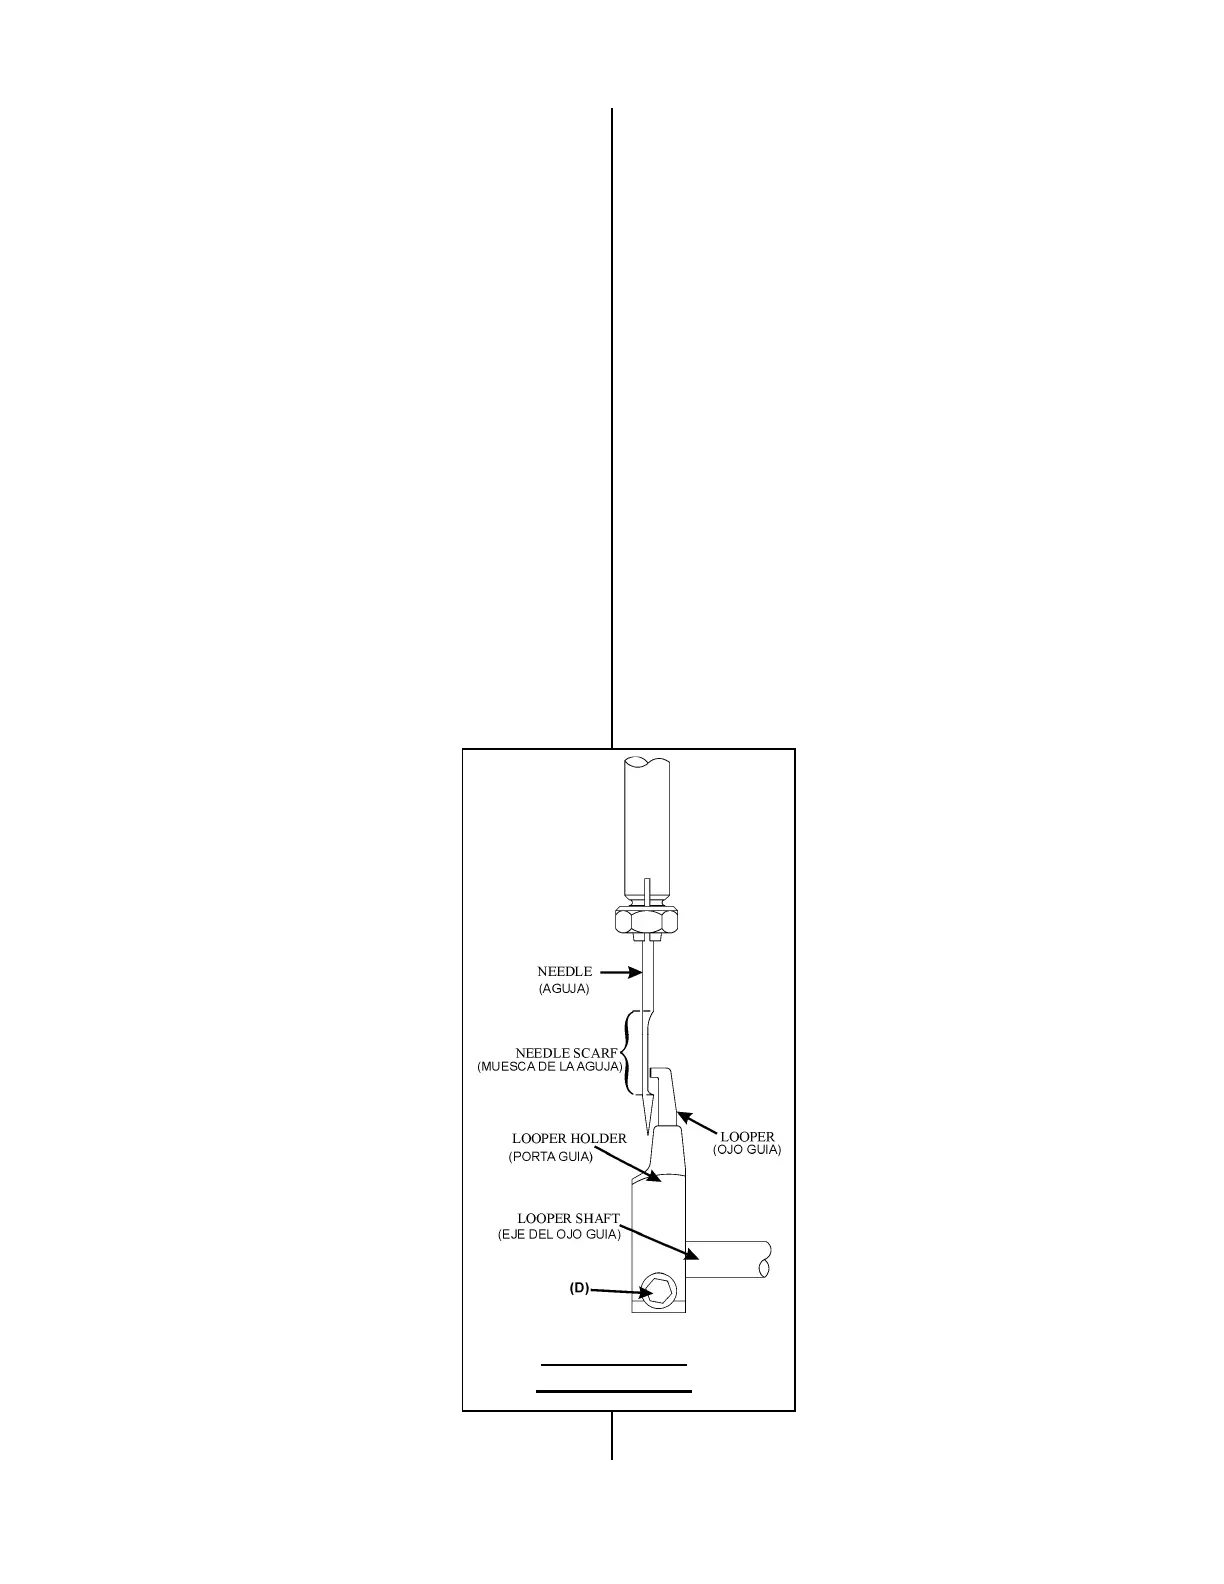
If the clearance between the needle scarf and
looper needs to be adjusted, follow these
steps:
1. Rotate the machine pulley until the
looper is directly behind the needle. Do
not forget to always rotate the pulley of
the machine clockwise, looking from the
top.
2. Loosen the socket cap screw (D) on the
looper holder. (Illustration 32)
3. Move the looper holder on the looper
shaft until the looper is positioned as
closely as possible to the needle scarf
without actually touching it. You should
be able to pass a sheet of paper between
the back of the needle and the looper
edge.
4. When this step is complete, tighten the
socket cap screw (D) on the looper
holder.
5. Rotate the machine
pulley through a couple
of complete cycles to be
sure that the looper
clears the needle both on
the up stroke and the
back stroke of the cycle.
6. When you have made
and verified all of the
adjustments, replace the
feed dog, throat plate and
looper cover.
Si la distancia entre la muesca de la
aguja y el ojo guía necesita ajustes, haga
lo siguiente:
1. Rote la polea de la máquina
manualmente hasta que el ojo guía
esté directamente detrás de la aguja.
No olvide siempre rotar la polea en el
sentido de las manecillas del reloj,
visto desde la parte superior.
2. Afloje los tornillos cabeza de encaje
(D) en el portaguía (Ilustración 32).
3. Mueva el porta guía en el eje de éste
hasta que el ojo se encuentre
colocado lo más cerca posible de la
muesca de la aguja sin tocarla.
Deberá ser posible pasar una hoja de
papel a través de la parte posterior de
la aguja y el borde del ojo guía.
4. Cuando se haya completado éste
paso, apriete el tornillo
cabeza de encaje (D) con
el porta guía.
5. Rote la polea de la
máquina dos ciclos
completos para
asegurarse de que el ojo
permite la distancia con la
aguja en los dos ciclos,
hacia arriba y hacia atrás.
6. Cuando usted haya
hecho y verificado todos
los ajustes, coloque en su
lugar el alimentador
dentado, la placa de
garganta y la cubierta del
ojo guía.
Illustration 32
(Ilustración 32)