Flashforge Corporation
Dreamer User Guide | www.flashforge.com
7. Tap [Pr int] and then tap the middle SD Card icon.
8. A list of file(s) will show up, tap the file that you would like to print, and tap [Yes].
9. The printer will now enter preheating and will start printing once it finishes
1. Turn on Dreamer. Make sure the build plate is leveled and filament is loaded on the
2. Turn on Wi-Fi on the Dreamer. Then tap [Tool]-[Setting]-[WiFi]-[WiFi ON].
3. A connection called “USR-WiFi232-G2” can be found on the list of available
networks. Connect your PC to this network.
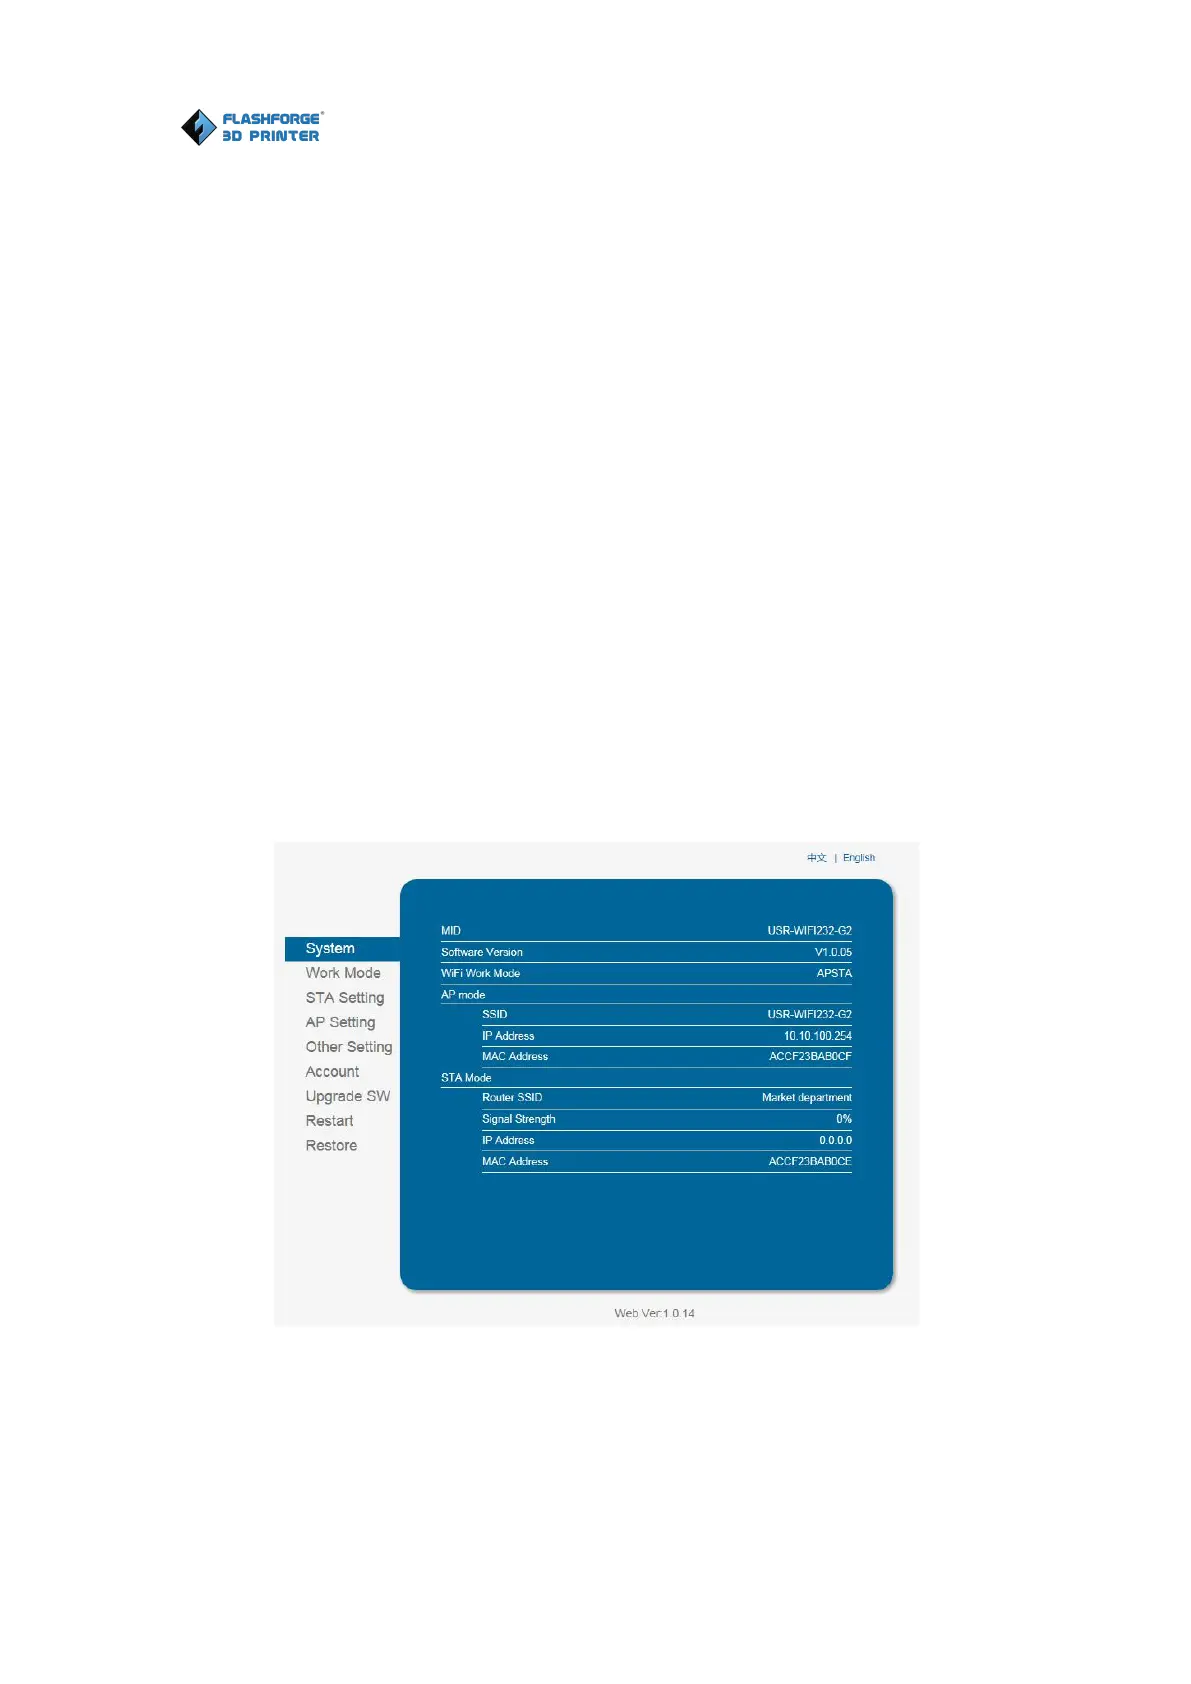
4. Open your Internet browser. Type in “10.10.100.254” and tap [Enter ] on your
keyboard. Enter the username and password to login. The default username and
password are both “admin” .The control panel will appear after a successful login.
5. Click on [Wor k Mode] and choose “AP+STA mode” and save it.
Notice: In STA mode, ther e may be the r isk that Dr eamer couldn’t be connected
via WiFi for ever, if STA mode is set in er r or
6.Click on [STA Setting], select a working network, enter the corresponding