Operation
Powering the Standard
3
3-13
2. Verify that the BAT switches on both the 732B and 732B-7001 are set to l.
3. Charge the 732B and 732B-7001 for at least 36 hours.
4. Switch both BAT switches to
.
5. Fabricate and connect a cable with a 9-pin connector on each end so that the battery
output from the 732B-7001 is connected to the external dc input of the 732B. Refer
to Figures 3-7 and 3-8 for the connector pinouts.
6. Set the 732B-7001 BAT switch to l to enable its output.
7. Set the 732B BAT switch to l to connect the batteries in parallel.
8. After the ac line power to both the 732V and the 732B-7001 is turned of, the 732B
can be powered by battery for at least 130 hours.
Replacing the Internal Battery 3-13.
If the battery fails to switch from constant-current charging mode to float-charging
mode, either the charger is defective or the battery needs replacement. For preventive
maintenance, it is recommended that you have the battery replaced every 18-24 months
to ensure 72-hour battery backup time. Refer to Section 5 for how to obtain the correct
battery type and for the procedure to replace the battery.
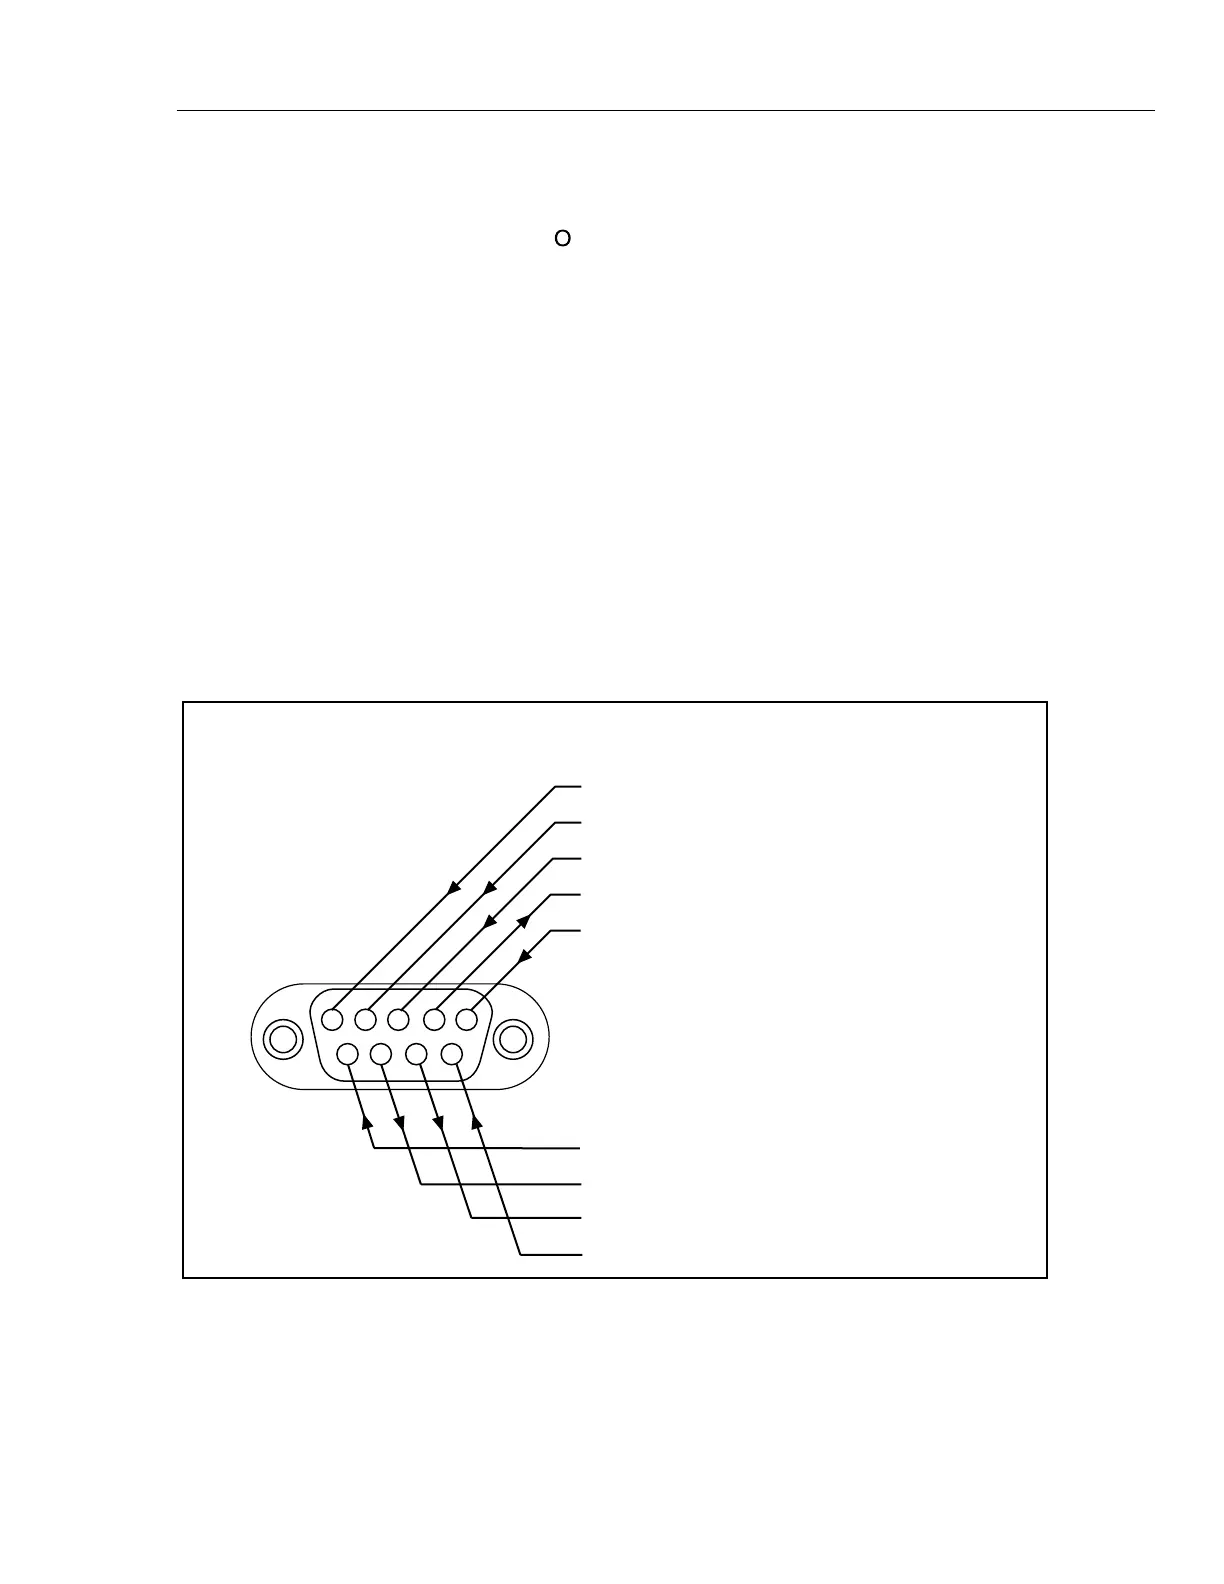
1
2
345
9
8
7
6
DESCRIPTION
EXT BAT COMMON
EXT COMMON FOR IN CAL
EXT +5 VDC FOR IN CAL
OVEN TEMPERATURE THERMISTOR A
EXT BAT +
EXT BAT COMMON
EXT IN CAL SIGNAL (ASSERTED HIGH)
OVEN TEMPERATURE THERMISTOR B
EXT BAT +
PIN
NUMBER
1
2
3
4
5
6
7
8
9
k11f.eps
Figure 3-7. 732B MONITOR/EXT BAT IN Connector Pinout
www.valuetronics.com