732B/734A
Instruction Manual
5-8
8. Allow the system to stabilize for at least one minute before final adjustment. Adjust
the 0.1 ppm bcd switch for a null indication on the null detector.
Note
If the switch reaches "0" and the null detector is still on the positive side of a
null, adjust the 1.0 ppm bcd switch down one setting. If the 1.0 ppm bcd
switch is already at "0", adjust the 10 ppm switch down one setting and
set the 1.0 ppm bcd switch to "9". Continue adjusting the 0.1 ppm bcd
switch for a null indication on the null detector.
Note
If the switch reaches "9" and the null detector is still on the negative side of a
null, adjust the 1.0 ppm bcd switch up one setting. If the 1.0 ppm bcd
switch is already at "9", adjust the 10 ppm switch up one setting and set
the 1.0 ppm bcd switch to "0". Continue adjusting the 0.1 ppm bcd switch
for a null indication on the null detector.
9. Reverse the HI and LO (positive and negative) leads on the UUT and certified 732B.
10. Set the OPR switch on the null detector to the OPR position and observe the reading.
If the reading does not equal zero, adjust the UUT for one-half of the null detector
reading.
11. Reverse the HI and LO (positive and negative) leads on the UUT and on the
Certified 732B. The null detector should have the same reading as it did at the end
of step 10. If it does not, adjust the UUT for one-half the difference.
12. Repeat steps 9 through 11 until the Null reading does not change when the UUT and
Certified 732B leads are reversed.
13. The residual reading on the null detector equals the sum of the thermal voltages in
the circuit. At this point, the output voltage of the UUT equals the output voltage of
the Certified 732B.
14. If the IN CAL led is illuminated, proceed to step 15. If it is not, depress the switch
inside the RESET hole located on the rear panel.
15. Calibration on the 10V output is complete. Record all test results. Disconnect all
test equipment. Place the top cover on the UUT, securing it with the six screws.
Cover the RESET hole and one of the six screws with tamper-proof calibration seals.
Calibration Without Adjustment 5-9.
Complete the following procedure to standardize the output of the 732B to a Certified
732B. Battery operation of the 732B UUT is preferred. Turn on the filtering of the
8506A.
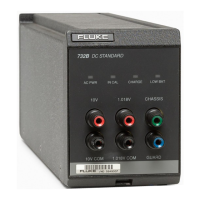
1. Obtain a certified 732B to use as the reference standard.
Caution
To avoid cracking or jamming the plastic binding post insulators,
tighten them only with finger pressure. Do not use tools.
2. Connect the UUT, Certified 732B, and 8506A as shown in Figure 5-1. (Substitute
the 8506A for the 854AB shown in the figure.)
3. Average 8506A readings over a period of at least one minute.
www.valuetronics.com