Getting Started
Results within Accuracy Range
2
2-9
To change any of the settings shown in Table 2-3, proceed as follows:
1. Turn the rotary switch to SETUP.
2. If the setting you want to change is not on the first Setup screen, press
$ Page Down to see additional Setup screens.
3. Use D U to highlight the setting you want to change.
4. Press ! Choice.
5. Use D U to highlight the setting you want.
6. Press E to store the highlighted setting.
7. Repeat steps 2 through 6 to change additional settings.
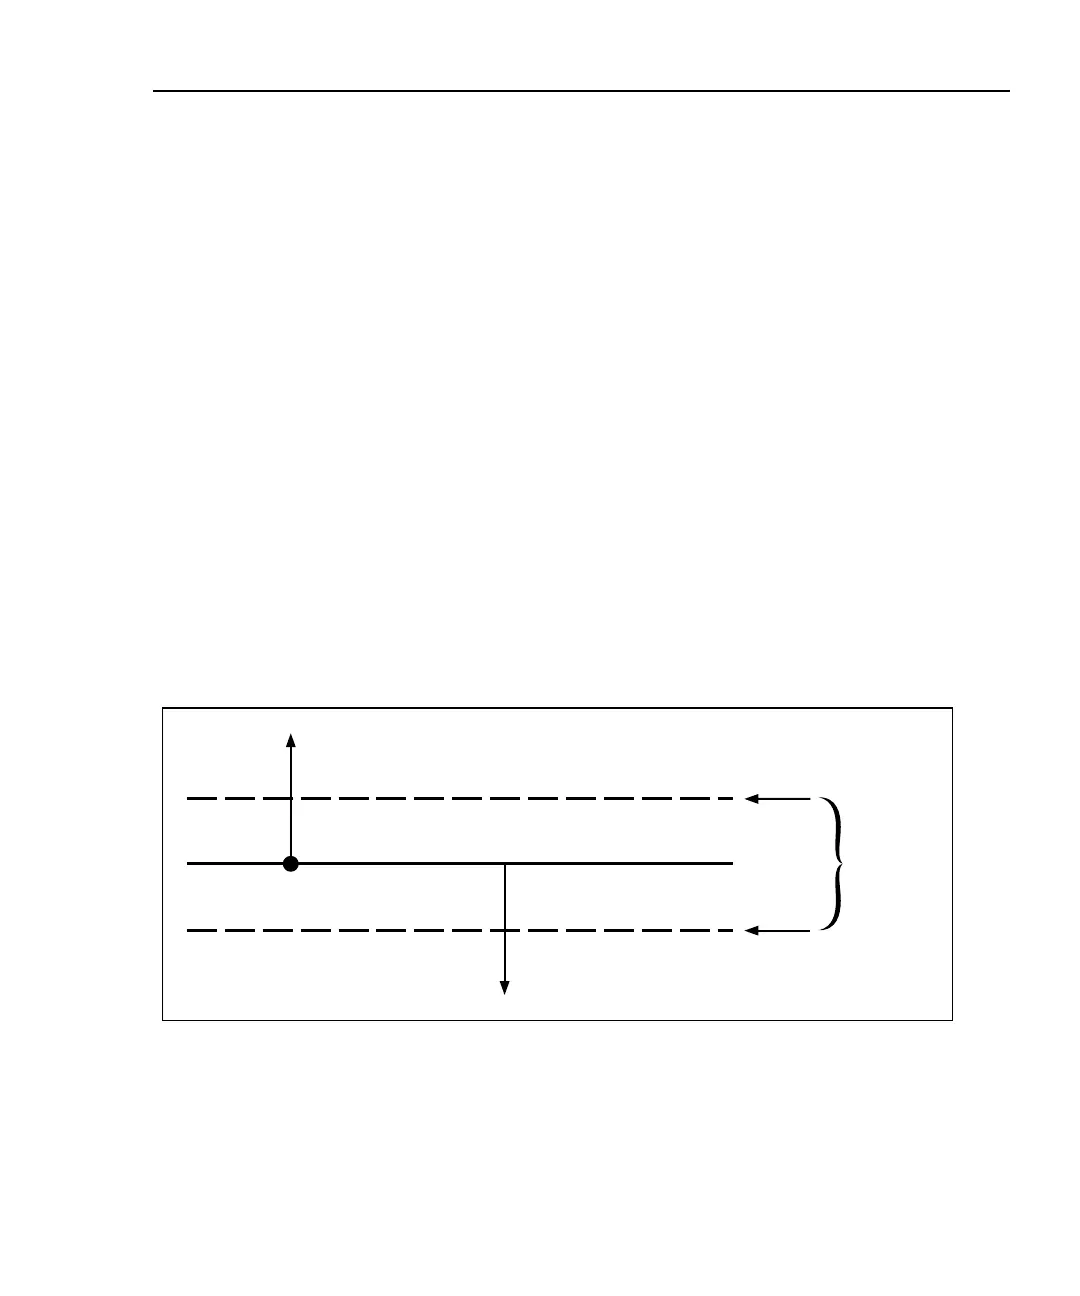
Results within Accuracy Range
An asterisk following a test result value indicates that the value is within the test
tool’s range of accuracy, as shown in Figure 2-3. All tests except the wire map test
may produce results with an asterisk if required by the selected test standard.
If a “pass” result is marked with an asterisk, look for ways to improve the cable
installation to eliminate the marginal performance. A “fail” result marked with an
asterisk should be considered a failure.
The asterisk appears on displayed, uploaded, and printed test results.
Limit
Pass
Fail
Accuracy
Range of
Test Tool
*
Pass Region
*
Fail Region
oy02f.eps
Figure 2-3. The Asterisk and Test Tool Accuracy
 Loading...