Owner’s Manual Page 77Water and Waste Systems - Section J
Simply operate the spray nozzle and water will be
delivered.Ifthesystemhasbeenrecentlylled,
or has not been used for an extended period of time,
air bubbles may accumulate at the pump. If this
should happen, re-priming may be necessary.
J - 4 ENCLOSED HEADS
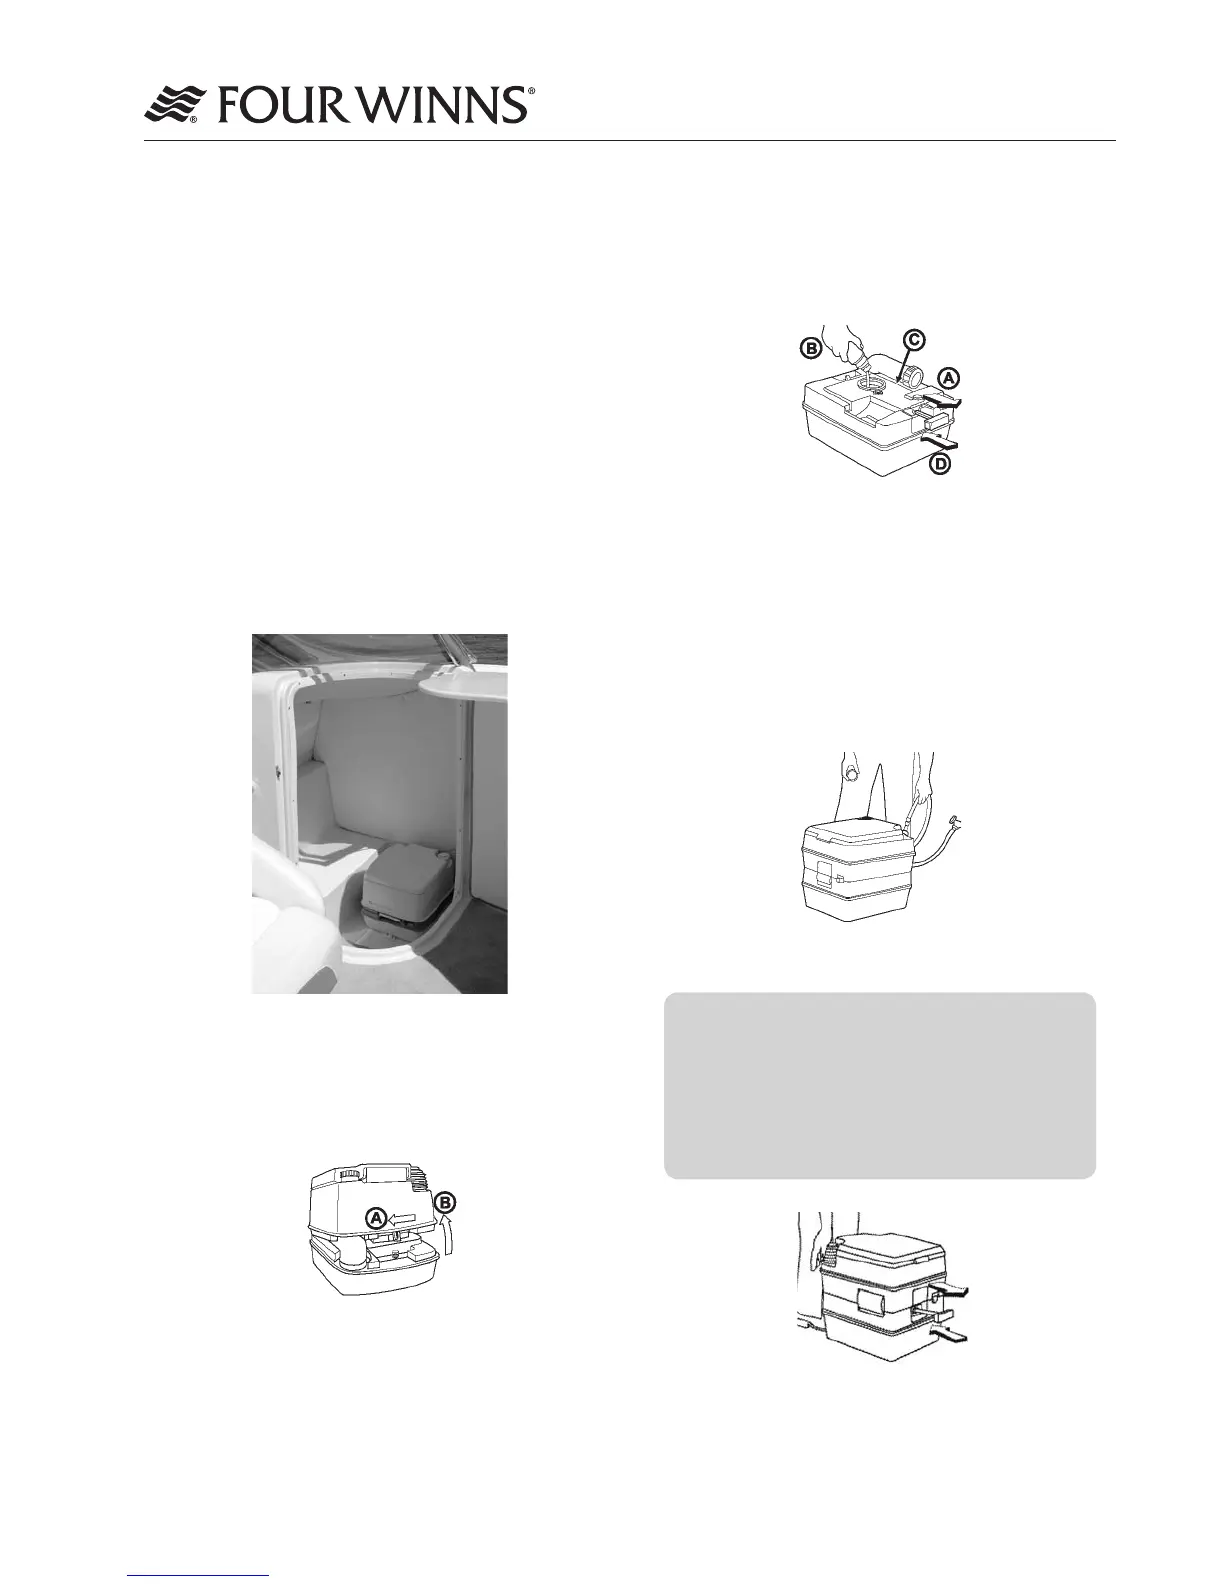
A. Enclosed Heads
Oncertainmodels,afullyenclosedberglasshead
is a standard feature built into the port console. These
roomy heads offer an opening port light with screen,
porta-potti,berglassliner,andoverheadlighting.
SeegureJ-4.Refertothemanufacturer’sliterature
included in the owner’s packet as well as the following
instructions regarding the use, care and maintenance
of the porta-potti.
Figure J-4: Enclosed Head
Porta-Potti Preparation:
Separate unit by sliding the locking lever to the left
“unlocked” position and hold (Figure J-5/A). Separate
the units (Figure J-5/B).
Figure J-5 (A & B): Separate Porta Potti
Withthewastetank(lowersection)sittingat,open
valve by pulling handle out (Figure J-5/A).
Add deodorant through the valve opening (Fig. J-6/B).
Use Thetford Holding Tank Deodorant (sample in-
c
luded) in built-in storage compartment (Fig. J-6/C).
Add water to cover tank bottom. Close valve and
replace deodorant (Figure J-6/D).
Figure J-6 (A - D): Porta Potti Preparation
Recombine the unit. Align hinge with front interlocking
tabs. To secure unit, press downward. It should click
into place.
Fillfreshwatertankbyremovingthellcapandlling
the tank with fresh water (Figure J-7). (NEVER add
holding tank chemical to the fresh water tank
assembly.) Replace and tighten the cap securely.
Figure J-7: Filling Fresh Water Tank
NOTICE
Before each use: With seat cover closed, open
and close the holding tank valve (Figure J-8)
to vent any pressure that may have built up
as a result of heat or altitude. This prevents
upward splashing of bowl contents when toilet
is ushed.
Figure J-8: Porta Potti
Bellows Flush Operation
 Loading...