90
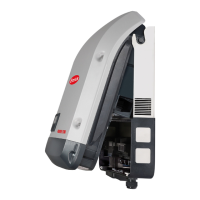
Place the air duct on the rear of the in-
verter
Thread in the fan cable and press in
the seal plugs (4)
WARNING!
The seal plugs must be completely in-
serted in order to ensure leak-tightness
Snap in the locks (6) for the air duct on
both sides
Mount the air duct using two 5x14
TX25 screws (3)
[2.15 Nm]
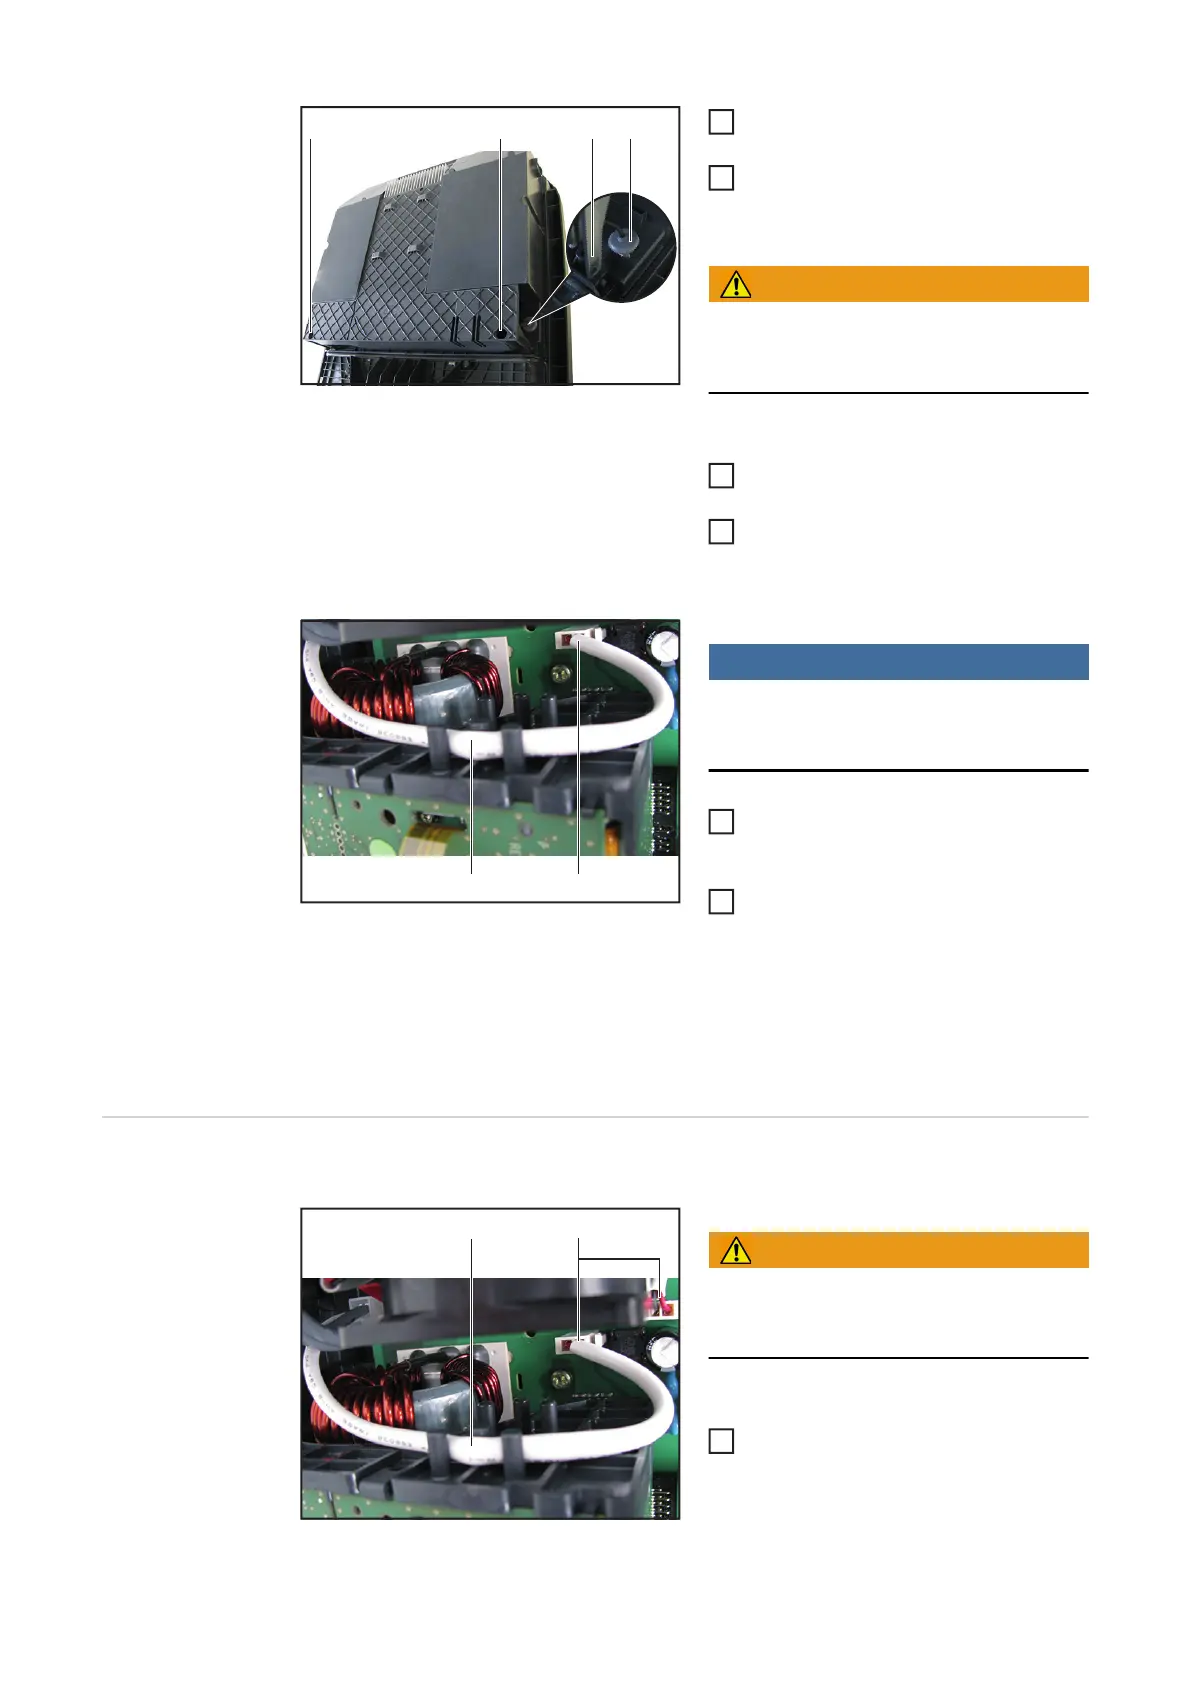
NOTE!
Carefully turn the inverter around.
Plug in the fan cable (1) on the Symo-
FIL and insert into the cable guide (2)
Close the inverter and place it in the
wall bracket (see "Opening and Clo-
sing the Device")
After switching on the inverter, carry out a
fan test via the display (see Operating Inst-
ructions)
Replacing the 8k2
External Fan
Removing the External Fan:
WARNING!
Follow the safety rules (see the begin-
ning of the "Safety" section)
Take the inverter out of the wall bra-
cket and open it (see "Opening and
Closing the Device")
(3) (3) (4)
(6)
2
3
4
5
(2)
(1)
6
7
(2) (1)
1
 Loading...