4-10
Ver.1.36
(5) Place a sample in a sample cup and attach it to the Pyrolyzer. When using a Double-Shot
sampler the dead space is purged by loosening the air purge nut on the sampler as shown on
page 1-5. Tighten it after two minutes. During this period, the GC may generate warning sounds
if the carrier gas is controlled by EPC, but if it is within 5 min, the GC will NOT power down.
(6) Click “START” button.
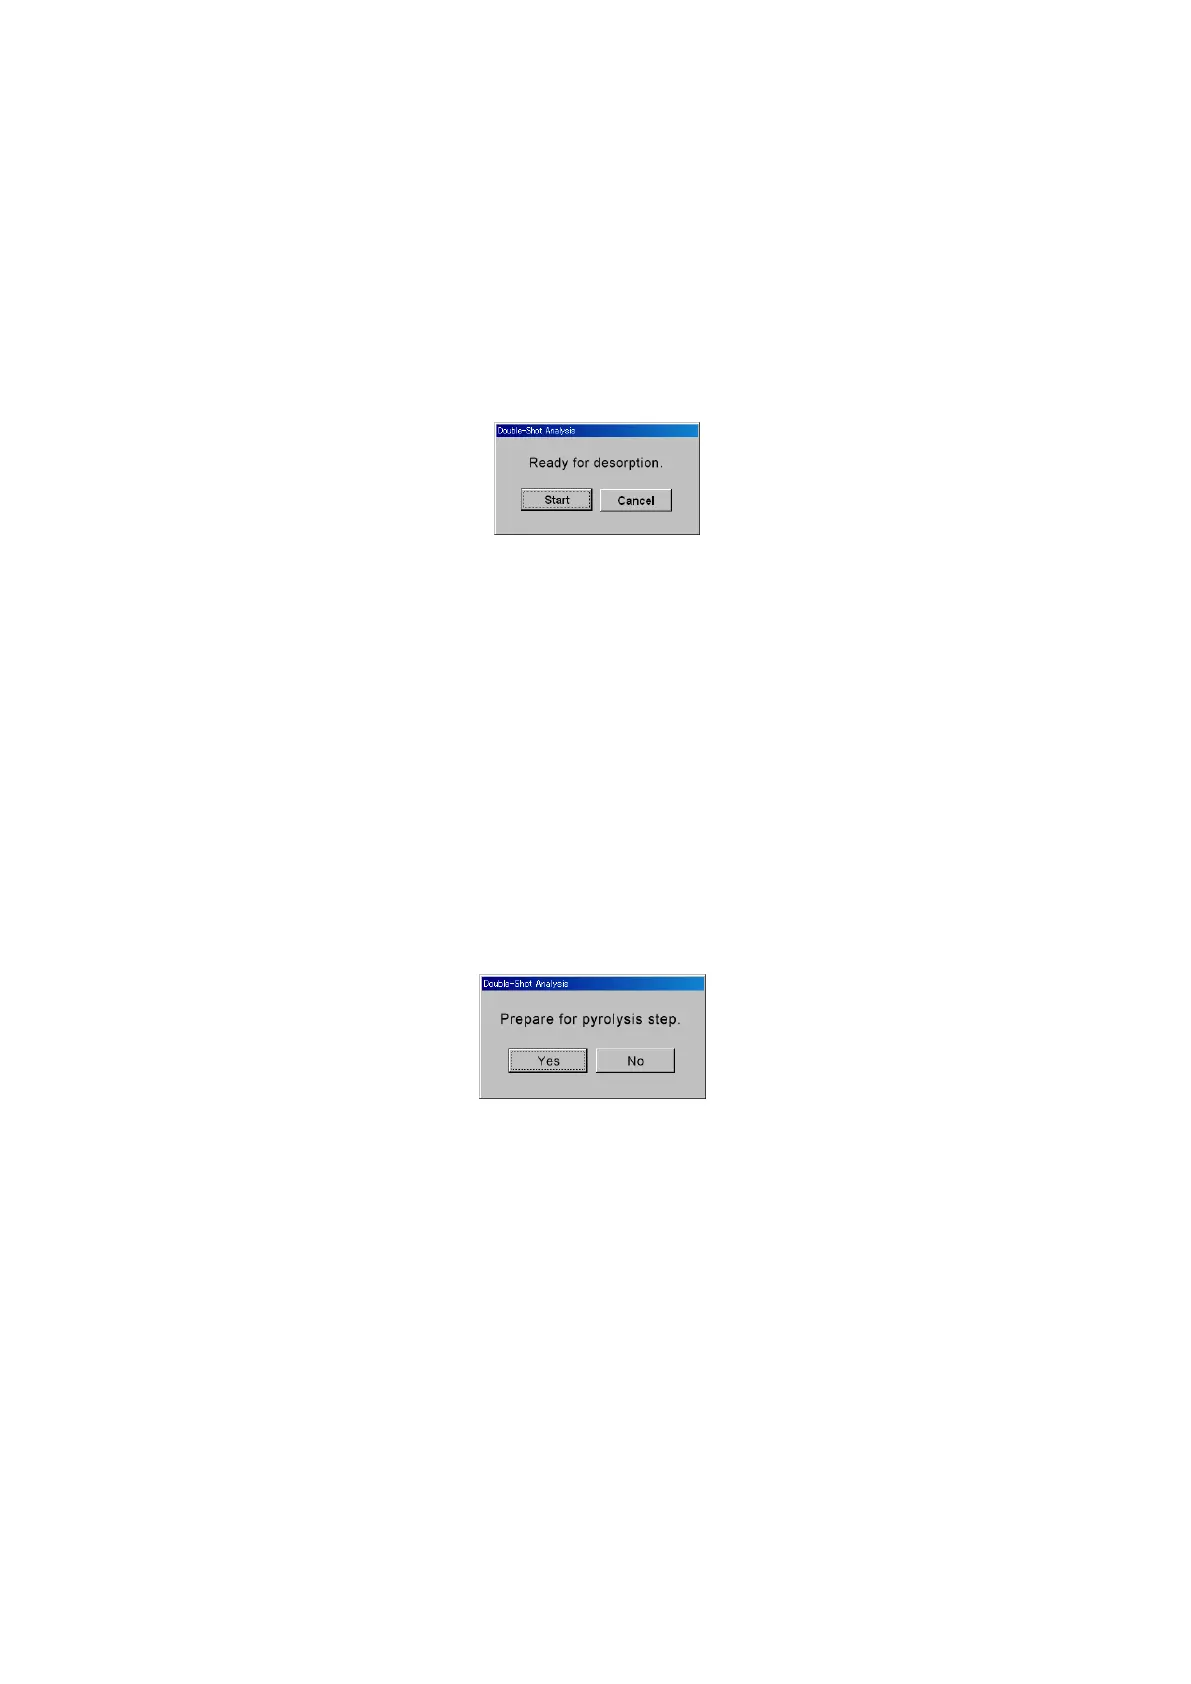
(7) When the GC, pyrolyzer furnace, interface, Selective Sampler, and MicroJet Cryo-Trap are all
READY, the dialog box shown in Fig. 4.10 will be displayed.
(8) Manually push the Double-Shot sampler down which positions the sample cup in the furnace.
Immediately, click on the “Start” button of the dialog box or hit “ENTER” key on the PC keyboard.
This will start the thermal desorption sequence.
(9) When the thermal desorption program is complete, the dialog box shown in Fig. 4.11 will be
displayed. Pull up the Double-Shot sampler; this positions the sample cup above the furnace at
near ambient temperature. When the column inlet pressure has stabilized, click “Yes” button.
This will start the GC and the pyrolyzer furnace temperature will be heated to the pyrolysis
temperature set (J) in Fig. 4.9.
(10) Thermally desorbed components are then analyzed by GC. When the analysis completes, the
GC oven will cool down to the initial temperature.
Fig. 4.10 Dialog box showing the start of the desorption
program in Double-Shot Analysis
Fig. 4.11 Dialog box showing the end of desorption program
in Double-Shot analysis
 Loading...