PAG.
23
rev 1.1
ENGLISH
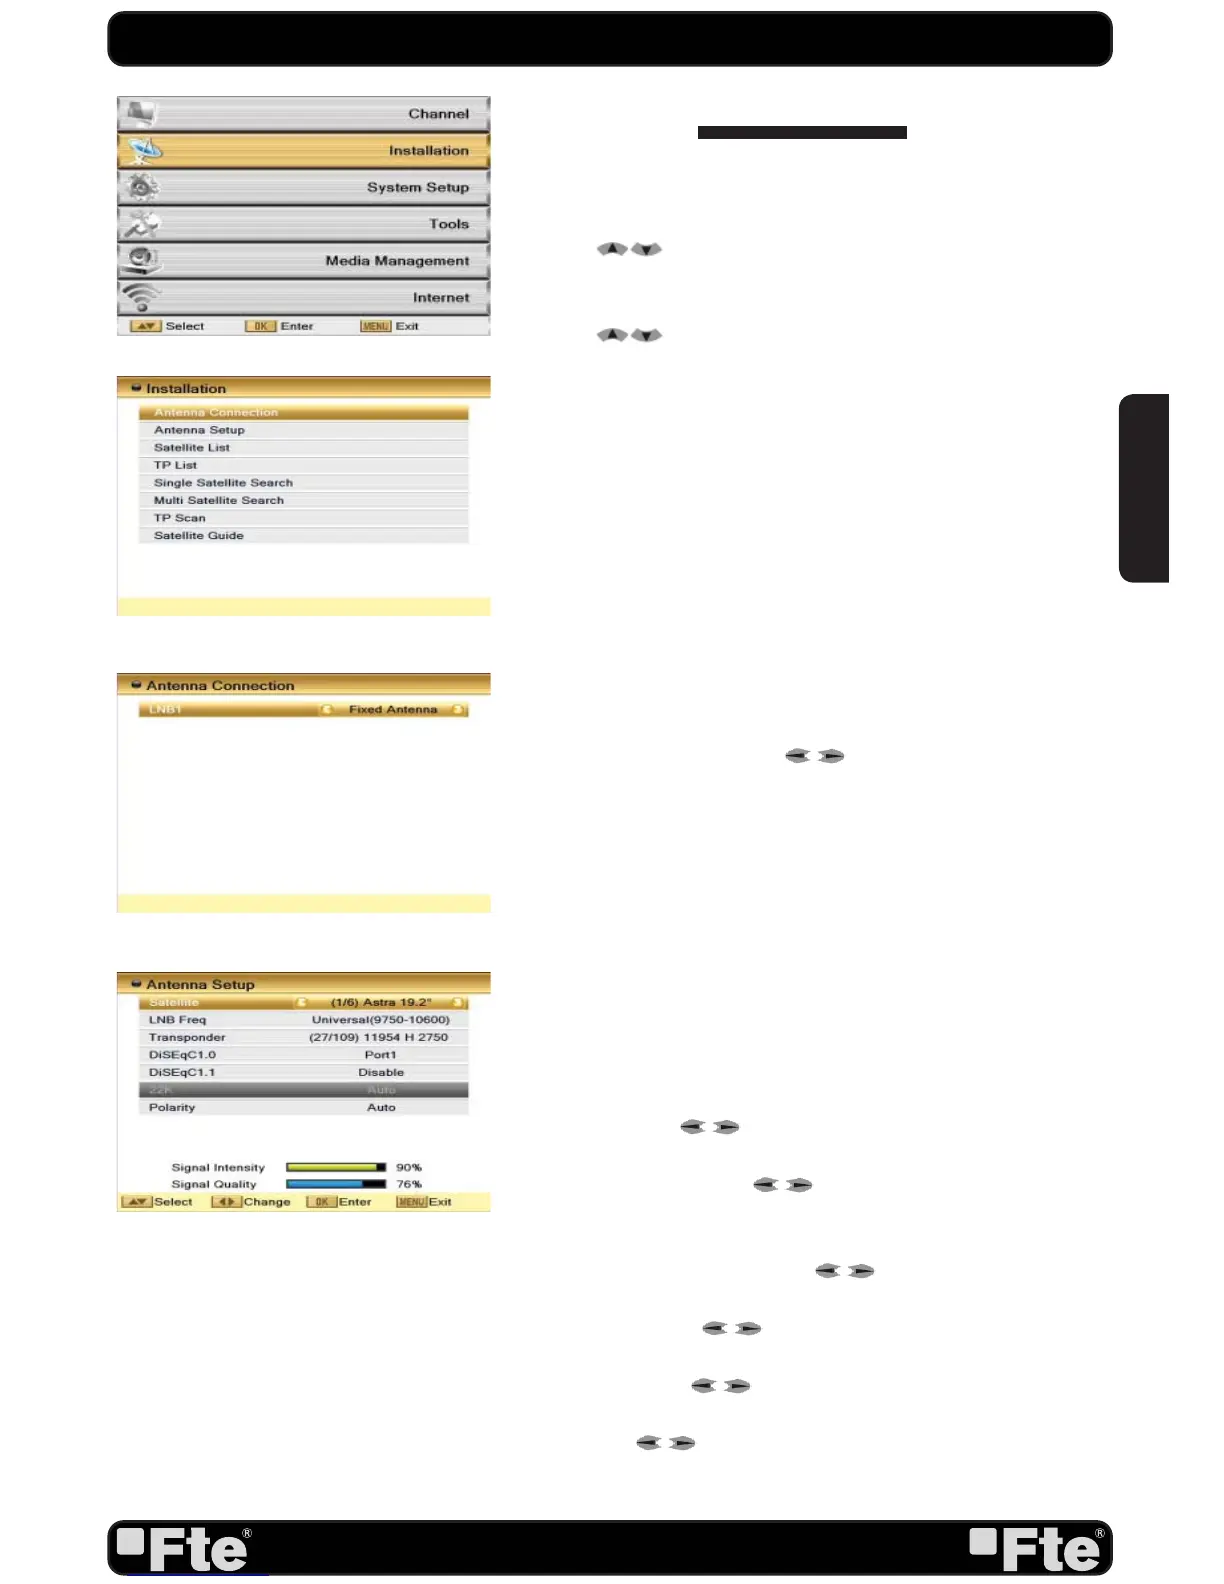
4. INSTALLATION
Press [Menu] in the TV mode to enter the main menu (OSD
33).
1. Press [
] to select the Installation item.
2. Press [OK] to enter the selected item.
In the Installation menu (OSD 34):
3. Press [
] to select the wanted menu item.
4. Press [OK] to enter the selected item among.
- Antenna connection
- Antenna Setup
- Satellite List
- TP List
- Single Satellite Search
- Multi Satellite Search
- TP Scan
- Satellite Guide
4.1. ANTENNA CONNECTION
When you enter the “Antenna connection” menu you can see a
window like the one beside (OSD 35).
1. LNB: Press the arrows [
] on the remote to select
the “Motor Antenna” option in case you have an installation
with an engine *. If you do not have an engine, choose “Fixed
Antenna”. If you have an Unicable installation choose “Unicable
(SAT-CR)
*.
2. Press [Exit] to exit this menu.
* This receiver does not allow moving DiseqC motors
4.2. ANTENNA SETUP
Depending on how the “Antenna Connexion” section is
configured, it will allow configuring different parameters:
(Fixed Antenna) (OSD 36):
- Satellite: Press [
] to switch Satellites or press [OK] to
enter satellite list to select directly.
- LNB frequency: Use [
] in order to change among
“Universal”, a specific “Polarity and Band” or a specific frequency
of the local oscillator.
- On “Transponder” item use [
] to select the desired
transponder.
- DiSEqC1.0: Use [
] to switch the options of DiSEqC
switches.
- DiSEqC1.1: Use [
] to switch the options of DiSEqC1.1
switches.
- 22K: Use [
] to switch “ON” and “Off”. The 22 kHz
signal is used in KU Universal LNBs to change between low
band and high band. After choosing LNB type “Universal” you
INSTALLATION
OSD 33
OSD 34
OSD 35
OSD 36