PAG.
25
rev 1.1
ENGLISH
INSTALLATION
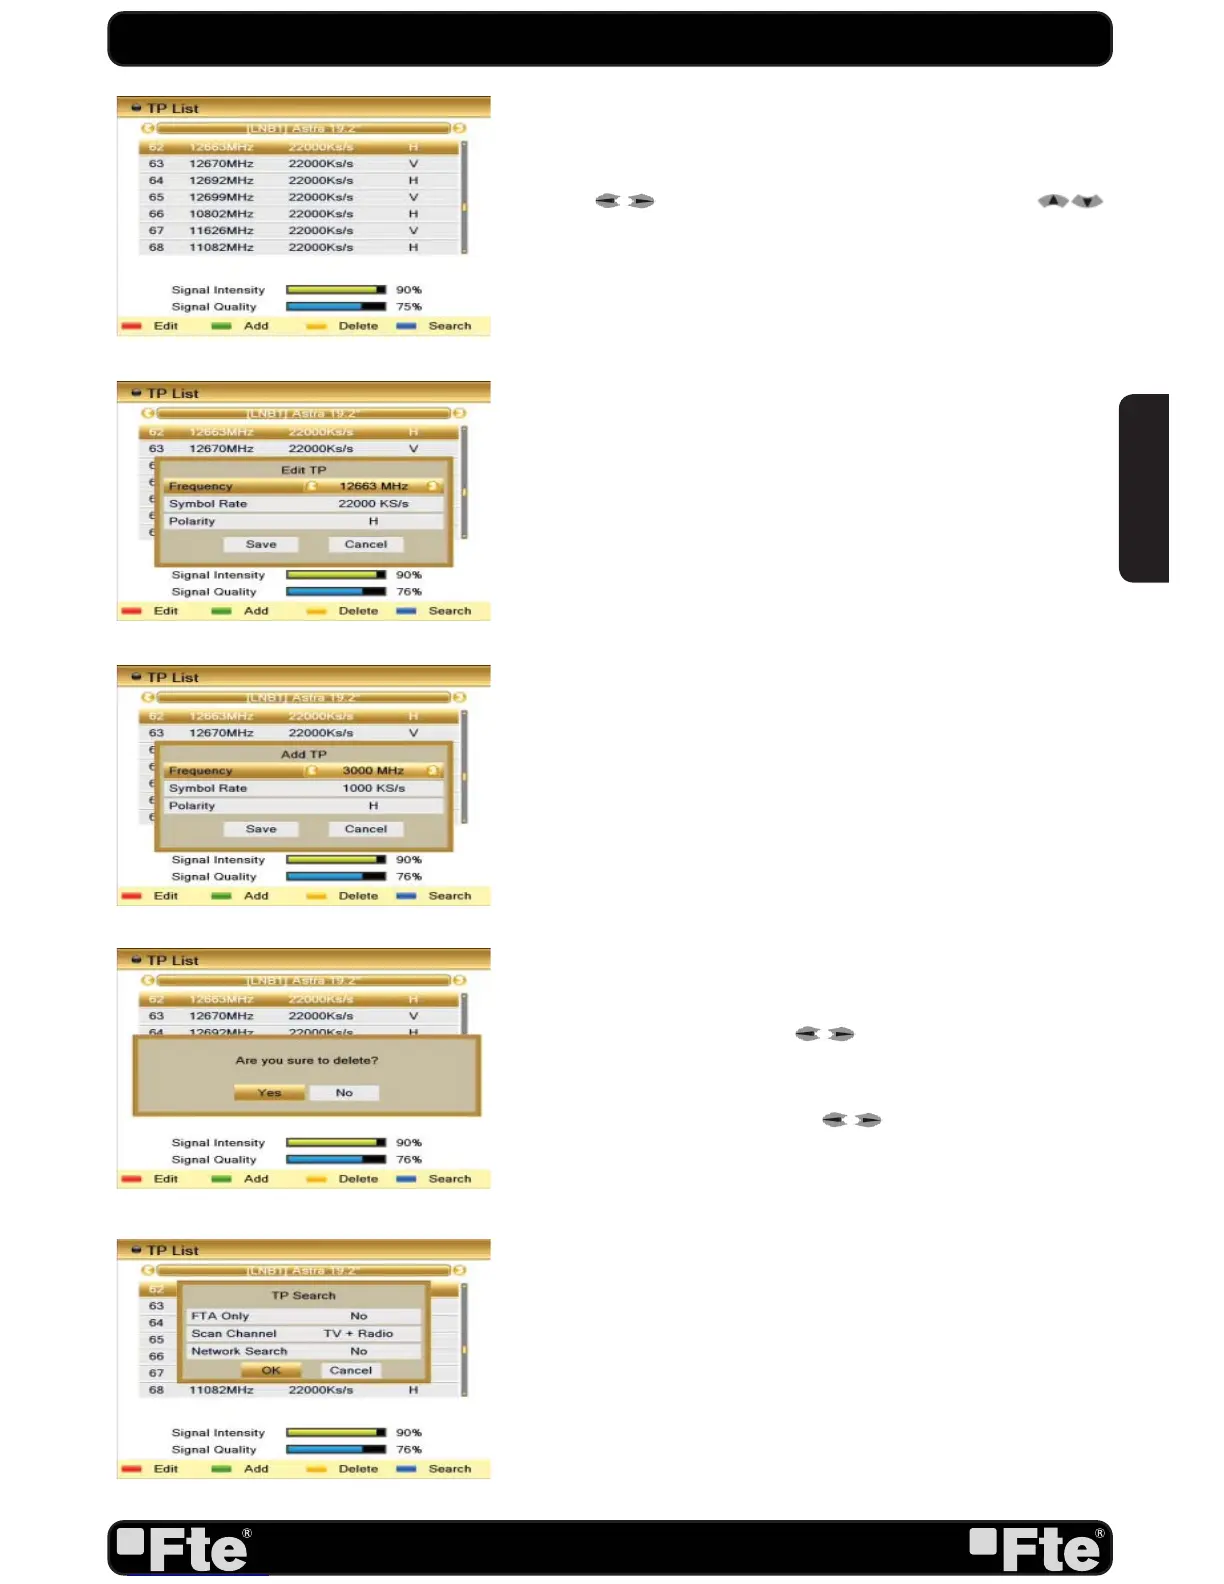
4.4. TP LIST
When you open the “TP List” menu you will see a window like
the one beside (OSD 42).
1. Press [
] to change the marked satellite. Press [
] to change the marked TP.
2. Press [Red] button to open the “Edit TP” menu (OSD 43).
Here you can edit the Transponder’s data like frequency, polarity
and Symbol Rate. If any of the TP of the list have tuned and
stored channels into the receiver, the following three options
“Frequency”, “Symbol Rate” and “Polarity” will not be able to
be edited.
It means that the parameters cannot be modified by error
neither loosing the stored channels when any value of the data
base is changed.
In case of any value, for example the Symbol Rate of a TP,
has been modified by the provider and the receiver has these
channels tuned, the TP must be deleted (it will delete all the
channels of this TP), create it again with the correct data. In
this window, the search of the channels of the TP can be done
selecting the “Search” option and pressing [OK].
3. Press [Green] button to open the “Add TP” menu (OSD
44). Here you can add a new TP and setup its parameters like
frequency, polarity and Symbol Rate. In this window, the search
of the channels of the TP can be done selecting the “Search”
option and pressing [OK].
4. Press [Yellow] button will open a dialog box asking you to
confirm the deletion of the current TP (OSD 45). If you select
“Yes” all the related channels will be deleted. If you select “No”
the operation will be cancelled.
5. Press the key [Blue] to make a searching of the selected TP.
When selecting this option a new window will appear, here you
will be able to configure the following parameters (OSD 46):
- On “FTA Only” item, press [
] to select scanning of all
channels or just scanning of free channels. If you select “Yes” it
will scan free channels only.
- On “Scan Channel” item, press [
] to select the scanning
range from TV + Radio Channels, only TV channels or only
Radio channels.
- Network Search: If you select this option as “No”, the receiver
will search the selected TP. In case you select “Yes”, the NIT
(Network Identification) will be identified and the receiver will
automatically search all the TP of this network.
- Press [OK] to start scanning.
- On the “TP Search” item, press [Exit] to cancel the scanning
and saving the found channels.
OSD 43
OSD 42
OSD 45
OSD 46
OSD 44