En-8
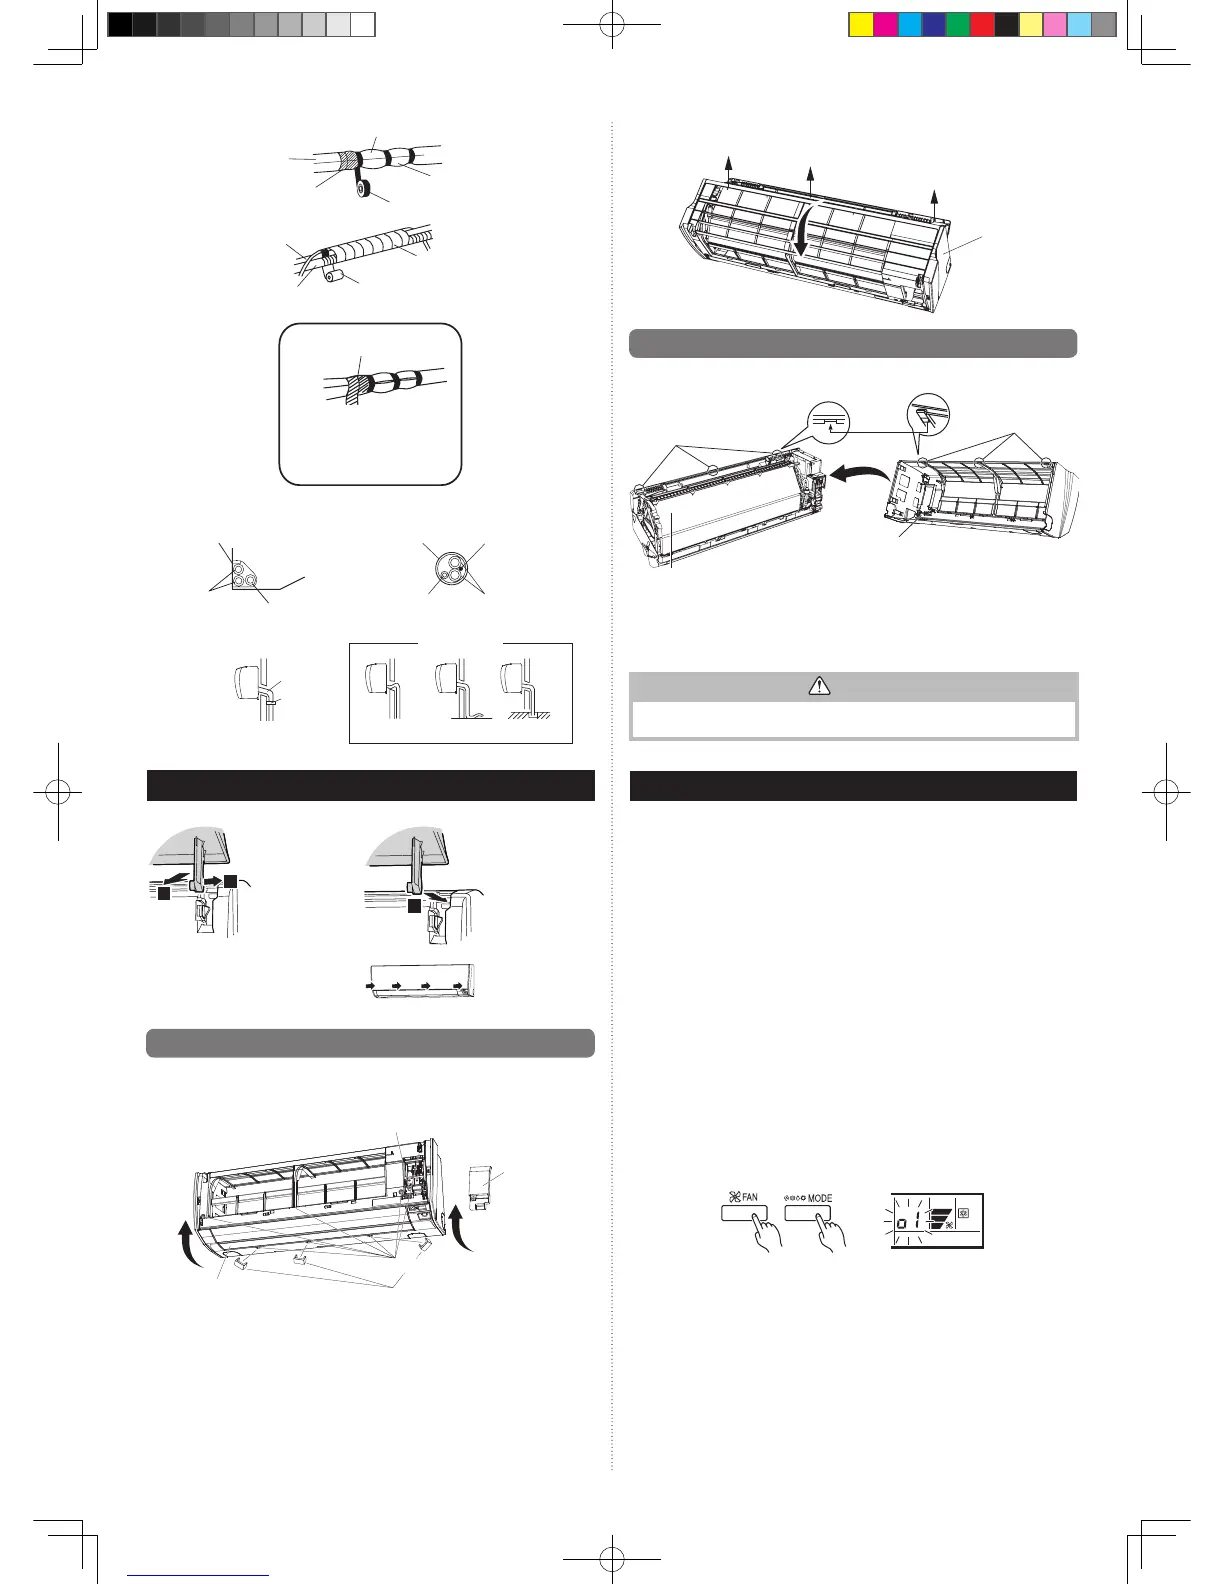
Overlap the insulation
Vinyltape
Wrapwithclothtape
Cloth tape
Drainhose
Pipe
Connection pipe
(heatinsulation)
Indoor unit pipe
(heatinsulation)
Bind the pipes together
so that there is no gap.
SealAisusedwhenthediameter
of gas pipe is Ø12.70 or more.
Butt connection pipe (heat
insulation)againstthe indoor
unitpipe(heatinsulation)and
wrapwithsealAsothatthere
is no gap.
Connection cable
Pipe
Drainhose
Drainhose Connection pipe
Wallpipe
Connection cable
Left piping
For connection from the left rear
Checkthefollowing:
GOOD
Drainhose
Saddle
Lifted up Wave End in water
PROHIBITED
9. FRONT PANEL REMOVAL AND INSTALLATION
Intake grill removal Intake grill installation
Whileholdingthe
grille horizontal, set
the left and right
mounting shafts into
the pillow blocks at
the top of the panel
“c”.
To latch each shaft
properly, insert the
shaft until it snaps.
Press4placeson
the intake grille to
close it completely.
9.1. Front panel removal
(1) Removeintakegrille(Referencetheintakegrilleremoval.)
(2) Remove3caps.
(3) Removewirecover.
(4) Remove7screws.
Screws(Wirecover)
Screws(7position)
Caps(3position)
Wirecover
Diffuser
NOTE :Whenreplacingthefrontpanel,donotscratchordamagethediffuser.
(5) Thefrontpanelispulledtothefront,raisingtheuppersurface,thenthefrontpanelis
removed.
Front panel
9.2. Front panel installation
(1) First, t the lower part of the front panel, and insert top and bottom hooks. (3 top
sides,2center)
Indoor unit
Front panel
Top hooks
(3position)
Topholes(3position)
(2) Attachthe7screws.
(3) Attachthewirecover.
(4) Attachthe3caps.
(5) Attachtheintakegrille.
CAUTION
Install the front panel and intake grille securely. If installation is imperfect, the front
panel or intake grille may fall off and cause injury.
10. TEST RUN
Check items
(1) Isoperationofeachbuttonontheremotecontrolunitnormal?
(2) Doeseachlamplightnormally?
(3) Doairowdirectionlouversoperatenormally?
(4) Isthedrainnormal?
(5) Donothaveanabnormalnoiseandvibrationduringoperation?
•
Donotoperatetheairconditionerintestrunforalongtime.
[Operation method]
•
For the operation method, refer to the operating manual.
•
The outdoor unit, may not operate, depending on the room temperature. In this case,
keeponpressingtheMANUALAUTObuttonoftheindoorunitformorethan10
seconds.TheOPERATIONindicatorlampandTIMERindicatorlampwillbegintoash
simultaneously during cooling test run.
Then,heatingtestrunwillbegininabout3minuteswhenHEATisselectedbythe
remotecontrolleroperation[reversecyclemodelonly].
(Pleasefollowtheoperatingmanualforremotecontrolleroperation.)
•
T oendtestoperation,presstheremotecontrollerSTART/STOPbutton.
(Whentheairconditionerisrunningbypressingthetestrunbutton,theOPERATION
LampandTIMERLampwillsimultaneouslyashslowly.)
[Using the wired remote controller] (Option)
For the operation method, refer to the operating manual.
(1) Stop the air conditioner operation.
(2) PresstheMODEbuttonandtheFANbuttonsimultaneouslyfor2secondsormoreto
start the test run.
Test run display
(3) PresstheSTART/STOPbuttontostopthetestrun.
 Loading...