Network Scanner fi-6000NS Getting Started 9
3.8 Checking the Network
Connection
The network connection may be checked by performing
a ping test.
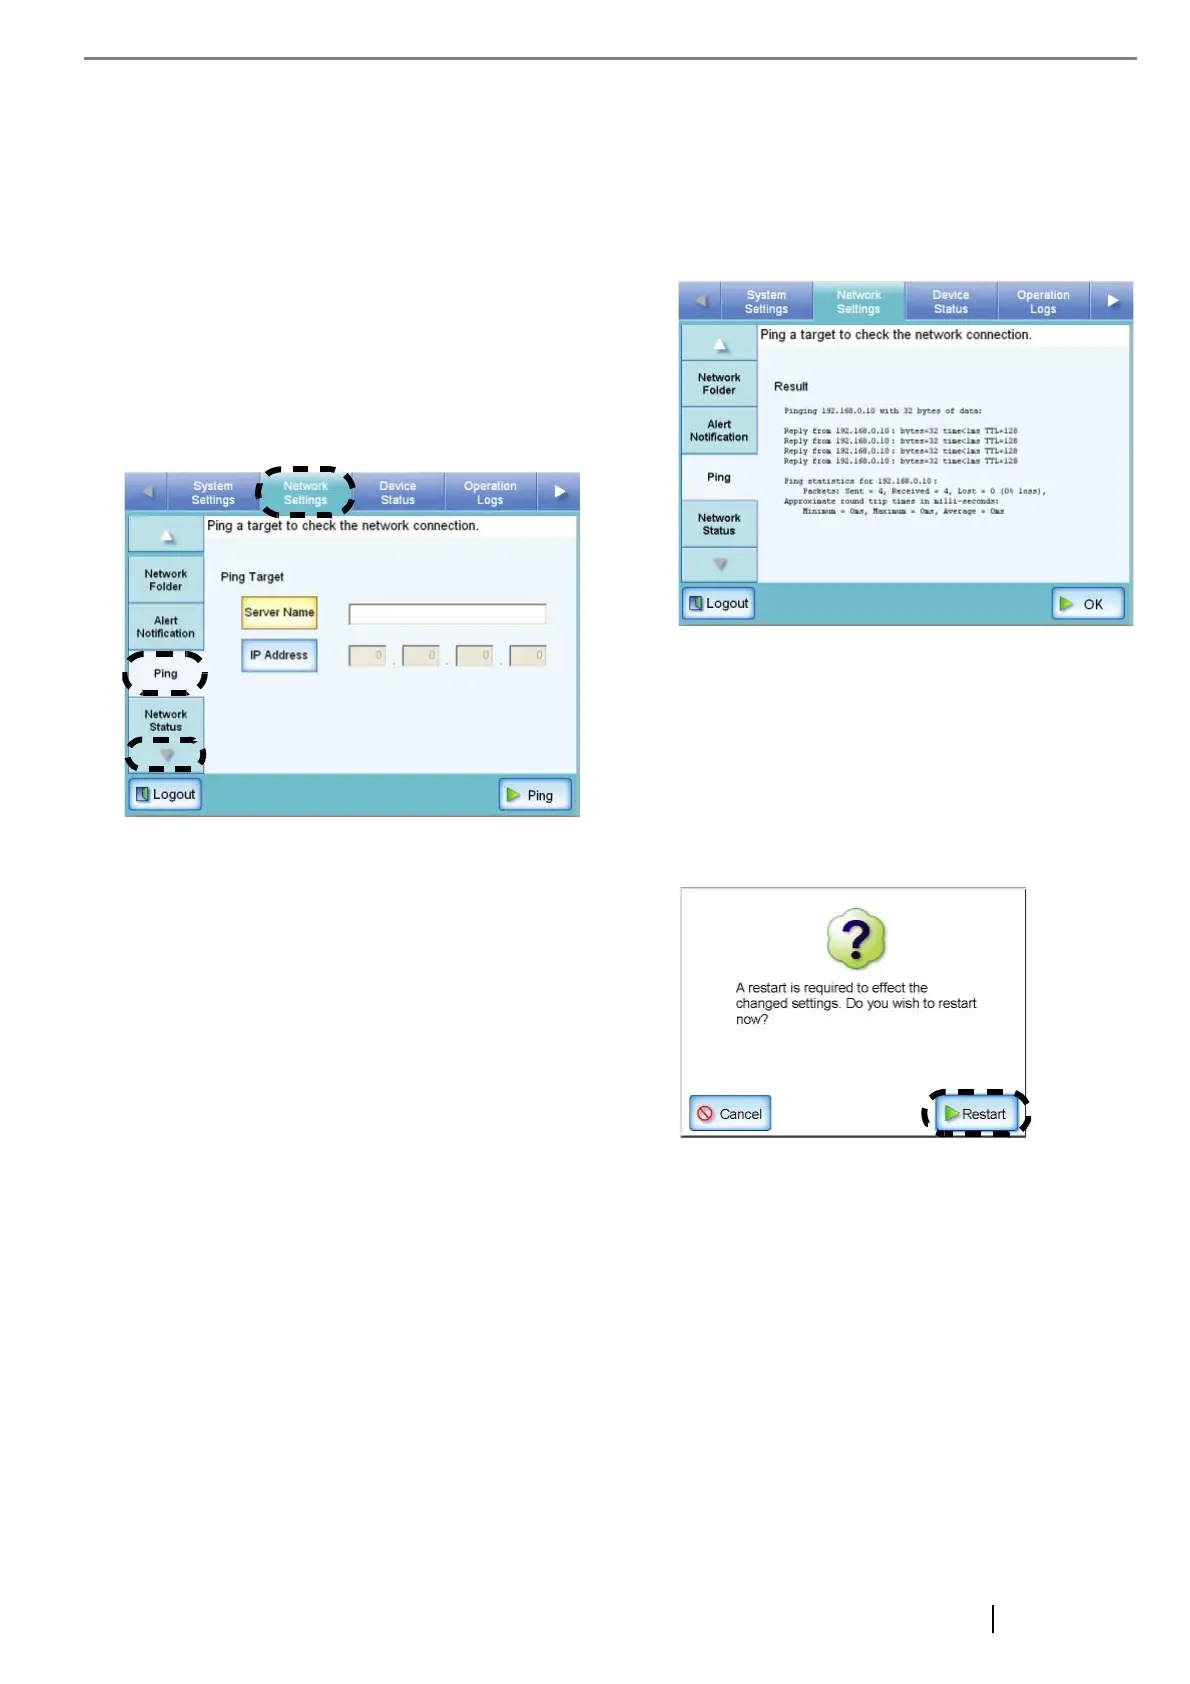
1. Select the [Network Settings] tab on the top
menu.
2. Press the [Down] button on the left side menu.
⇒ Scroll the left side menu down until the [Ping]
tab appears.
3. Select the [Ping] tab on the left side menu.
⇒ The "Ping" screen appears.
4. Select whether to set a server name or IP
address.
The [Server Name] and [IP Address] buttons
cannot both be selected.
5. Enter the target server name or IP addresses
(selected in Step 4).
• If the [Server Name] button is selected:
Enter a Fully Qualified Domain Name (FQDN)
or server name in the input field. This may be up
to 255 characters long.
• If the [IP Address] button is selected:
Enter a numerical IP address.
6. Press the [Ping] button.
⇒ A ping test is performed and the results are
displayed. If the result shows "Lost=0 (0%
loss)", the network connection is functioning
normally. For any other result, refer to
"Checking Basic Network Operation with a
Ping Test" (page 16).
After performing all settings, restart the system.
3.9 Restarting the System
1. Press the [Logout] button.
⇒ The restart confirmation screen appears.
2. Press the [Restart] button.
⇒ The scanner restarts, and the "Login" screen
appears.
Next, download the "Network Scanner fi-6000NS
Operator's Guide".
 Loading...