18
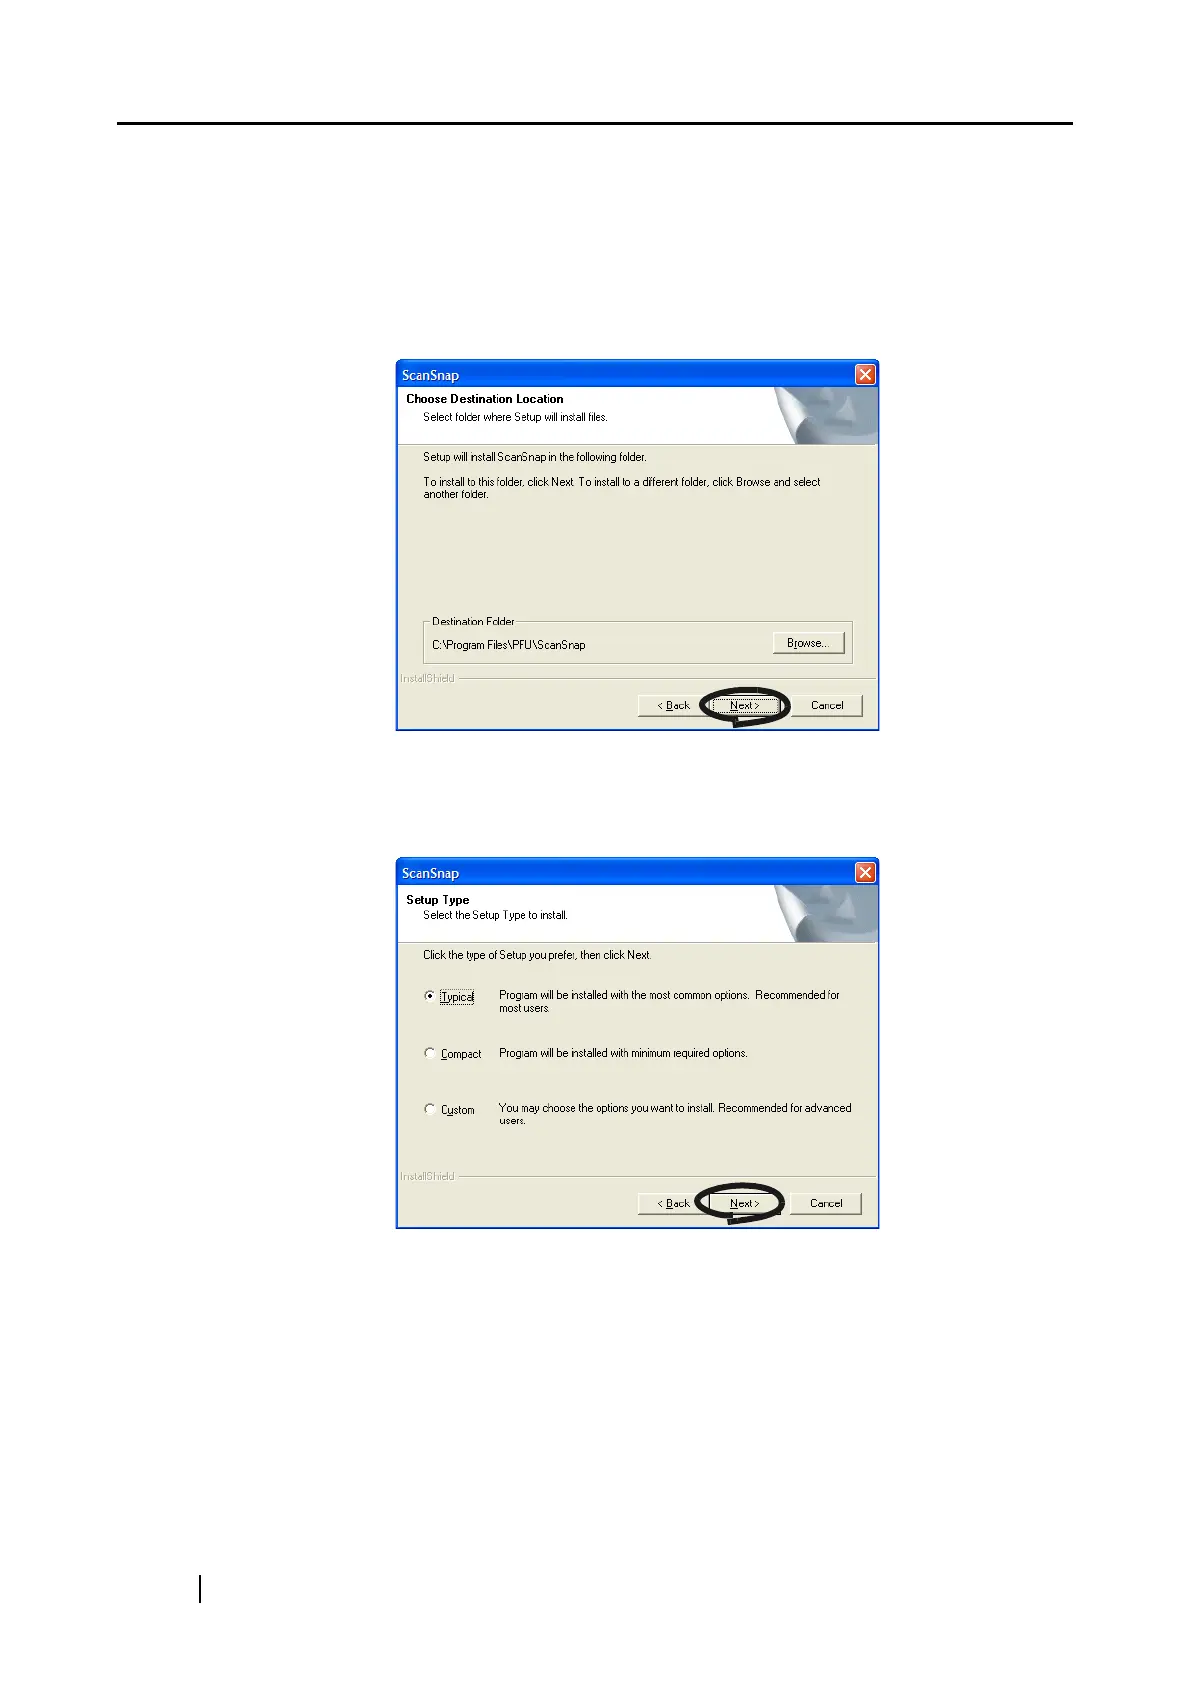
6. In the "Choose Destination Location" screen, choose the destination folder and click
the [Next] button.
To install ScanSnap in the default folder, simply click the [Next] button.
Usually, there is no need to change the directory path. If the selected drive does not have
enough free disk space, change the directory path.
To change the directory path, click the [Browse] button. The "Select Directory" dialog box
is displayed; select the folder to install ScanSnap.
⇒ The "Setup Type" screen is displayed.
7. Select an installation option and click [Next] button.
Select [Typical] for ordinary use.
⇒ This displays the "ScanSnap Manager Setting 1" screen.
 Loading...