2 Garrett Metal Detectors
ATX
™
3
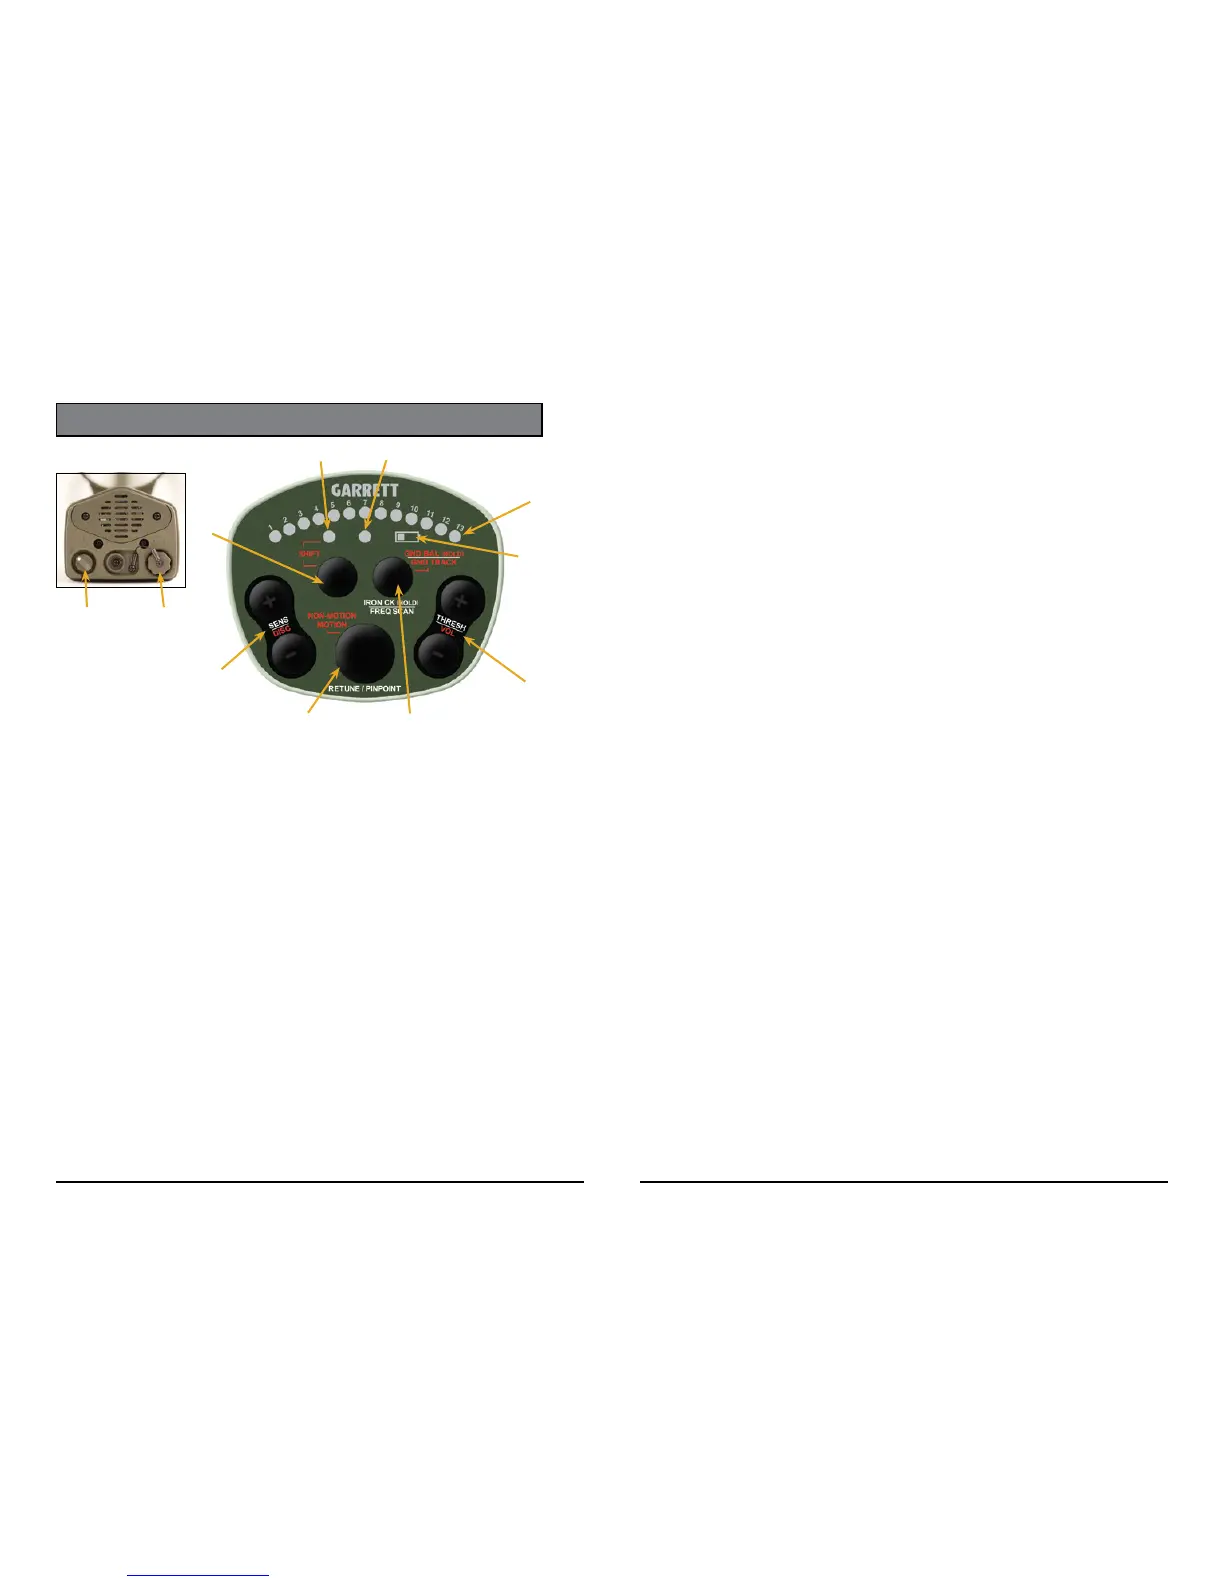
ATX CONTROLS
PRIMARY CONTROLS
(White-text functions controlled directly by buttons)
A: Power Switch ON/OFF: Located at rear of detector.
B: Headphone Connector Located at rear of detector.
C: Power ON Indicator Green LED indicates power ON; blinks if Gnd Track on.
D: Signal Strength Indicator Increases from left to right. Also used to indicate
settings (p. 19).
E: Low Battery Indicator (See p. 21 for details.)
F: Threshold ( +, - ) Set to preferred level; normally barely audible (p. 22).
G: Freq. Scan (Quick Press) Hold coil stationary away from metal and press button
to scan for quietest frequency (p. 23).
G: Iron Check (Hold Down) Press and hold button to check target for iron, indicated
by very low-tone growl (p. 24).
H: Retune (Quick Press) Press to quickly retune audio to zero; retune generally
only required in Non-Motion Mode (p. 25).
H: Pinpoint (Hold Down) Press and hold button to pinpoint a target (p. 26).
H+A: Factory Reset Press and hold button while switching unit ON to return
detector to original factory settings (p. 27).
I: Sensitivity ( +, - ) Set as high as stable operation will allow (p. 28).
SECONDARY CONTROLS
(Red-text functions controlled by rst pushing Shift Button)
J: Shift Button Press to access Secondary controls. Press again to
exit Secondary, or wait 5 seconds for automatic exit.
K: Shift Indicator Red LED indicates access to Secondary controls.
J+F: Volume (+,-) Limits how loud a large target sounds. Does not affect
faint signals (p. 33).
J+G: Ground Track (Quick Press) Provides slow, continuous tracking to ground minerals.
OFF = LED 1, SLOW = LED 5, MEDIUM = LED 9,
FAST = LED 13. Set to OFF for max detection unless
changing ground conditions require frequent Ground
Balancing (p. 35).
J+G: Ground Balance (Hold) Hold button while repeatedly bouncing searchcoil to
quickly balance out ground minerals (p. 44).
J+H: Non-Motion/Motion Mode Motion-Mode (indicated by LEDs quickly scanning back
and forth) is normally preferred because it is more
stable/quiet. Non-Motion Mode (indicated by stationary
LEDs) can provide additional depth but may require
frequent Retunes (p. 45).
J+I: Discrimination (+,-) Set to minimum (1st
LED) for maximum detection.
Increase if desired to eliminate small targets (p. 48).
Note: When adjusting any setting, the initial button press shows the current setting;
subsequent presses within 1�5 seconds will adjust the setting�
CONTROLS/QUICK START GUIDE
A B
I
J
G
H
F
D
E
C
K
(Back of detector)
Garrett recommends that all new ATX owners completely read and understand the entire
manual before using this detector� This section is only intended as a reminder�
1. Switch ATX on and check batteries.
Four audio beeps indicates fully-charged batteries�
2. Set to preferred Mode, usually Motion Mode�
3. Set Discrimination to preferred level, usually to minimum (1 LED)�
4. Set Sensitivity, Threshold and Volume to preferred levels�
5. Perform Frequency Scan, if needed, to eliminate electrical interference�
6. Perform Ground Balance to eliminate ground response and to ensure
maximum detection�
7. Begin searching.
Sweep searchcoil parallel to—and less than 1 inch from—the ground, scanning
coil from side to side at a speed of about 2 feet/second (60cm/sec)� See p. 42.
Note: All settings are saved at Power OFF� Therefore, once you have selected your preferred
settings, you only need to perform Frequency Scan and Ground Balance, if needed, before
starting to search�