10 Garrett Metal Detectors
ATX
™
11
Signal Strength Indicators
Target signals are visually indicated on the ATX by the upper row of LEDs�
A trio of red LEDs moves from left to right in response to the increasing
strength of the target� No lighted LEDs indicates zero signal response�
During adjustments, the upper row of LEDs also show the settings�
Three red LEDs to the far
right indicates maximum
target signal strength.
CONTROLS AND FUNCTIONS
Motion vs. Non-Motion Detection Mode
The ATX can detect targets in either Motion Mode (requiring the coil or tar-
get to be in motion) or in Non-Motion Mode (static detection)� The default
detection mode of the ATX is Motion Mode�
To switch the detection mode:
• Press and release the SHIFT button to access the Secondary controls�
• Press the NON-MOTION/ MOTION button to toggle between the two
modes (see illustration on next page). The rst press of this button
indicates current setting; quickly press this button again to change
the mode�
• Motion Mode is indicated by central LEDs that quickly scan back and
forth; Non-Motion Mode is indicated by stationary LEDs�
• Press and release SHIFT button again to exit Secondary adjustments�
Note: The Red Shift LED must be visible to switch detection modes�
Motion Mode is the default setting� It is usually preferred because it
is more stable and quiet, but requires the searchcoil to be in motion to
Primary and Secondary Controls
The ATX has two levels of controls, primary and secondary�
All primary controls (Sensitivity, Threshold, Retune, Pinpoint, Frequen-
cy Scan, Iron Check) are indicated with white letters on the control panel�
These controls are directly accessible�
Secondary controls (Discrimination, Volume, Mode, Ground Track,
Ground Balance) are indicated with red letters on the control panel� These
are accessible by rst pressing the SHIFT button, which turns on the red
Shift LED� Secondary adjustments must be made while the SHIFT LED is
lit; otherwise the ATX will automatically exit the Secondary Shift mode and
return to primary adjustments in 5 seconds�
Note: When adjusting any setting, primary or secondary, the initial but-
ton press always shows the current setting, then subsequent presses must
be made within 1�5 seconds in order to adjust the setting; otherwise, the
LEDs will return to showing signal strength�
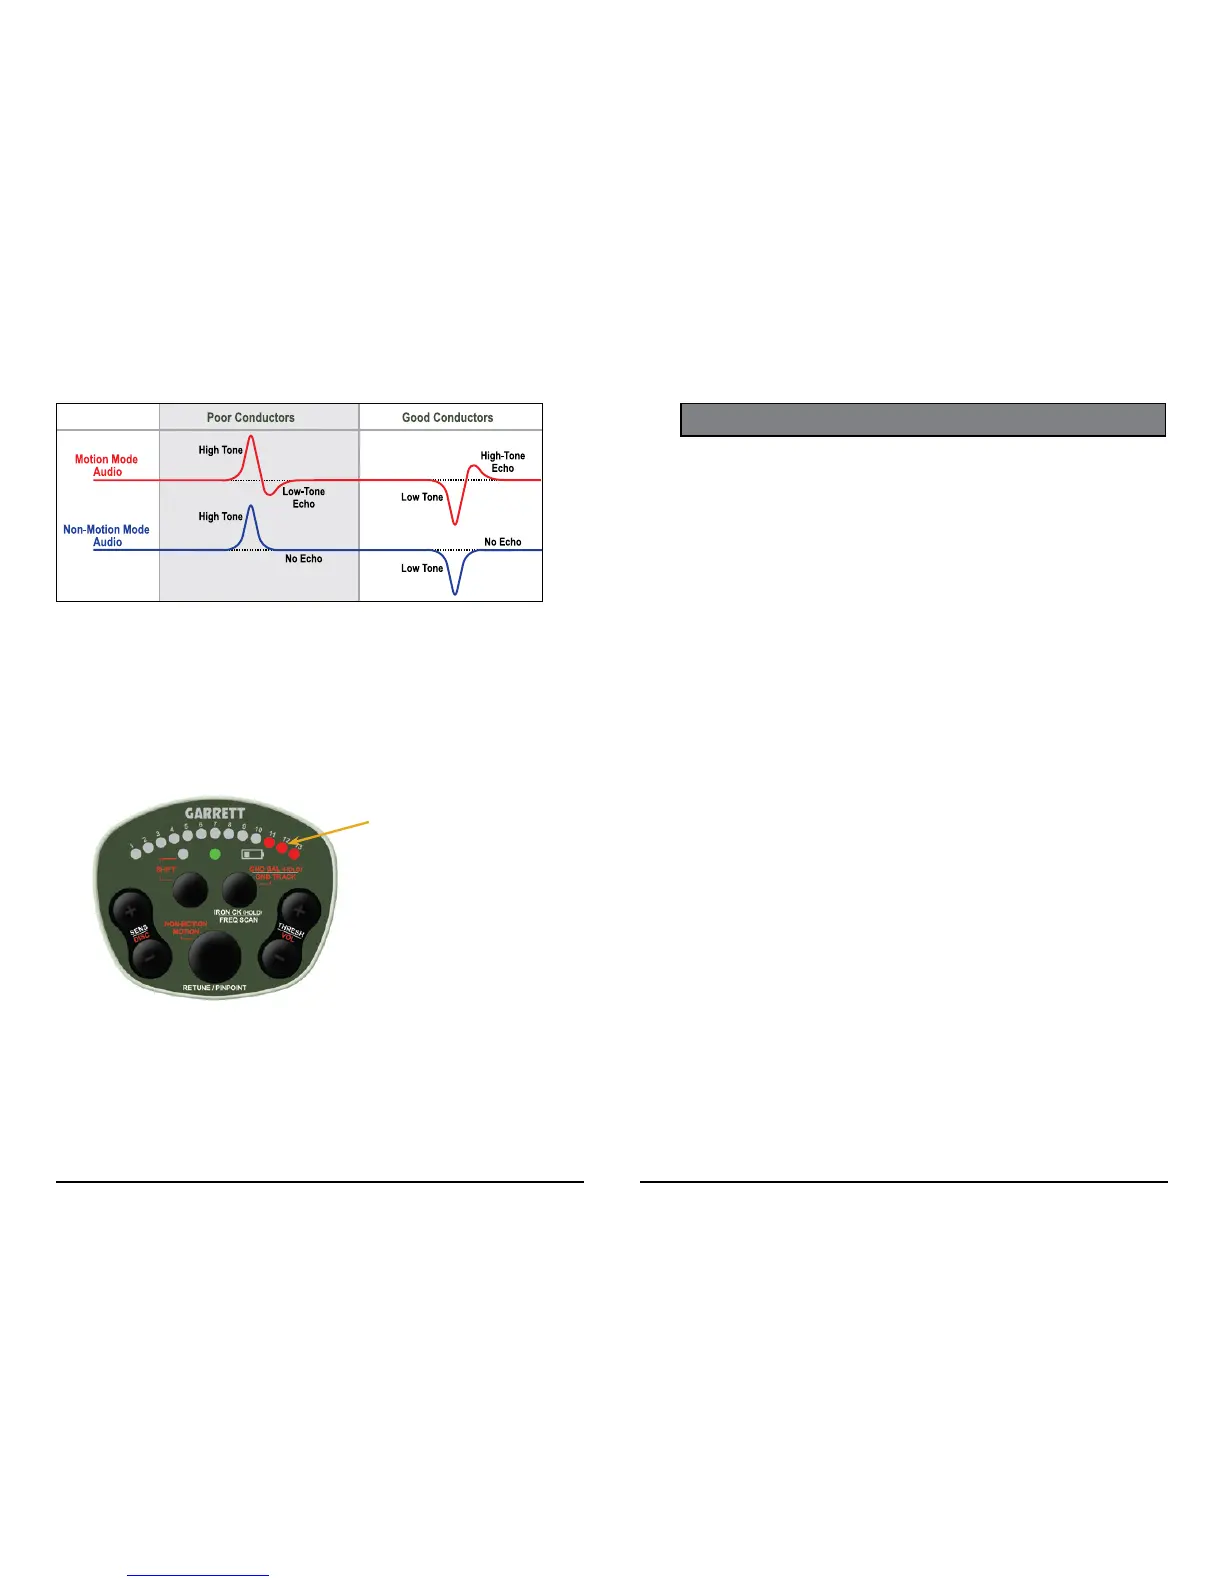
This chart illustrates the different audio signals produced in Motion versus Non-Motion modes.