ORIUS ™ 833 User’s Guide Series Rev 3 3-2
corner and its location can be easily changed by putting the pointer inside the box and dragging it. The Auto
Survey updates the image display (brightness and contrast) in real time.
Auto Exposure is enabled and disabled by clicking on the Auto Exposure selection box. Generally one does not
use Auto Exposure when using Camera View mode of operation. The purpose behind Camera View is to
operate the camera at its fastest refresh or frame rate. When the checkbox is not selected the user is in control of
the exposure time. Type in the exposure time desired and then press the Enter key. Selecting “Optimize” will
automatically adjust the exposure time and duty cycle of the camera to give you the fastest frame rate.
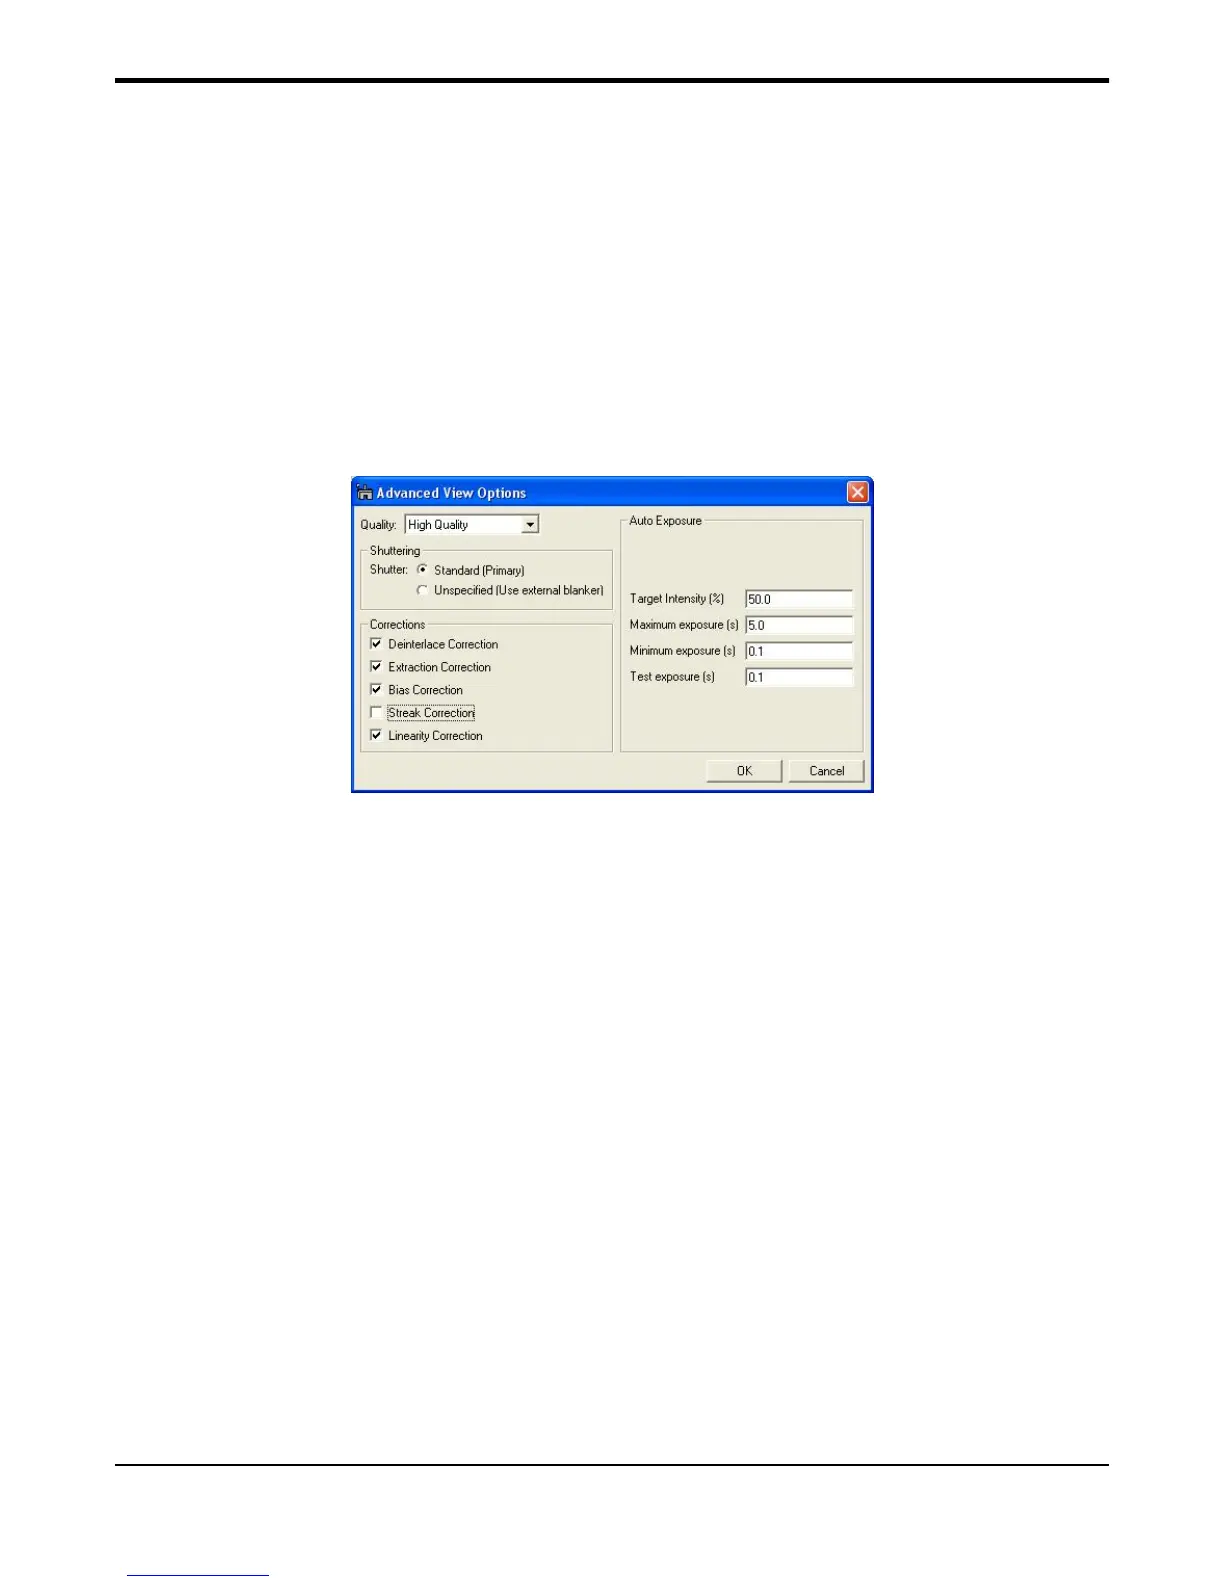
Another feature to aid in diffraction pattern viewing and acquisition is a software setting to remove “streaking”
artifact from the image. Streaking can occur normally when imaging intense transmitted beam spots during
diffraction mode. This streak can be eliminated by selecting “Streaking Correction” in the Camera View and
Camera Acquire Setup dialog window. Click on the Advanced button to expose the Options window:
Quick Tip: Using the keyboard up and down arrow keys will respectively double or halve the exposure time.
To view a continuous image of the sample:
• Select the Camera Inserted checkbox to insert the camera.
• Setup: Search mode (full CCD and bin x4 selected)
• Press Start View button to start the image acquisition
If you need to adjust the microscope focus of the sample:
• Click Focus Loupe in the Camera View window.
Only the selected area (see Figure 3-2) will be imaged at a very fast rate allowing to set a more precise focus on
the area of interest.
 Loading...