5 Setups, alignments and adjustments
86 GE Healthcare 32551-IMG rev 6
8 Go back to service mode and make two exposures with semi-
automatic (A) mode 27kV so that very long exposure time (four times
longer than exposure time for 40 mm Acr = for example 4-5 sec.) and
very short exposure time (3 of exposure time for 40 mm Acr = for
example 250-300 ms) are achieved.
9 Develop the films and record the optical density of the films (=O.D).
10 Select the adjustment direction of ‘S1’ (affects the compensation
slope at exposures shorter than rotation point ‘P’) and ‘S2’ (affects the
compensation slope at exposures longer than rotation point ‘P’) from
the table below.
‘S1’ and ‘S2’ can have values 0, 50, 100, 150...up to 700. The maximum
compensation is 140% or 60% of O.D. in ‘P’ (rotation Point).
11 Enter the #64 AEC program. Press kV+ until the thickness
compensation parameter ‘c’ is reached.
12 Press Autorel to scroll the ‘S1’ parameter in the kV display. Use
Den+/- buttons to change the value. This parameter affects the
compensation slope at exposures shorter than rotation point ‘P’.
13 Press Autorel to scroll the ‘S2’ parameter in the kV display. Use
Den+/- buttons to change the value. This parameter affects the
compensation slope at exposures longer than rotation point ‘P’.
5.2.18 kV compensation
The kV compensation is performed with both filters (Mo/Rh) and all
cassette tunnels (Bucky/cassette holder/magnification tunnel) separately.
DO NOT change the gain parameter anymore.
1 Enter service program 64.
2 Proceed to loop in AA- and A-modes.
The Control Panel will display:
– kV screen of the Control Panel: current kV selected
– Density Correction on mAs-screen of the control panel: + 1.00
(default)
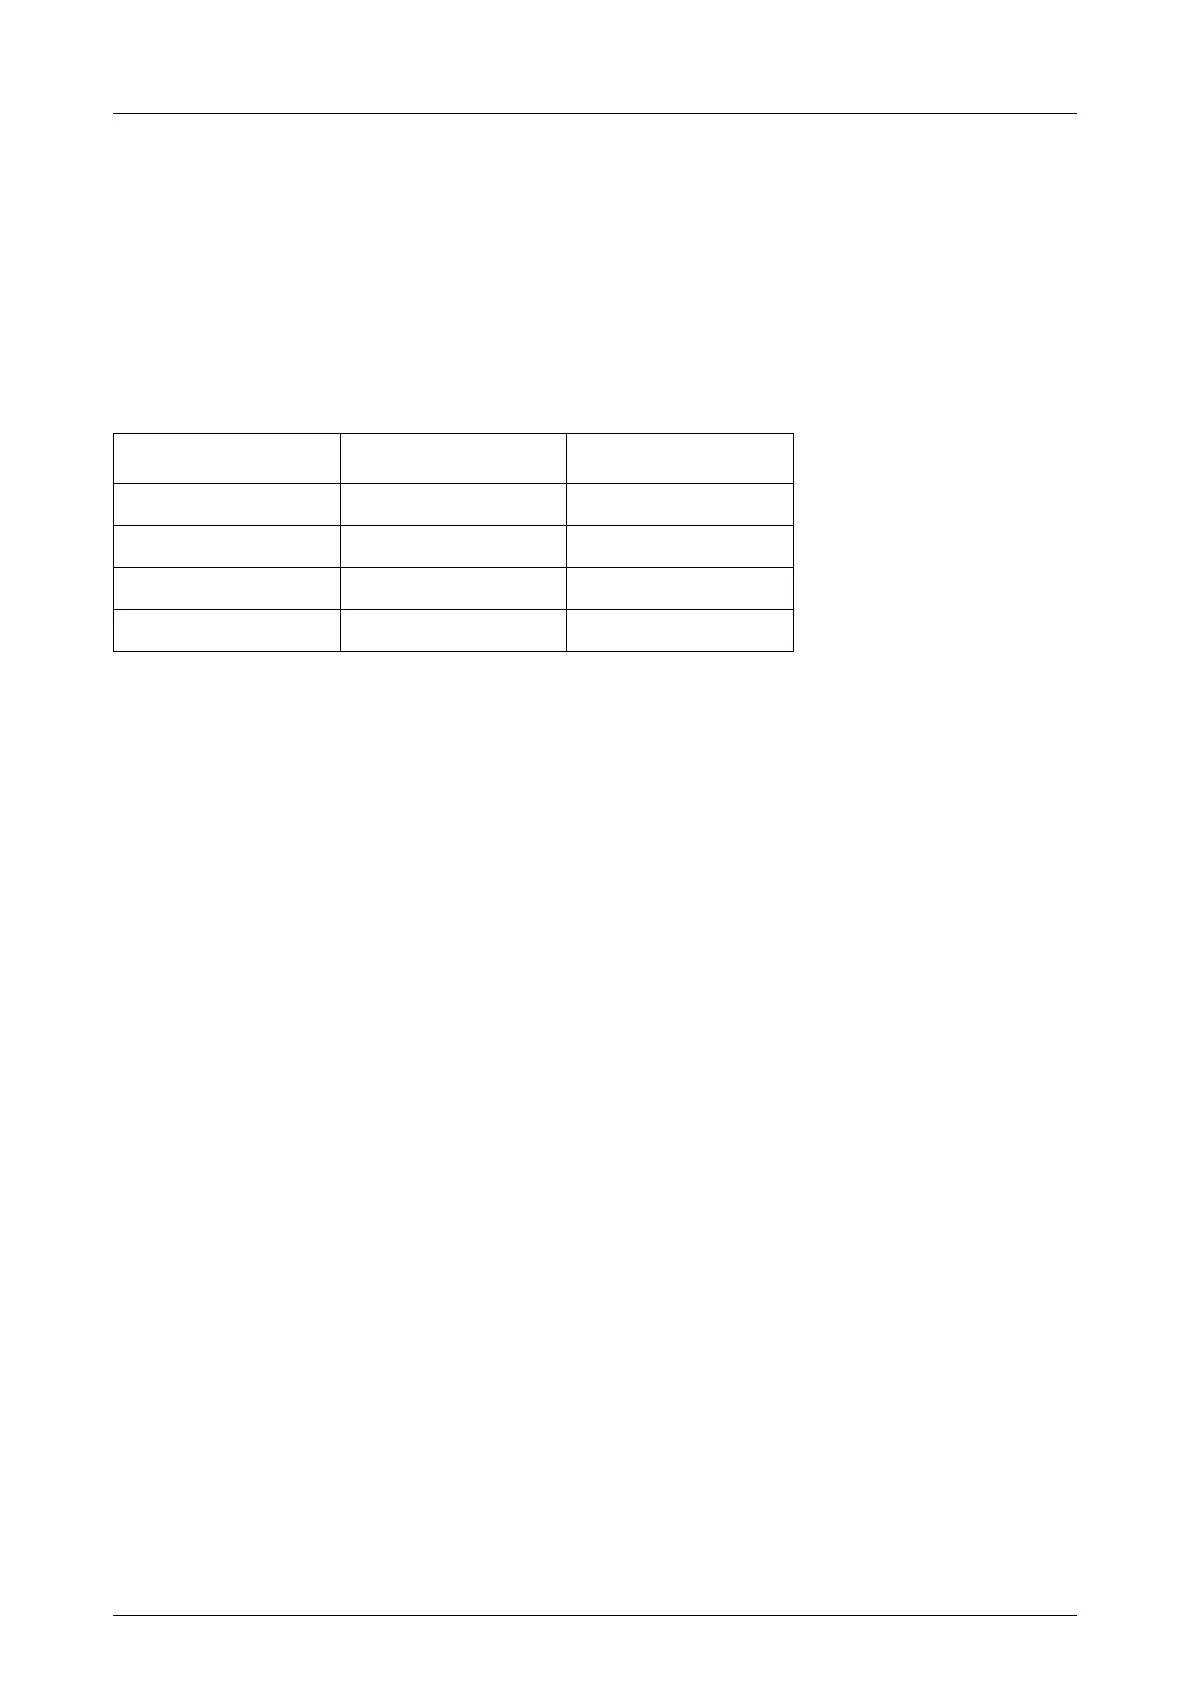
3 Adjust for each station (a, b, c) in both modes.
too light O.D. too dark O.D.
r1<1 increase S1 decrease S1
r1>1 decrease S1 increase S1
r2<1 decrease S2 increase S2
r2>1 increase S2 decrease S2
Table 5.10 O.D. corrections