5 Setups, alignments and adjustments
32551-IMG rev 6 GE Healthcare 77
1 Check that the fast turn-around times are equal at both ends. If
adjustment is necessary, move the slotted metal sheet travelling
through the optocoupler.
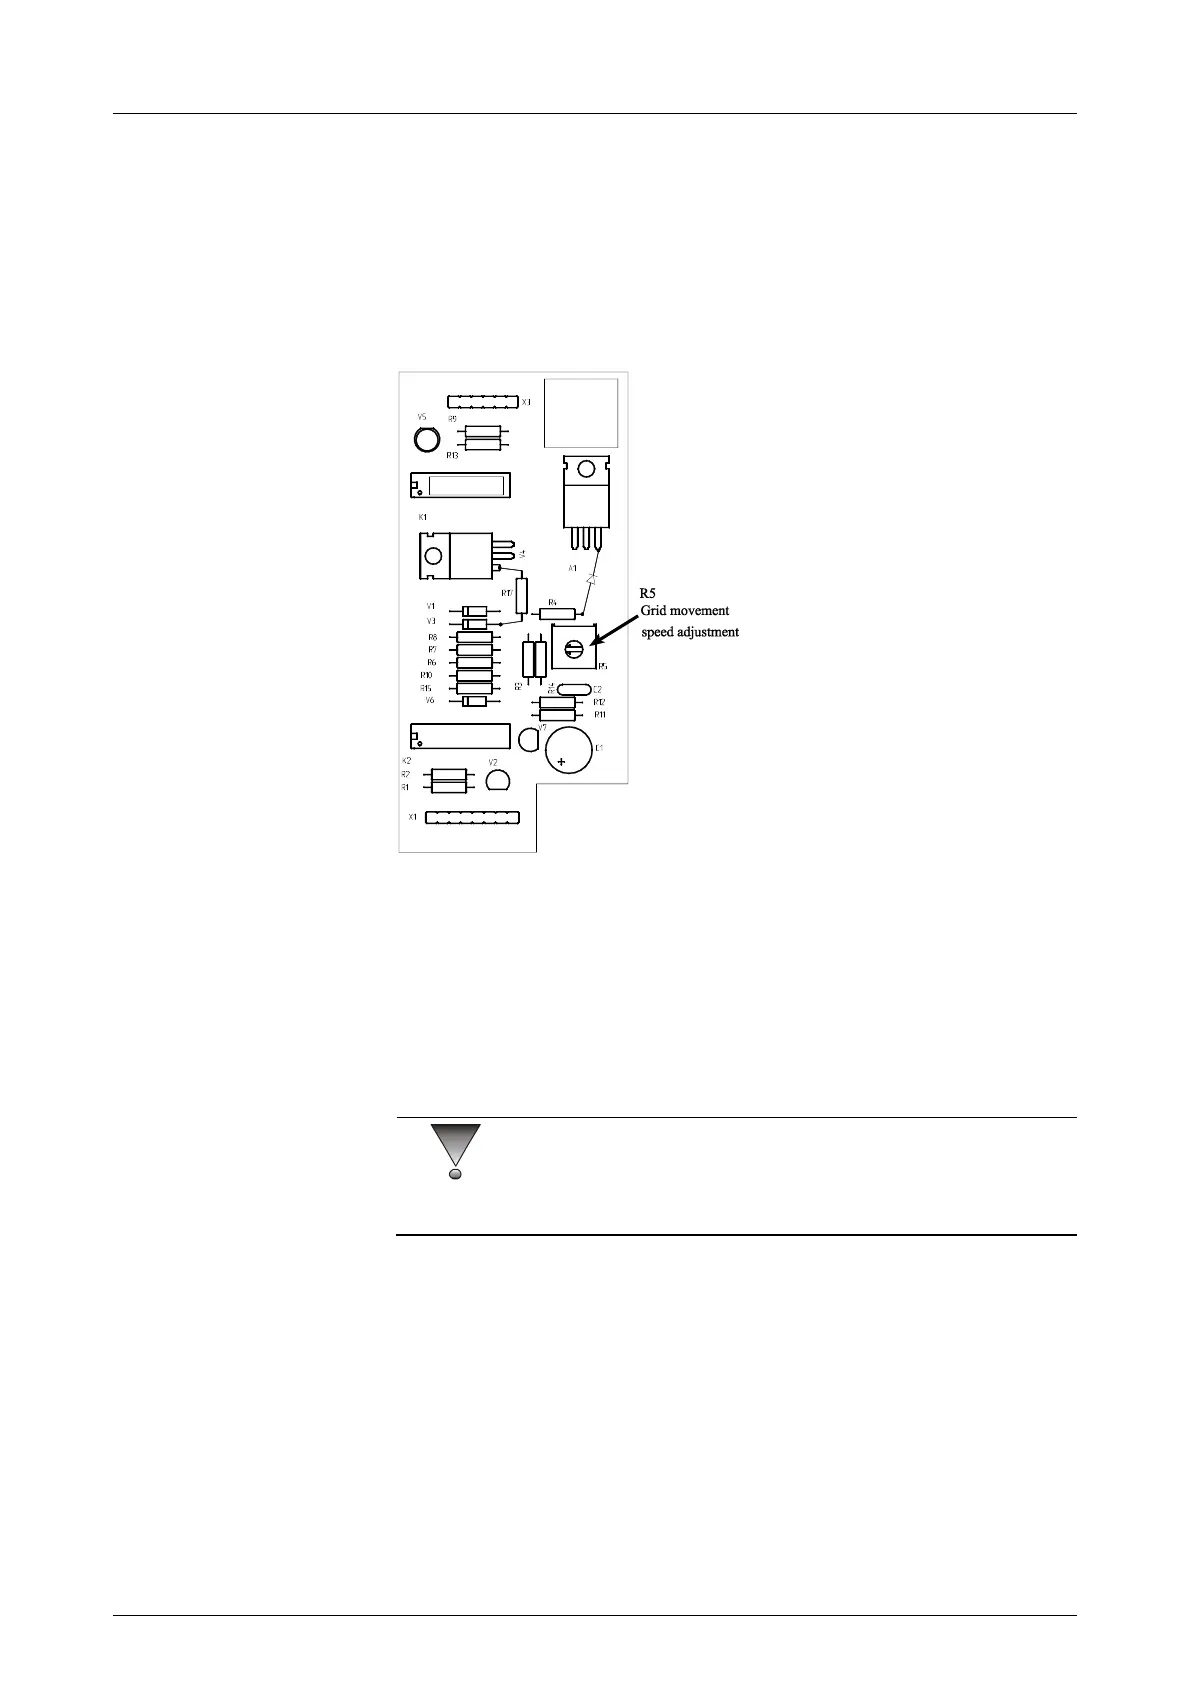
2 The grid travelling time is adjusted from R5 located on the bucky-
control board. In the CC position travel time of the grid should be 1.6
+/- 0.1 sec. The fast travel time should be 0.17 +/- 0.1 sec.
3 Make sure that the grid moves well in lateral positions (C-arm in +/-
90°angle) as well.
Fig 5.12. Bucky control board
5.2.14 AEC adjustment
Test equipment needed: Sensitometer, Densitometer, Acrylic blocks, Film
& Cassette.
1 Attach Bucky device.
2 Press Den+ & Den- for 3 sec. to enter program (Pr) mode.
CAUTION!
Store all default values in the tables on the next pages (molybdenum filter)
and (rhodium filter).
3 Press Autoexp to AA mode and channel a. Select Molybdenum filter.
4 Select max. kV change range of initial kV (factory default “4 kV) with
kV- and kV+ keys. Value can be selected between 0...9 kV. 0 kV
means that initial kV does not change at all during the exposure.
Value 9 means that kV can decrease or increase 9 kV from initial kV
(which was selected according the breast thickness) during
exposure.
5 Select the internal density correction factor within a range of 50% to
200% (0.50 on screen means 50% and 2.00 on mAs-screen means
200% change to exposure time). The default value is 1.00.