PROTEUS XR/a
GE MEDICAL SYSTEMS Operator Manual
REV 11 DIRECTION 2259724-100
7-19
7-8-5 Replace Collimator Lamps Assembly
ONLY THE LAMP OFFERED BY GEHL WITH THE HOLDER CAN BE USED
AS REPLACED PART. OTHERWISE IT MAY CAUSE ISSUE OF LIGHT
ILLUMINANCE, EDGE CONTRAST OR LIGHT/X-RAY FIELD ALIGNMENT.
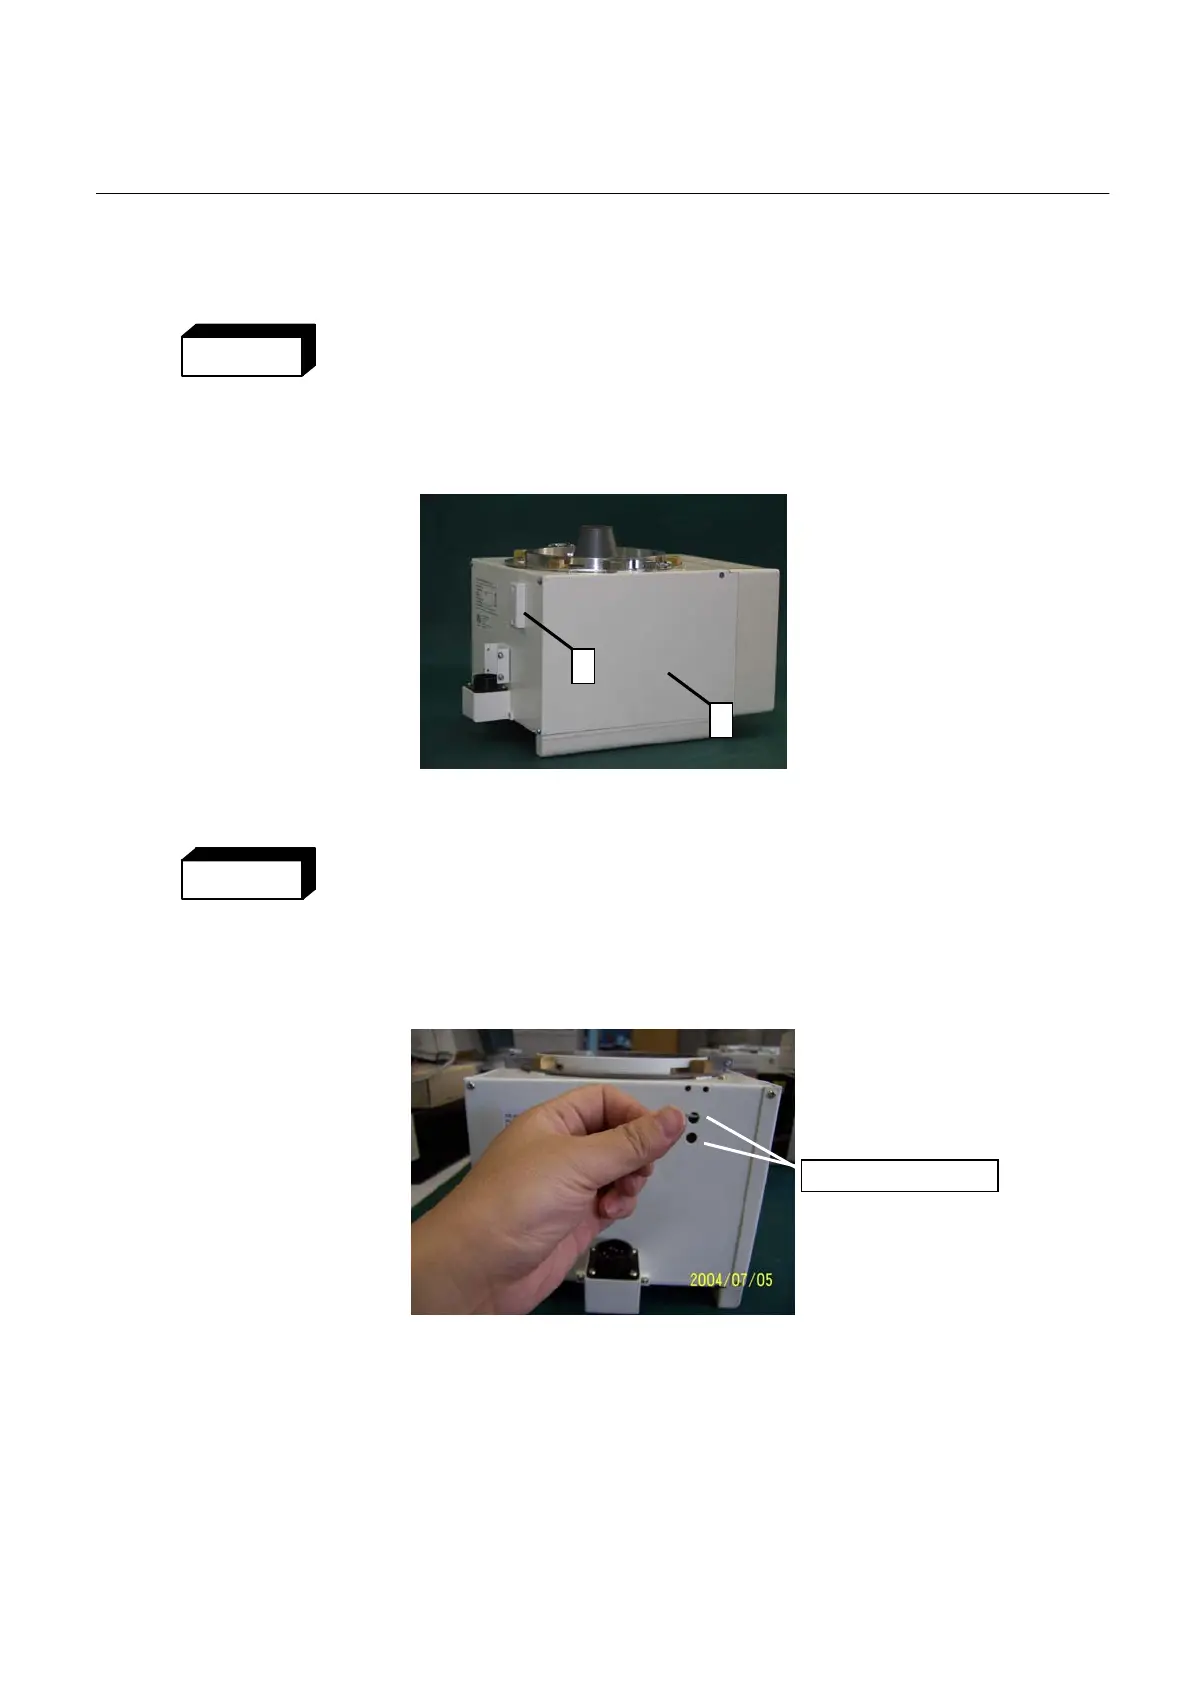
• Removing the defective lamp assembly
- Move the collimator right cover (1) and the shielding for lamp mounting
hole (2).
- Unplug the connector of the lamp.
IF THE LAMP OF THE LIGHT LOCALIZER REMAINS ILLUMINATED FOR A
LONGER PERIOD OF TIME, THE HOLDER MAY HEAT UP. PLEASE AVOID
TOUCHING THE LAMP HOUSING UNTIL IT COOLS DOWN.
- Loosen 2 mouning screws of the lamp assembly from the hole on rear
side of the collimator and remove the defective lamp assembly from the
right side of the collimator
• Mounting the new lamp assembly
- Mount the new lamp assembly
- Reconnect the connector of the lamp
- Mount the right cover of the collimator and the shielding for lamp
mounting hole
WARNING
2
1
WARNING
Lamp exchange Hole
FOR TRAINING PURPOSES ONLY!
NOTE: Once downloaded, this document is UNCONTROLLED, and therefore may not be the latest revision. Always confirm revision status against a validated source (ie CDL).

 Loading...