Prerequisites
●
The valve has been removed, see
9.5 Removing the valve
.
●
Insert V-ring without grease. To facilitate tting, use water with a drop of wash-
ing-up liquid to remove the surface tension. To ensure that no rust is transfer-
red, the washing-up liquid solution must be mixed in a ceramic, plastic, or stain-
less steel container.
Tools
●
V-ring insertion tool
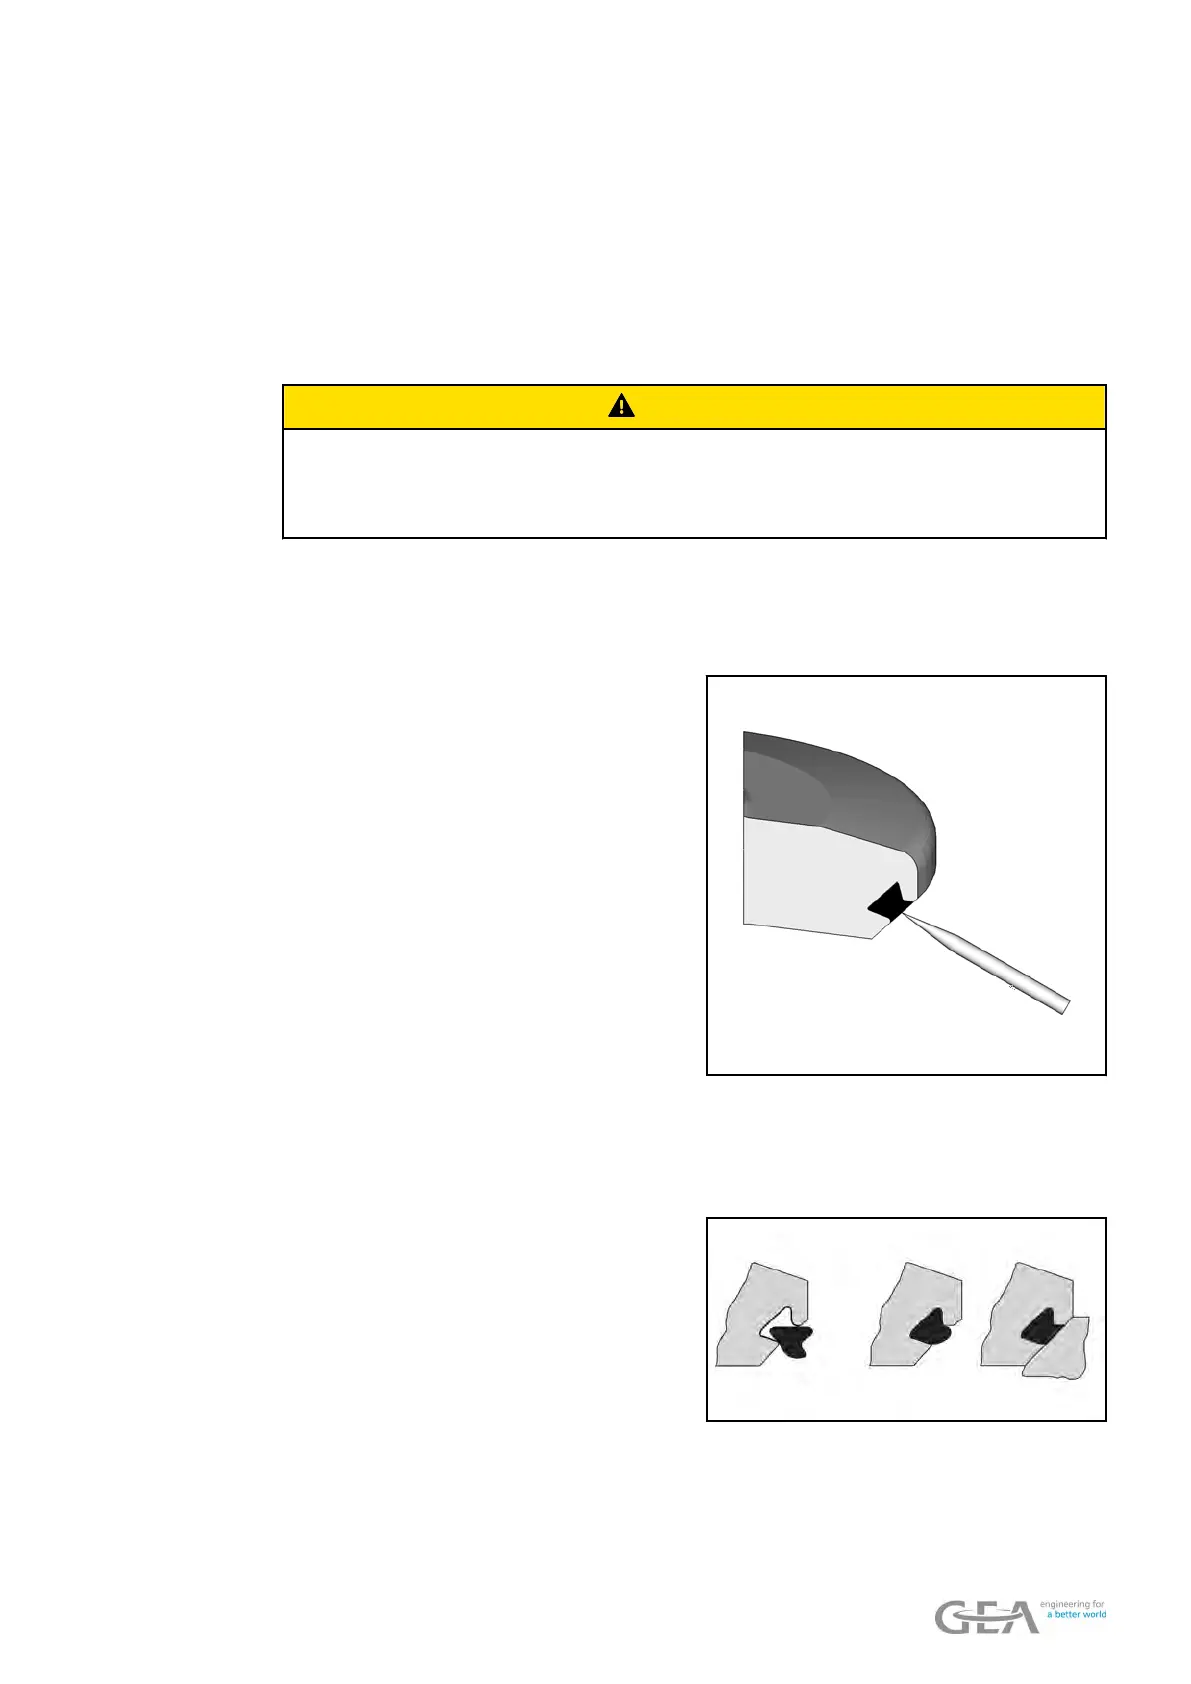
CAUTION
Sharp-edged tool
Risk of injury if the pickset tool slips when removing the V-ring.
●
Clamp the valve disk with the vice mount into the vice.
INFO Functional and running surfaces of the valves may not be damaged.
INFO Do not grease the V-ring.
1. Put a tool from the pickset into the V-
ring and take it out.
2. Before mounting, wet the V-ring on the side not in contact with product (rear
side). Ensur
e that water does not drip into the V-ring groove on the valve disk.
3. Air out the valve upon connection (22).
4. Insert the V-ring. Make sure the instal-
lation position of the V-ring is corr
ect.
9.7 Maintenance - 83 / 104

 Loading...