in.xe TechBook
7
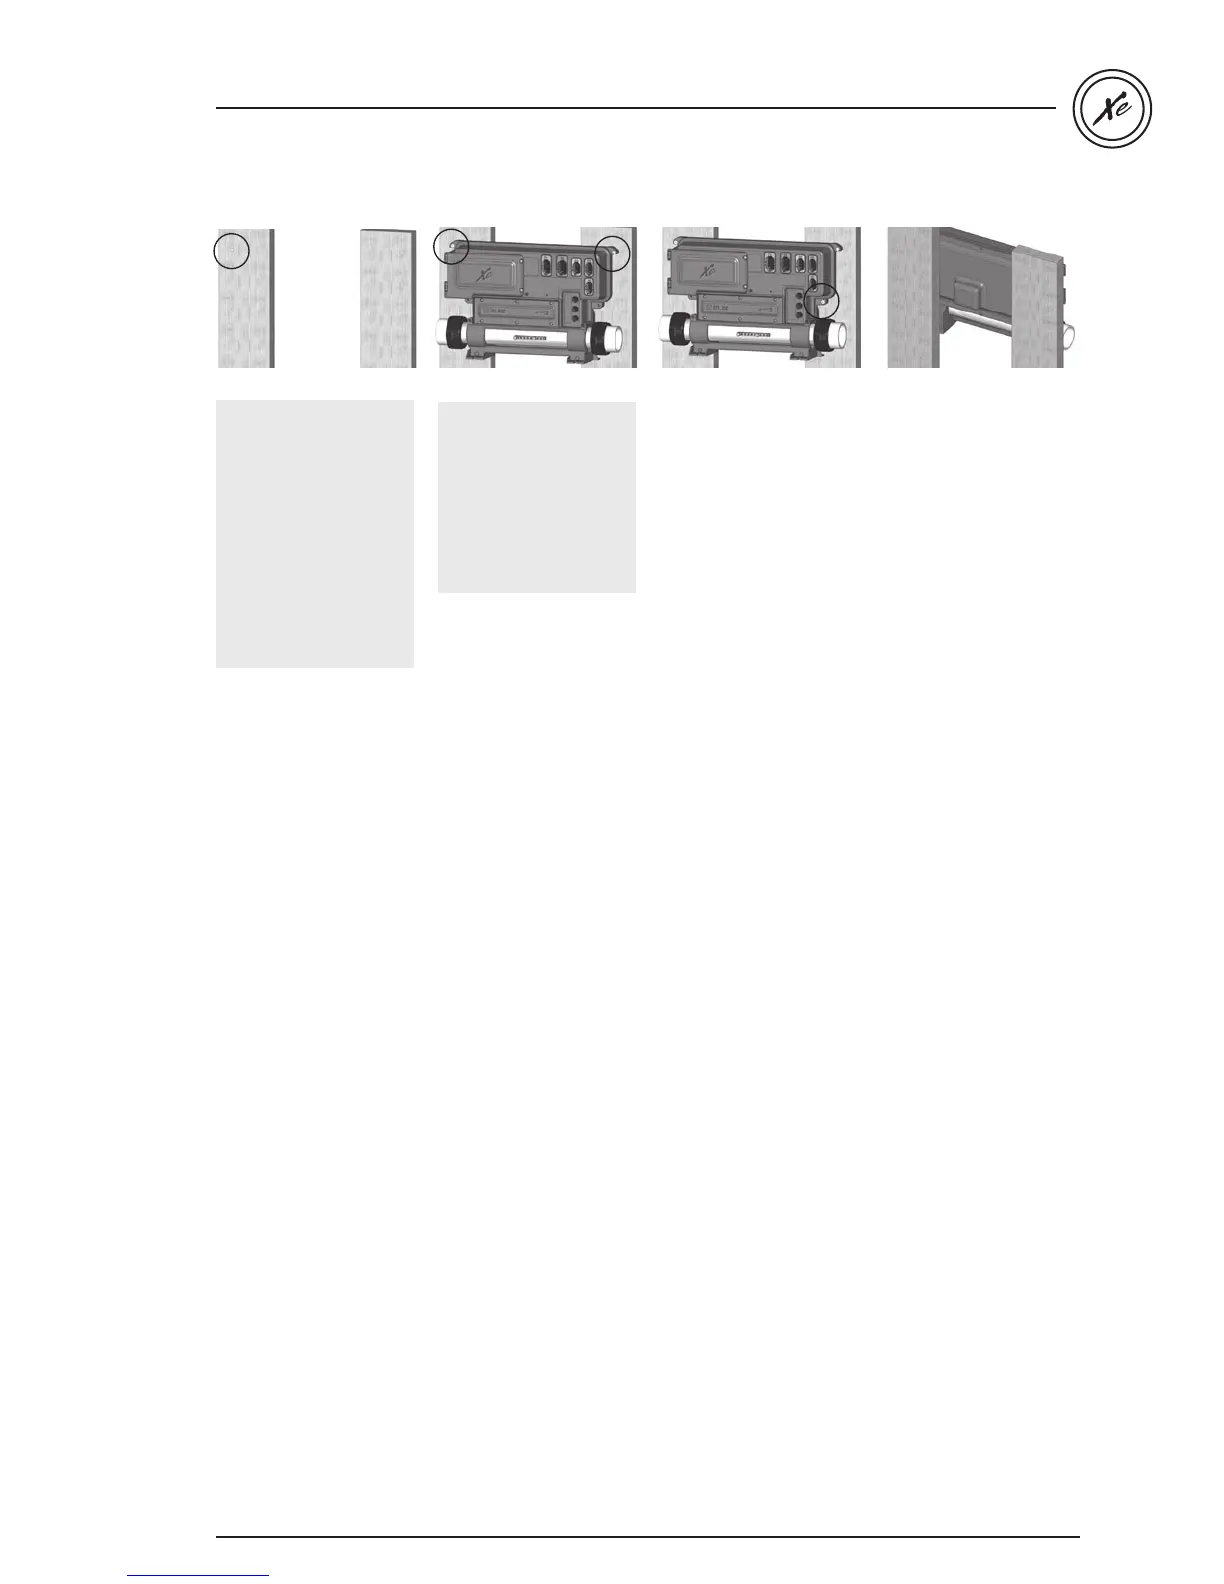
Wall installation procedure
Firmly attach lower
mounting holes on each
side of the pack with
the 2 remaining screws
and 2 washers.
The following material is
recommended:
4- # 10 screws of
appropriate length with
round, truss or pan
head.
4- washers .5" OD x
.0625” thickness (12 mm
OD x
1.5 mm)
Use two 2 standard 2x4
or 2x6 wall studs, spaced
on 16-inch centers to affix
the spa pack.
In the case of a flat
wooden surface: select
the most appropriate
location on wall for
the spa pack. A 4" (52
mm) square cut-out will
be needed to allow
the transformer to fit
through it.
Firmly attach, one at a
time, upper mounting
holes on each side of the
spa pack with 2 screws
backed by 2 washers.
Note: Make sure these
2 screws and 2 washers
are installed. They will
make the pack stable
when input, outputs and
accessory connectors will
be inserted in their ports.
 Loading...