Maintenance
36833 C MGG100M Operating Manual 49
Checking Engine Oil Level
The engine oil level can be checked using the sight glass or dipstick. Both methods are below.
Note: The unit is equipped with an auxiliary engine oil reservoir and automatic float valve. When engine oil is checked,
the auxiliary reservoir also should be checked.
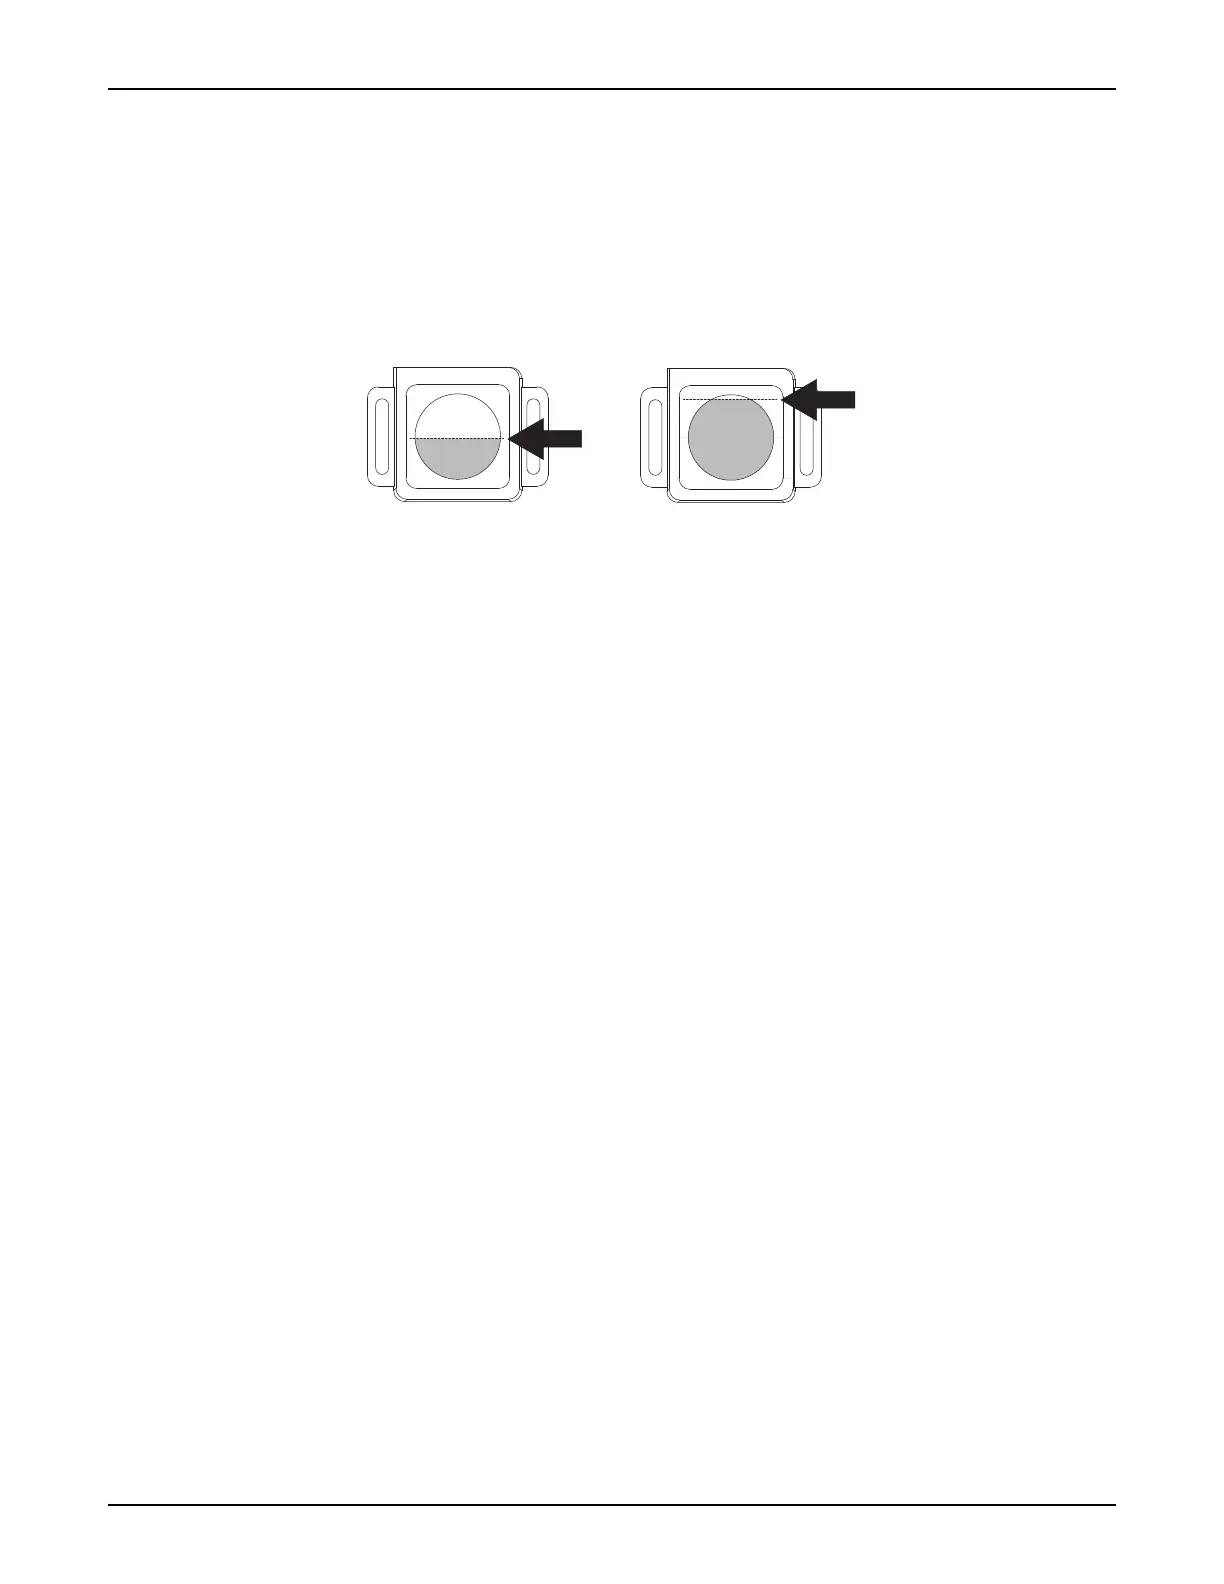
• Checking sight glass: See Figure 24. The oil level should be about halfway up the sight glass when the engine
is running and near the top when the engine is stopped. If not, adjust the regulator height by loosening the two
screws on the regulator bracket and slowly sliding the regulator along the slots until the oil is at the proper level.
Tighten the screws.
Figure 24 - Appropriate Levels: Engine Running (Left) and Stopped (Right)
• Checking dipstick:
1. Stop engine and let cool for at least 10 minutes.
2. Remove oil dipstick and wipe it dry with a clean, lint free cloth.
3. Fully insert dipstick into dipstick tube. Visually confirm dipstick is fully inserted.
4. Wait 10 seconds, then remove dipstick.
5. Examine oil level on both sides of dipstick. The lower of the two levels is the correct measurement.
6. Add oil, if necessary.
Typical Causes of Inaccurate Readings
• Reading higher oil level on dipstick
• Reading dipstick before oil fully drains into oil pan
• Inserting and removing dipstick too quickly
• Dipstick not fully inserted in dipstick tube
Adding Engine Oil to Auxiliary Reservoir
As needed, add oil into the oil reservoir. Open the valve and allow oil to drain into the controller until the sight glass
is approximately halfway full when engine is running, or near the top of the sight glass when the engine is stopped
(see Figure 24). The dipstick can be used to verify correct oil level when the unit is off. The valve may be left open.
Close the valve before moving the unit.
After adding or changing the oil, run the engine one minute and check the oil level. Remember to wait 10 minutes
to allow the engine to cool and oil to fully drain into the oil pan.
00573
 Loading...