27
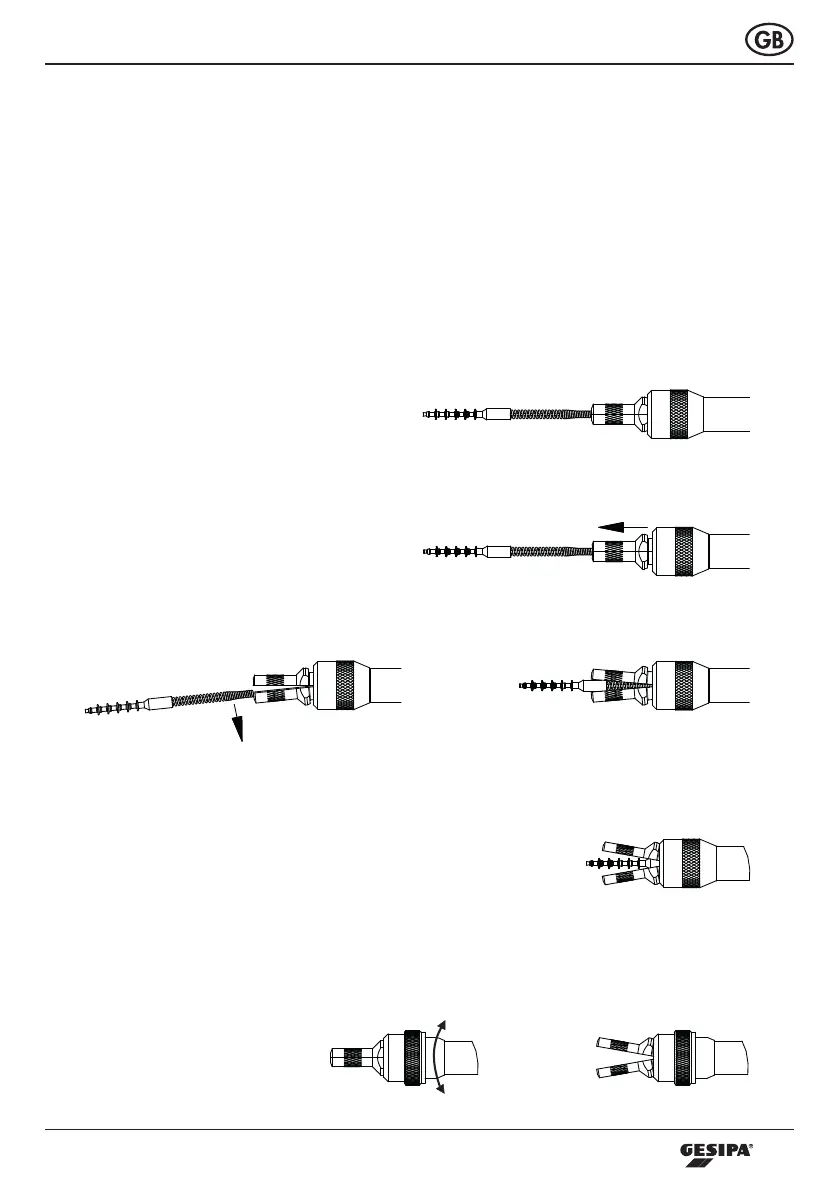
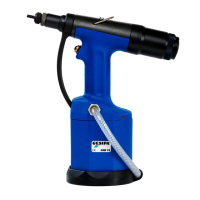
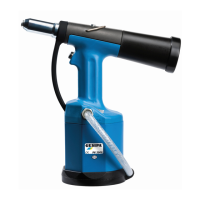
7.4 How to set a speed rivet
• Connect the rivet setting tool to the compressed air network.
• The black button must be activated in order to insert the speed rivet into the rivet setting
tool.
7.4.1 Spreader nosepiece without opening mechanism
• Insert the speed rivet with mandrel spring into the spreader nosepiece until the mandrel
spring is attached to the spreader nosepiece.
• Push the front sections of the spreader nosepiece forwards against the spring force.
• Push the previously inserted speed rivet out in order to open the spreader nosepiece.
R
64546 Mörfelden-Walldorf
GESIPA Blindniettechnik GmbH
0.13 24.01.13 - Kolle J. -
Zeichnung ins PDM-System eingepflegt
Rev.: Datum Aenderung: gezeichnet geprueft Text
Zeichnung wurde mit CAD erstellt Schutzvermerk DIN ISO 16016 beachten
Datum Name
Massstab Werkstoff Halbzeug
Masse (g)
Bearb. 24.01.13 J. Kolle
1:1
- - 1913.1
Gepr. - H. Harder
Maße ohne Toleranzangabe Oberflaechenangaben nach Oberflaechenbehandlung
DIN-ISO 2768-mk DIN EN ISO 1302 -
-
Benennung Materialnummer
TAURUS
7560025
Zeichnungsnummer
A3
-1- Speed Rivet
0013782
erstellt in: - Ersatz fuer: -
Blatt
9/9
• With the spreader nosepiece open, insert the speed rivet with mandrel spring
so that only one speed rivet protrudes.
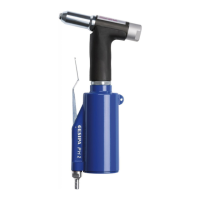
7.4.2 Spreader nosepiece with opening mechanism
• Turn the knurled ring to the right or left to open the spreader nosepiece.