MDE-5222F
30
UL Bucket
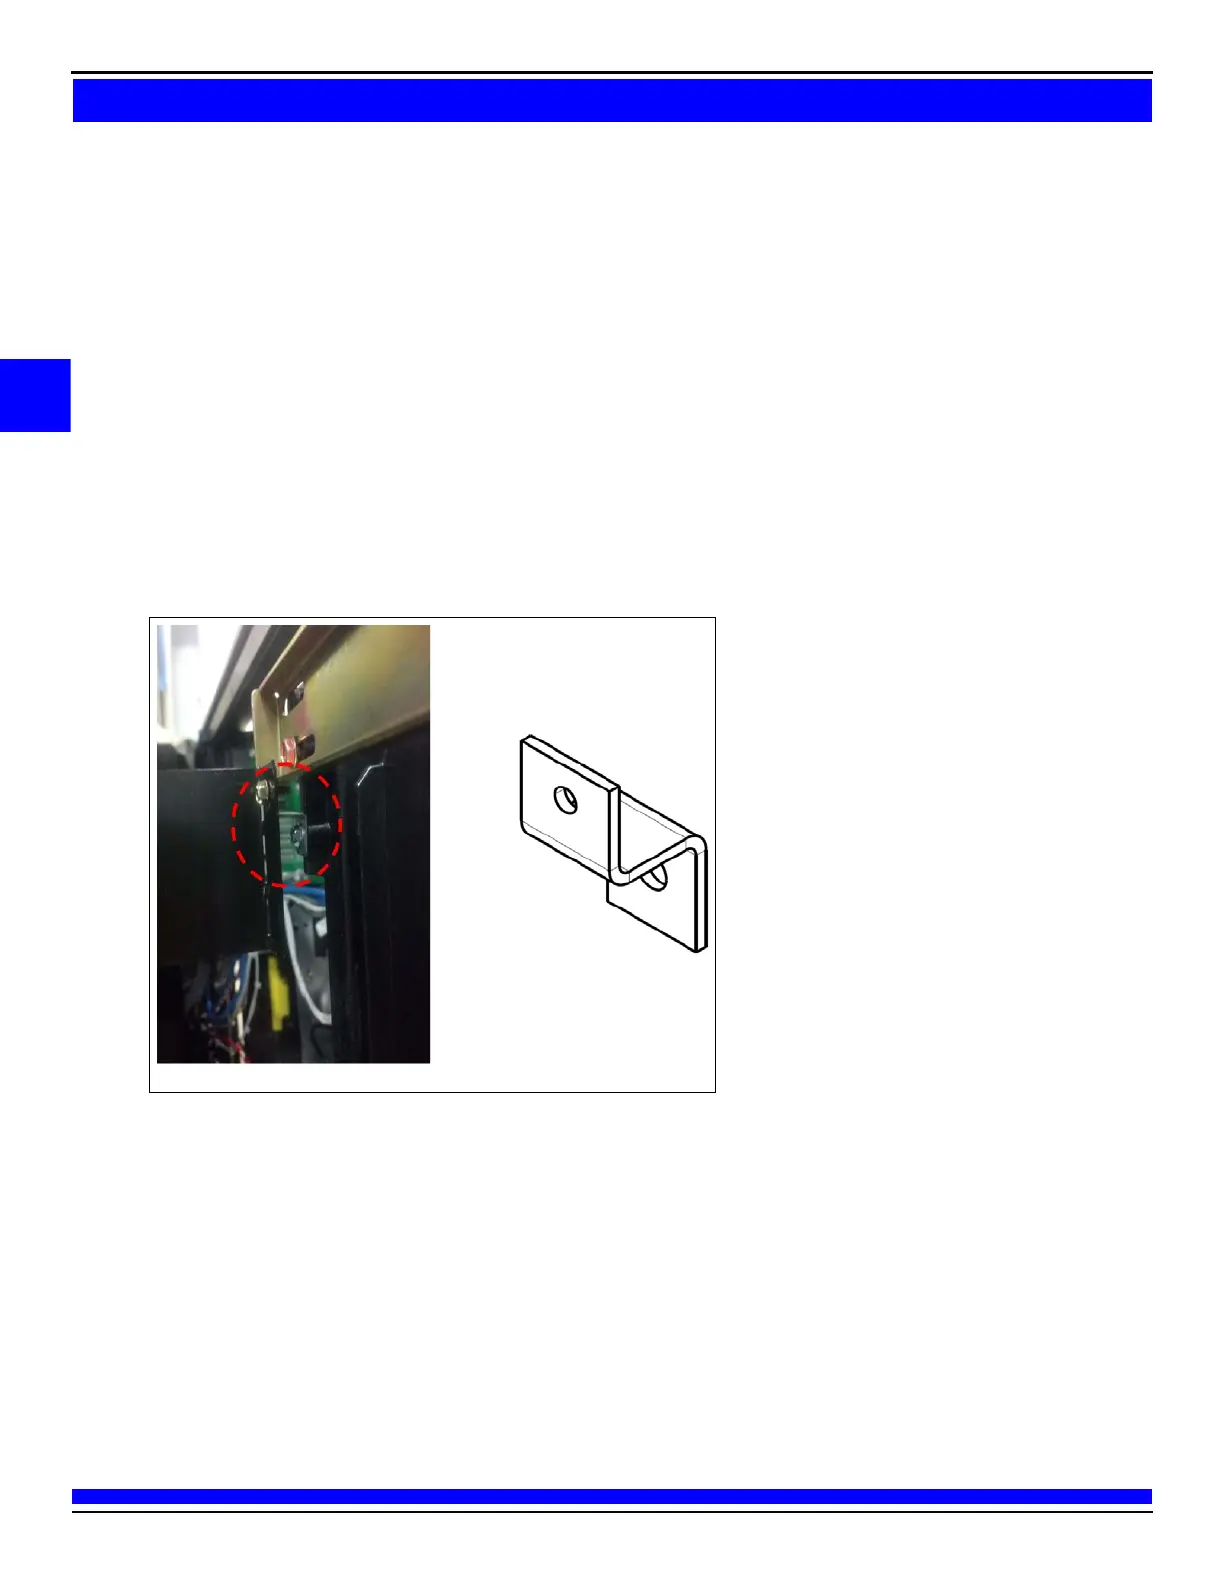
To install the UL bucket:
1 Attach the four “Z-shaped” M15322B001 offset brackets to the UL bucket to offset and raise the UL
bucket (see Figure 13).
Note: Use gloves when handling the UL bucket and the Z-shaped brackets.
2 Ensure the small mounting hole of the Z-bracket is on the top. This will raise the UL bucket from its
original position.
3 Use the original UL bucket screws to secure the individual brackets to the doors. Then use the four
Q11677-24 Screws provided in the kit, to attach the UL bucket to the brackets.
Note: If the Encore 500 unit you are upgrading does not have a UL bucket, a UL bucket will be provided
in the kit if the intercom board is installed.
Figure 13: Raising UL Bucket Using Z-shaped Offset Brackets
 Loading...