patient's name of the viewbed monitor.
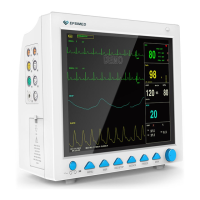
② Viewbed parameter area
All parameter data of the viewbed monitor is displayed in this area.
③ Viewbed waveform label
The viewbed waveform label allows you to select a waveform of the viewbed monitor.
④ Viewbed waveform area
The viewbed waveform area is located beneath the viewbed waveform label. It displays the waveform selected through
the viewbed waveform label. The scanning speed is 25 mm/s. In addition, information relating to the viewbed
waveform is shown above the waveform.
4.4.2 Wave setup
1. Select "WAVE SETUP" item in the "SYSTEM SETUP" menu.
2. Adjust the wave type of a channel, the wave corresponding to this channel in the main interface will change
accordingly.
4.4.3 Wave select
1. Select "WAVE SELECT" item in the "SYSTEM SETUP" menu.
2. The waveform in waveform area will show up or disappear accordingly by selecting corresponding parameter or
canceling the selection. The parameter in gray is unadjustable.
3. If "FULL ECG" is selected, the full-lead ECG waveform will be displayed in the waveform area in one screen, if
"STEP ECG" is selected, the step ECG waveform will be displayed in the waveform area.
NOTE:
l "FULL ECG" and "STEP ECG" are set off as default, and these two functions can not be turned on at the
same time.
4.4.4 Parameter setup
1. Select "PARAM SETUP" item in the "SYSTEM SETUP" menu.
2. You can set the font color in parameter area and the color of waveform. The color of parameter value activating the
alarm is red.
4.4.5 Parameter select
1. Select "PARAM SELECT" item in the "SYSTEM SETUP" menu.
2. The waveform and parameter will show up or disappear accordingly by selecting corresponding parameter or
canceling the selection.
4.4.6 Time setup
1. Select "TIME SETUP" item in the "SYSTEM SETUP" menu.
2. You can set the "Date" and "Time" items. Use cursor to highlight the item that you want to modify and turn the
knob to select time.
3. Then select "SAVE SET" button.