17PowerUp Installation and Operation Manual
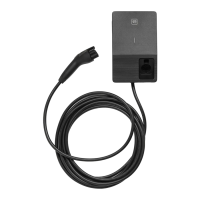
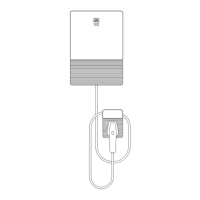
Once you have mounted the unit onto the wall you can proceed with connect-
ing the power wires.
Making the Connections
CAUTION!
BEFORE CONNECTING THE AC POWER WIRES TO THE UNIT, ENSURE THAT
UPSTREAM BREAKER HAS BEEN USED TO DE-ENERGIZE THE CIRCUIT.
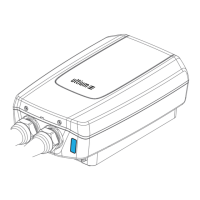
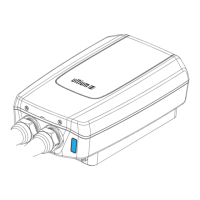
1. Strip the wires at a length of 10 – 11mm.
2. Thread the AC power wires through the conduit and conduit fitting. Ensure
6 inches of free wire
3. Install the conduit assembly onto the unit.
Note:
For the torque to use when installing the conduit assembly, please refer to
the recommended values listed in the specifications.
4. Connect the AC power wires.
a. Insert the corresponding wires into the input terminals marked “PE”, “L2”,
and “L1”.
b. Torque each terminal with a Phillips-head screwdriver (torque: 19 ± 2 in-lbs
/ 2.2 ± 0.2 Nm).
Note:
Use 90°C copper conductors only for the AC power wires.