76
12. Remove the timing spacer from the machine.
13. Turn the hand wheel a full rotation to ensure the needle does not hit the hook assembly at any
point.
14. Tighten the two remaining set screws through the timing cut-out. The needle plate and bobbin
case can be reinstalled.
Repairs and Diagnostics
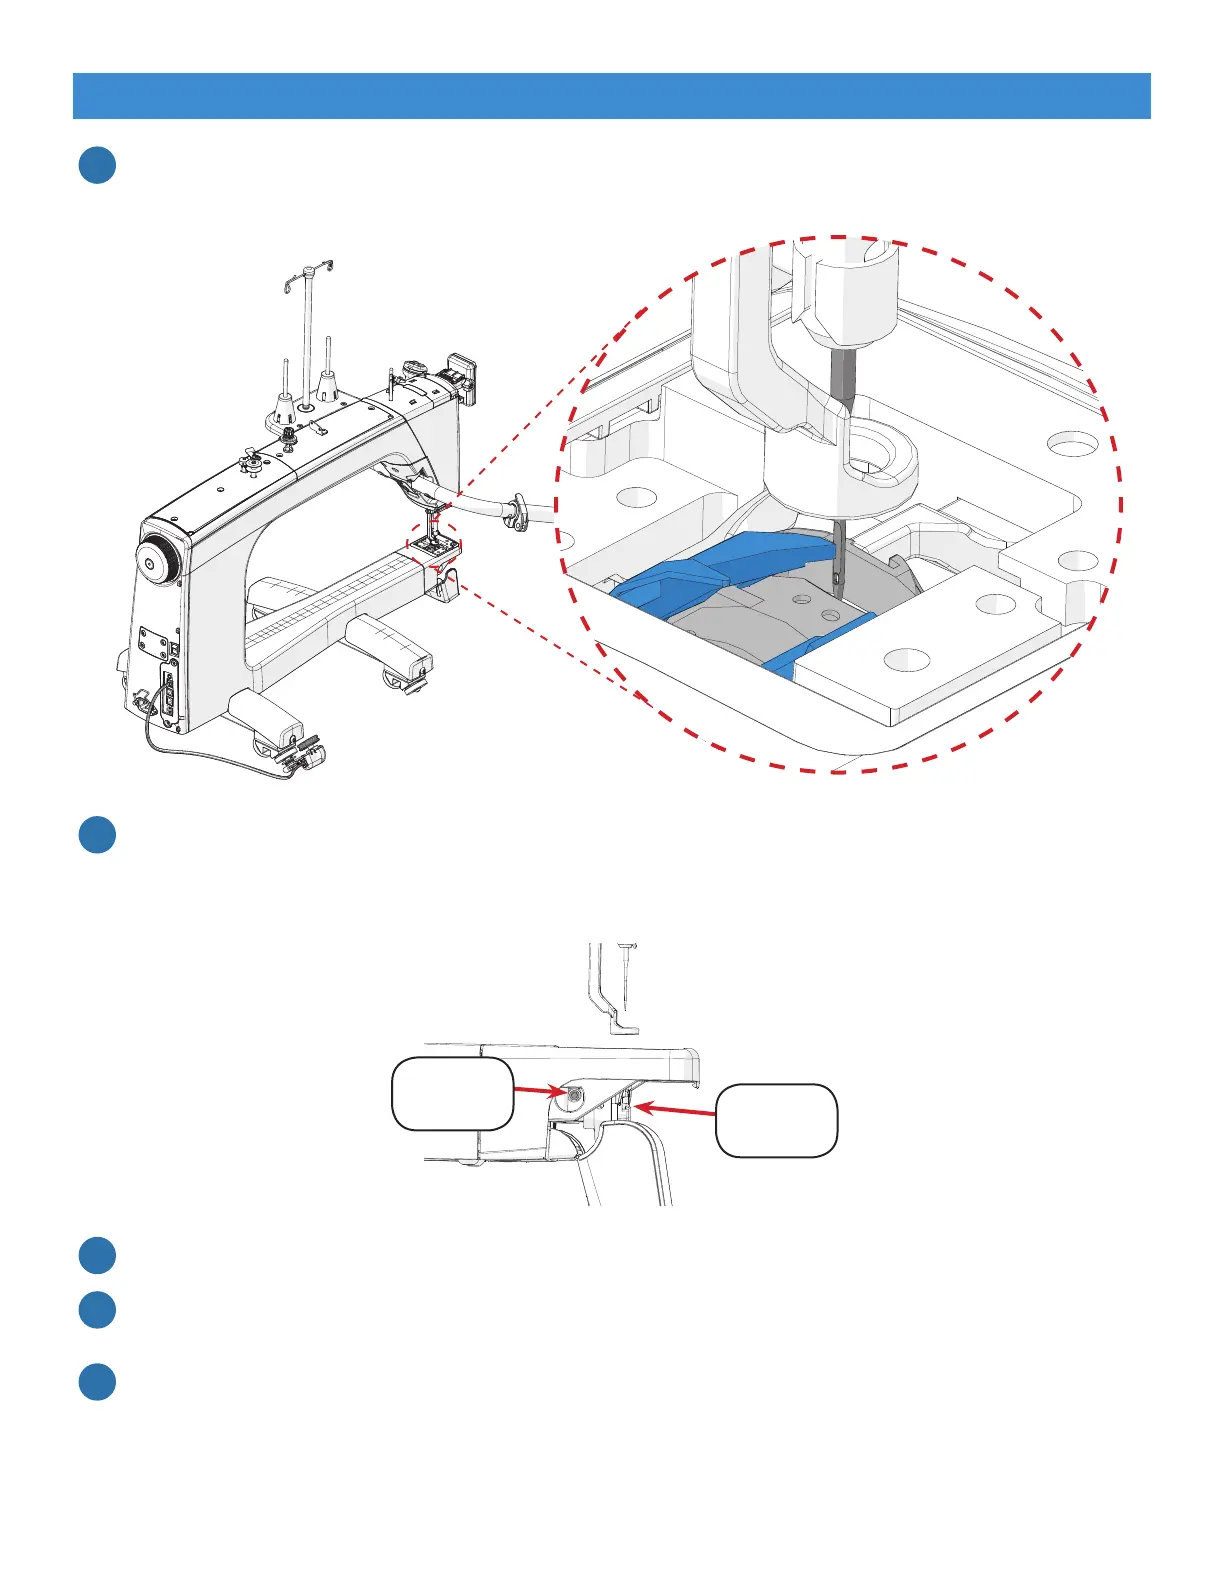
10. Position the tip of the hook (shown in blue) in the middle of the back of the needle (shown in
gray). This is easier to see from the back of the machine.
11. Push the hook assembly inward (toward the rear of the machine) while tightening the set
screw through the timing cut-out. Watch for bending in the needle and listen for a clicking
sound that could indicate the needle is hitting the hook.
12
13
14
15
Timing the Machine (Continue)
Set Screw
Hook
Assembly
16
 Loading...