Repair
40 3A4399A
Repair
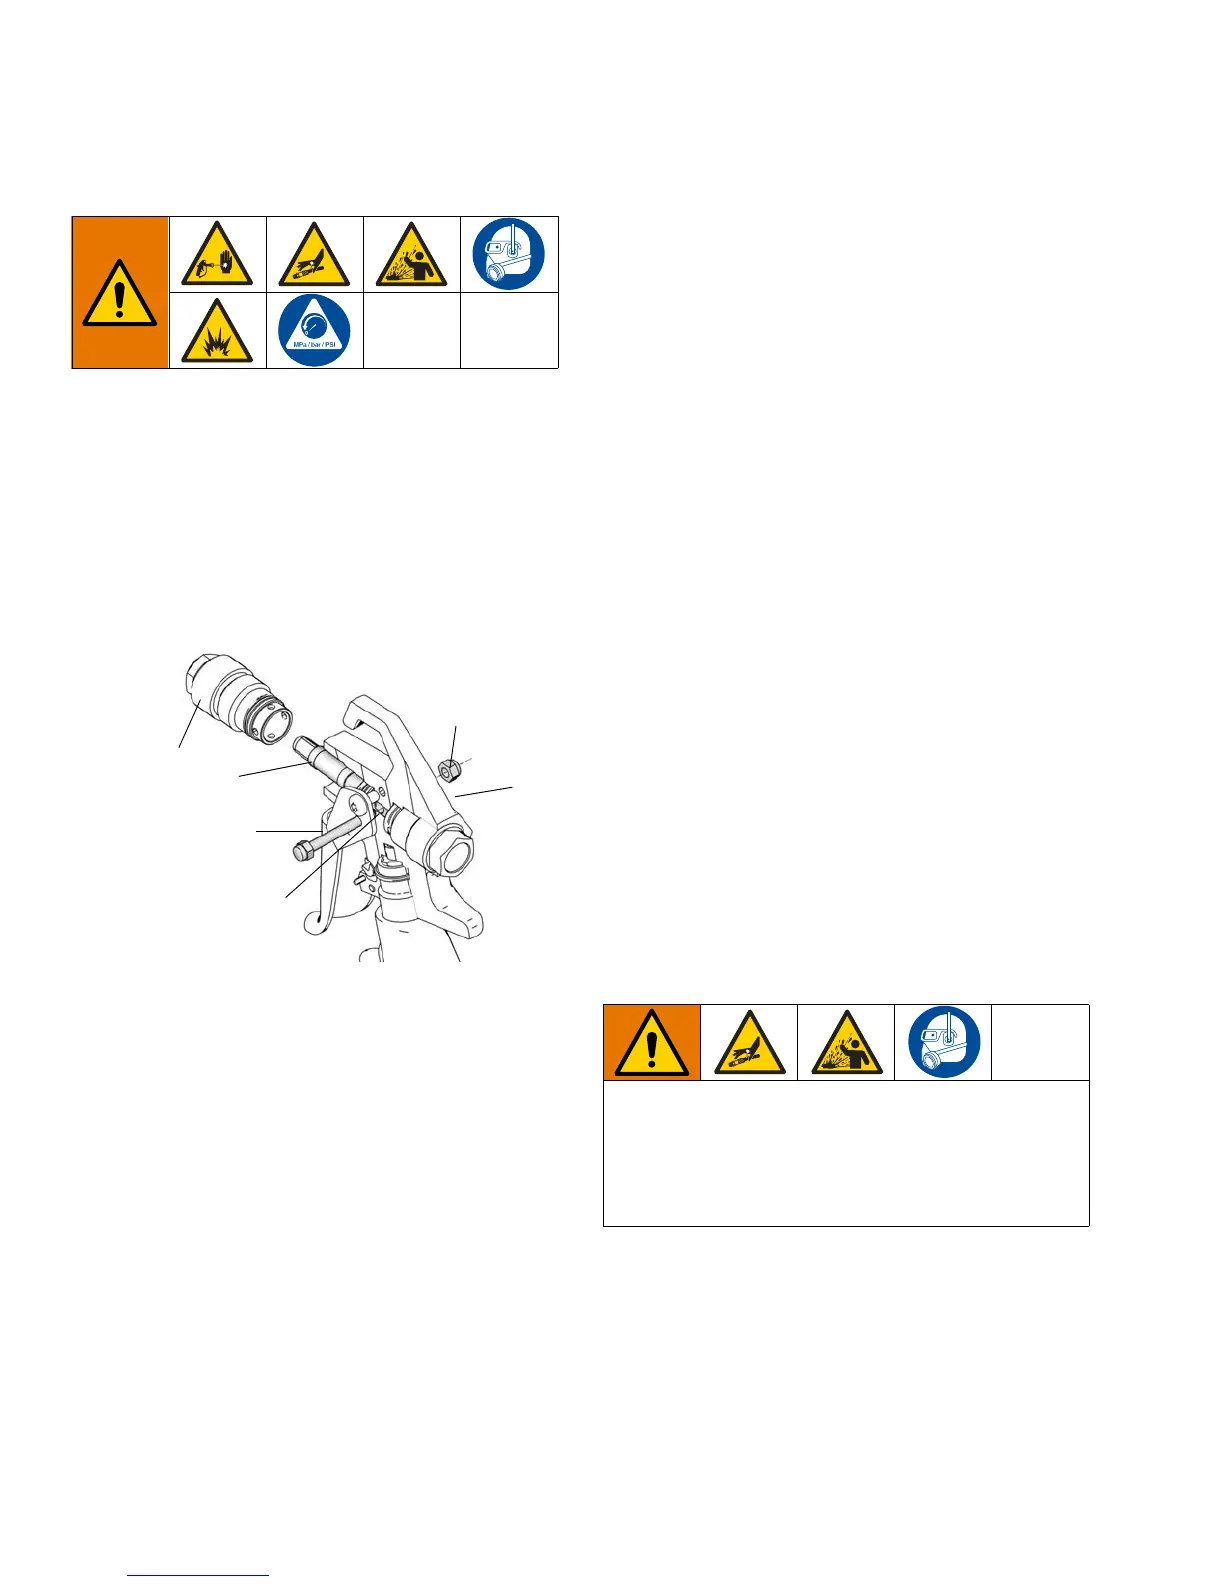
Gun
Tools needed:
• 8-inch adjustable wrench
• 1/4-inch nut driver
Replace Needle
1. Perform Pressure Relief Procedure, page 8. Set
trigger lock (2).
2. Remove tip (26) and guard (25) from gun (1).
3. Disconnect fluid hose from gun at swivel (8).
4. Remove nut (17) and trigger pin (16).
5. Unscrew diffuser (15a) from front of gun (1).
6. Remove needle assembly (15b) through front of gun
(1).
7. Use a soft brush to clean out internal passages of
gun.
8. Grease o-rings of new needle using a non-silicon
grease.
9. Guide new needle (15b) through front of gun (1)
making sure the flat sides (a) of the needle
assembly face the sides of gun housing.
10. Install diffuser (15a). Torque diffuser to 26-30 ft-lbs
(35.25 - 43.38 N•m).
11. Replace pin (16) and nut (17).
Pump
Pump repair kit 248212.
Tools Needed
•Vise
• 12 in. adjustable, open-end wrench (2)
• Hammer (20 oz maximum)
• Small screwdriver
• Throat Seal Liquid
• Pick or long small screwdriver
Cleaning and Inspecting Parts
Clean and inspect parts. Pay particular attention to the
ball seats in the intake valve and piston, which must
have no nicks or wear, and to the inside of the sleeve
and the outside of the piston rod, which must not be
worn or scratched. Replace worn or damaged parts.
NOTE:
Remove and clean sleeve when repacking pump.
COMPONENT RUPTURE HAZARD
To reduce the risk of serious injury from pressurized
fluid, never use sharp or pointed tools to remove
sleeve. If the sleeve cannot be removed easily, return
the sleeve and cylinder to a Graco distributor for re-
moval.