Service
312780K 41
Servicing EasyKey
Updating Software
To update software, upload new software from your PC
using the basic web interface. See manual 313386.
NOTE: If using the Graco Gateway in your system, dis-
connect its cable from the EasyKey before updating the
ProMix 2KS software.
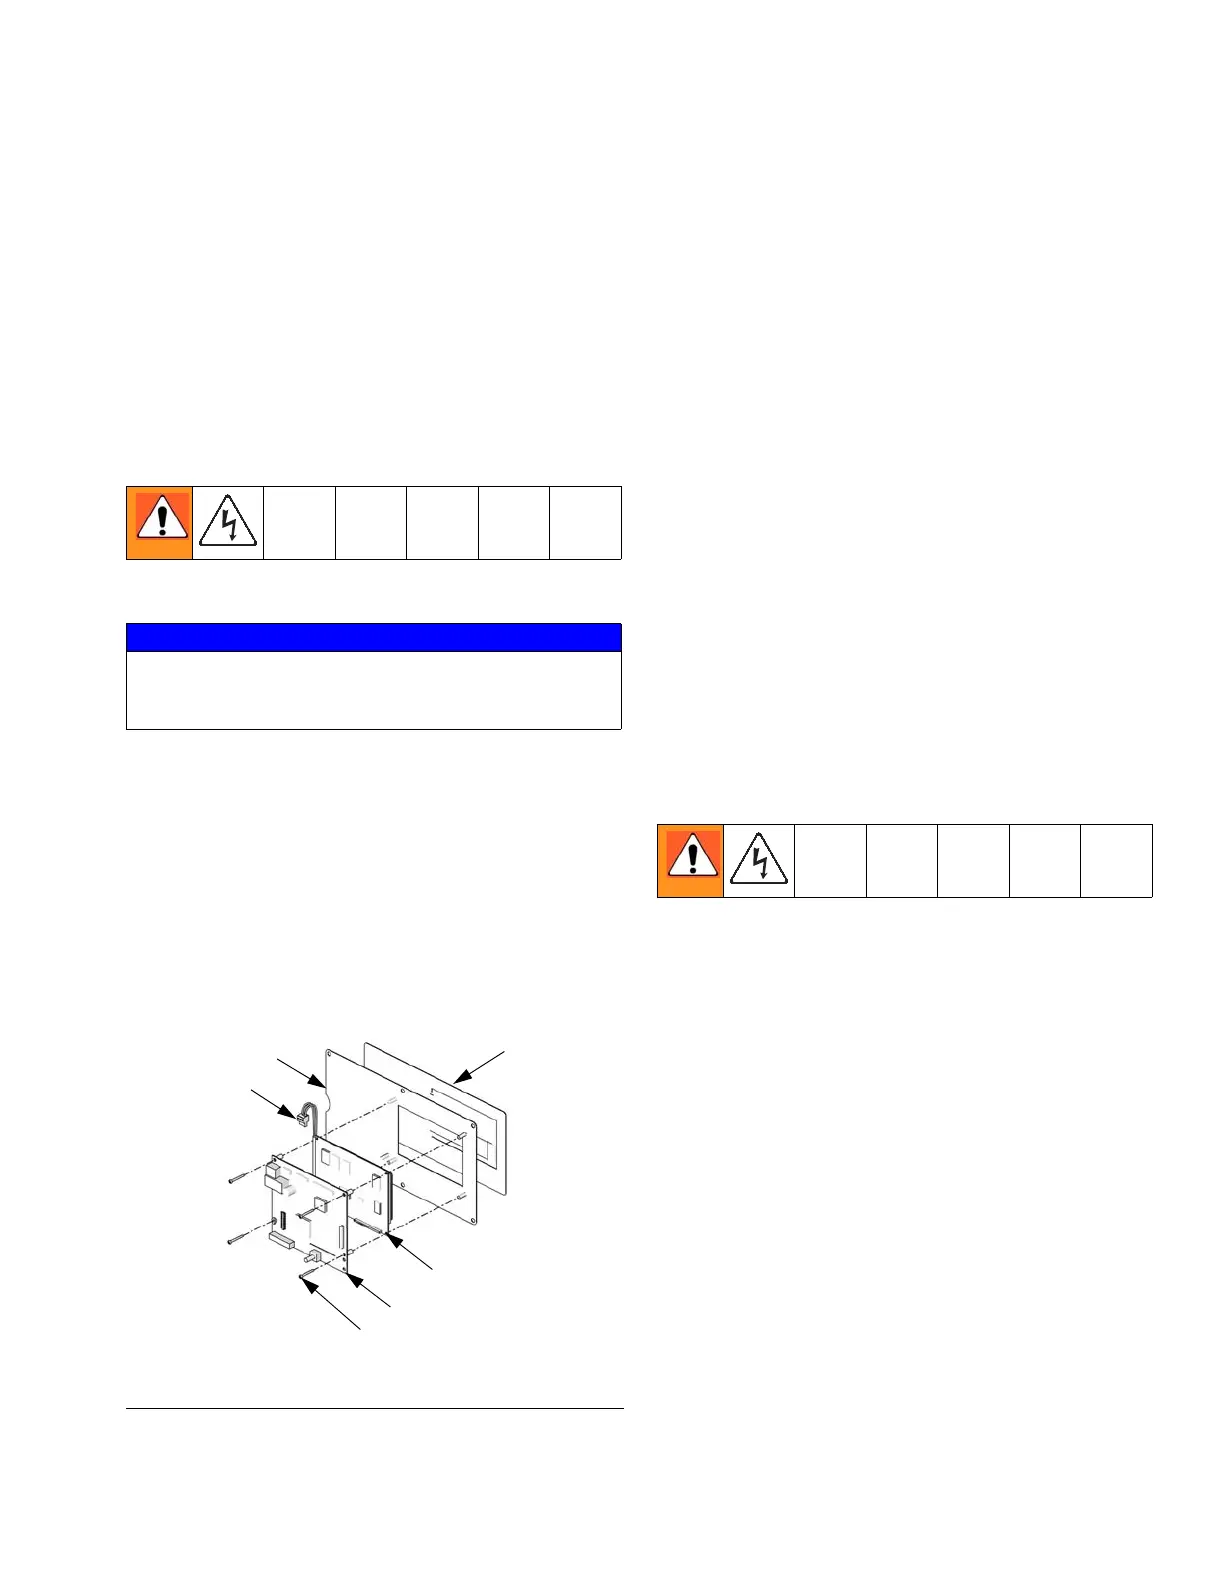
Replacing Display Board or Graphic
Display
1. Follow Before Servicing, page 40.
2. Unlock and open EasyKey door with its key.
3. Note position of all external connections (J4, J5, J6,
J7, J8, J9, J10) to display board, then unplug the
connectors. See F
IG. 8 on page 22.
4. Remove 4 screws (210e) and the display board
assembly (210b, 210c). F
IG. 15.
5. Disconnect graphic display power cable (J1) from
the display board (210c).
6. Separate graphic display (210b) from display board
(210c) [connector J2 on back of board].
7. To assemble the new parts, align connector J2 on
the display board (210c) with the socket on the
graphic display (210b). Press them together. See
F
IG. 15.
8. Reconnect the graphic display power cable (J1) to
the display board (210c).
9. Mount display board assembly with screws (210e).
10. Plug all connectors into display board (210c). F
IG.
15. Confirm that the cables do not pinch when open-
ing or closing the door.
11. Locate the battery on the board (see F
IG. 8 on page
22). Pull the strip to remove the protective isolator
and activate the battery.
12. Close and lock EasyKey door with key.
13. Turn EasyKey power on to test display board.
Replacing Power Supply
1. Follow Before Servicing, page 40.
2. Unlock and open EasyKey door with its key.
3. Note position of power supply input and output
wires. See EasyKey Electrical Schematic, page
33. Disconnect wires from power supply (214f). See
F
IG. 16.
4. Remove power supply from din rail.
5. Install new power supply (214f). Reconnect input
and output wires in positions noted in step 3.
6. Close and lock EasyKey door with key.
7. Turn on power at main circuit breaker.
8. Turn EasyKey power on to test operation.
NOTICE
To avoid damaging circuit board when servicing, wear
Part No. 112190 grounding strap on wrist and ground
appropriately.
F
IG. 15: Display Interface
210a
TI12554a
210e
210c
210d
210b
J1

 Loading...