Repair
3A8501A 25
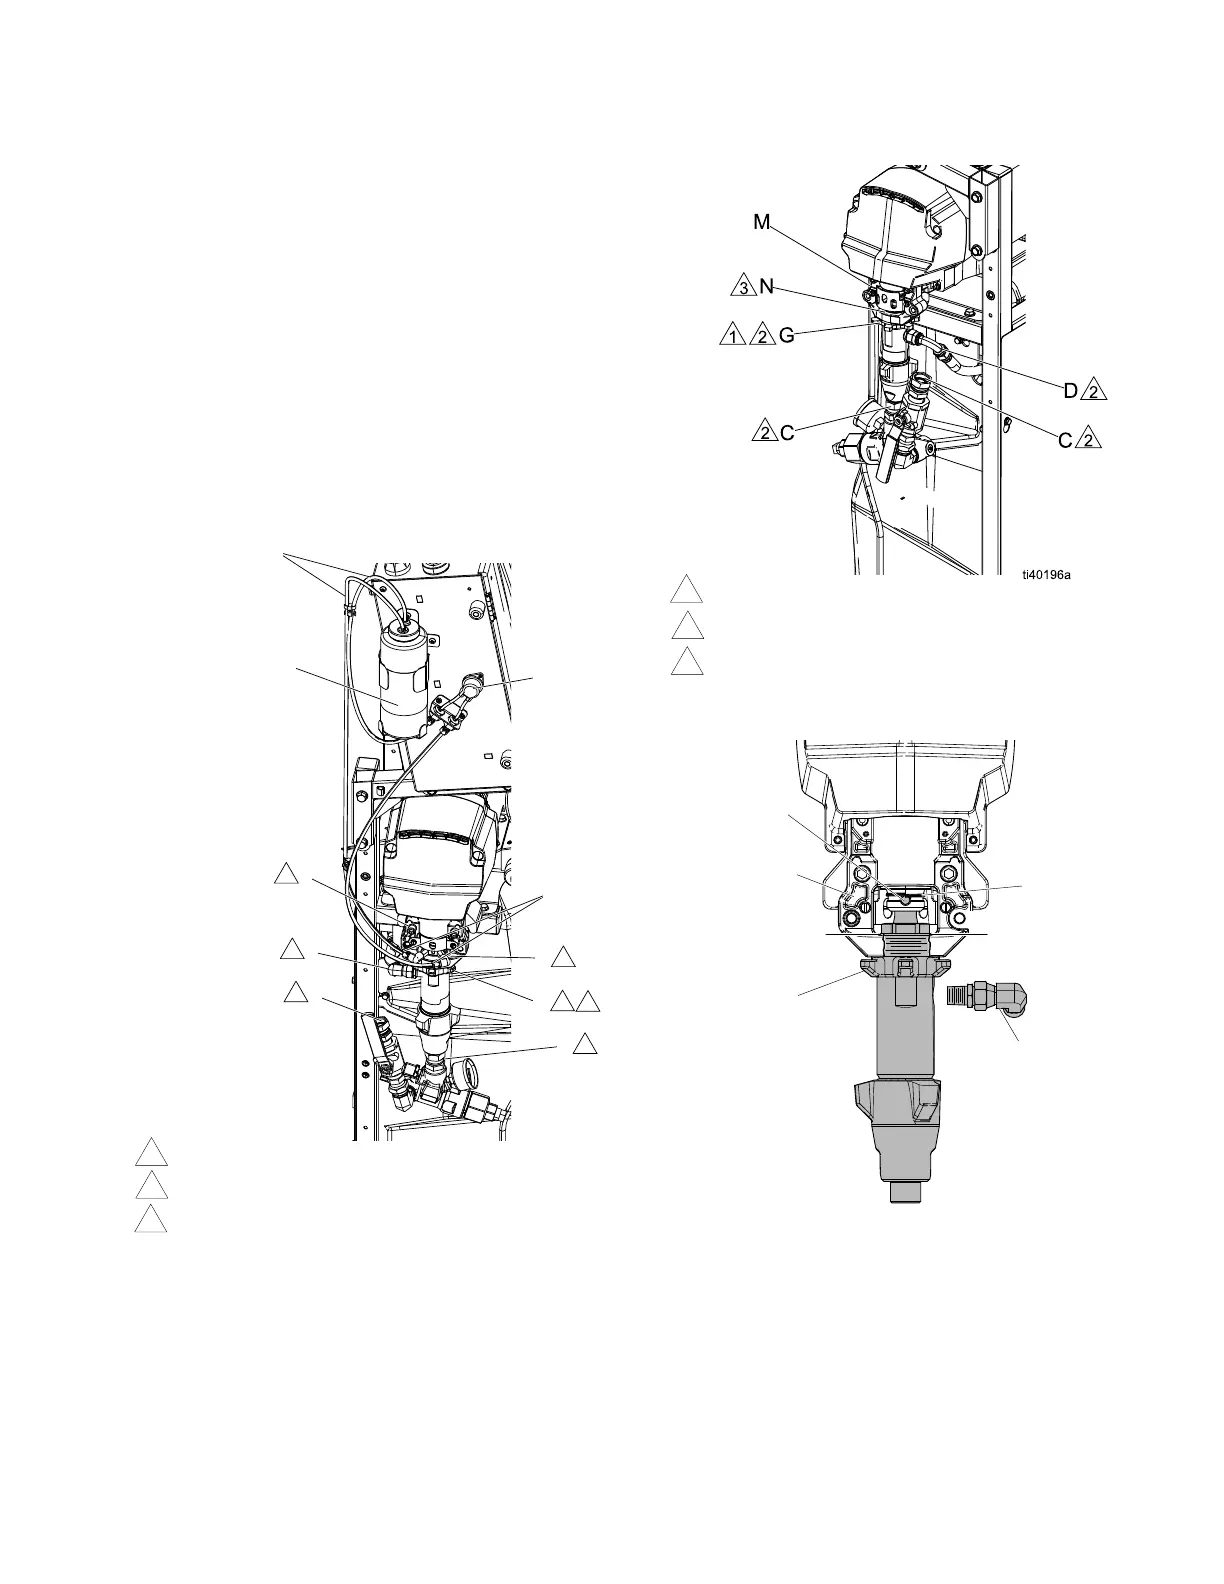
7. Disconnect fittings at fluid inlet (C) and outlet (D).
8. Also disconnect steel outlet hose from heater inlet.
NOTE: Step 9 only applies to pump A. Skip this
step if removing pump B.
9. Disconnect hoses (T). Remove both hose fittings (U)
from wet-cup.
10. Remove cover (M).
11. Push the retaining wire clip (E) up. Push pin (F) out
from the side of the pump facing the heaters.
Loosen locknut (G) by hitting it firmly with a
non-sparking hammer, then unscrew the pump.
Pump A
Flat side faces up.
Lubricate threads with TSL fluid or Fusion grease.
Pump top threads must be nearly flush with bearing face (N).
Pump B
Flat side faces up.
Lubricate threads with TSL fluid or Fusion grease.
Pump top threads must be nearly flush with bearing face (N).
1
2
N +/- 1/16 in.
N +/- 1/16 in.

 Loading...