English Maintenance
12 Plate Heat Exchanger
EN
EN
Closing
Check that all the sealing surfaces are
clean.
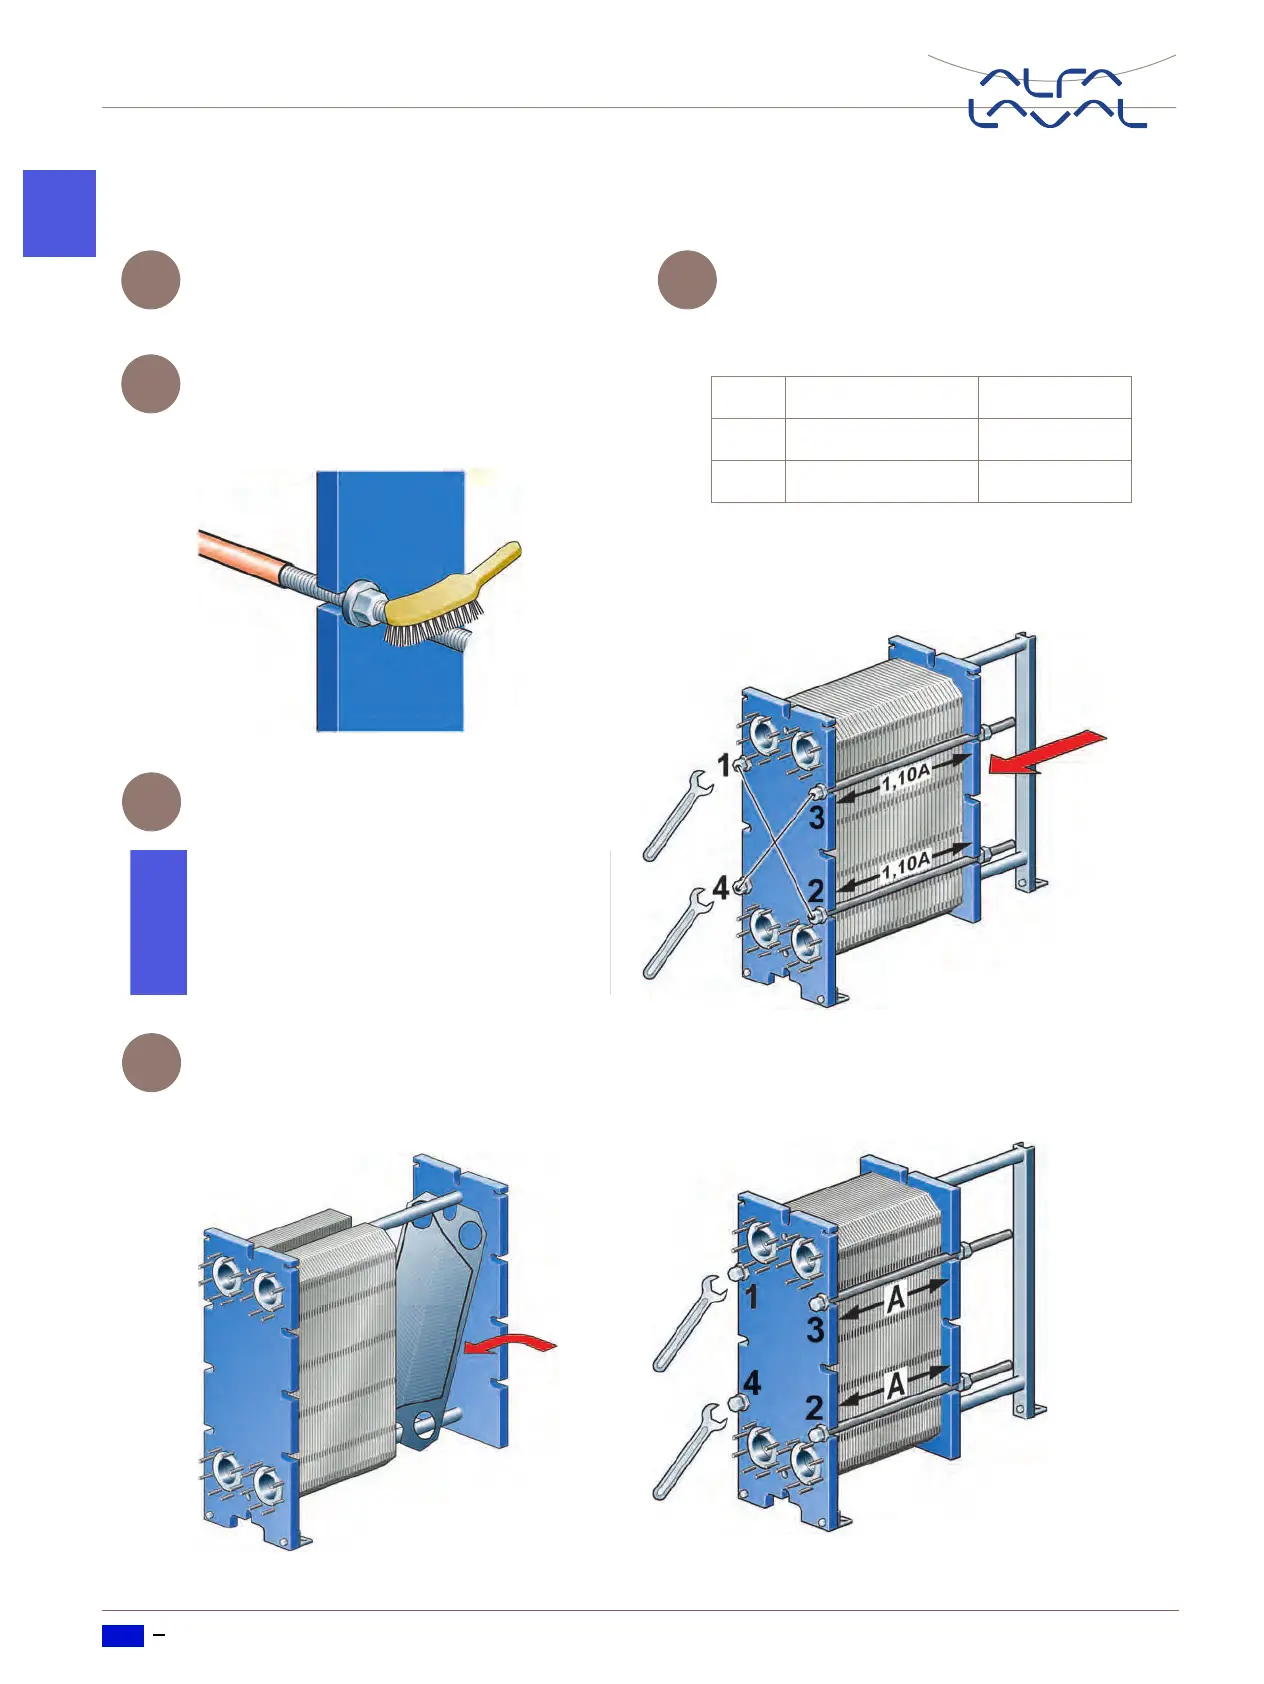
Brush the threads of the bolts clean, using
a steel wire brush. Lubricate the threads
with a thin layer of grease, e.g. Gleitmo
800 or equivalent.
Attach gaskets to the plates or check that
all the gaskets are properly attached.
Insert the plates with the herring bone pat-
tern positioned in alternate directions and
with the gaskets turned towards the frame
plate.
Press the plate assembly together. Tight-
ening is done in two steps, see figures be-
low. Be careful so that the frame plate and
the pressure plate are always in parallel.
Tighten the two diagonal pair of bolts alter-
nately until the plate package measures
1,10A.
After that bolts are tightened alternately
and diagonally, as shown in the figure be-
low.
1
2
3
Note!
If the gasket is wrongly positioned, it will
show by the fact that it rises out of the gas
ket groove or that it is positioned outside
the groove.
4
Step Bolt No. To dimension
1 1–2 or 3–4 1,10A
2 1–2–3–4 A
5

 Loading...