Chapter 3: Dryer Supports
Installing Front and Rear Anchor Plates
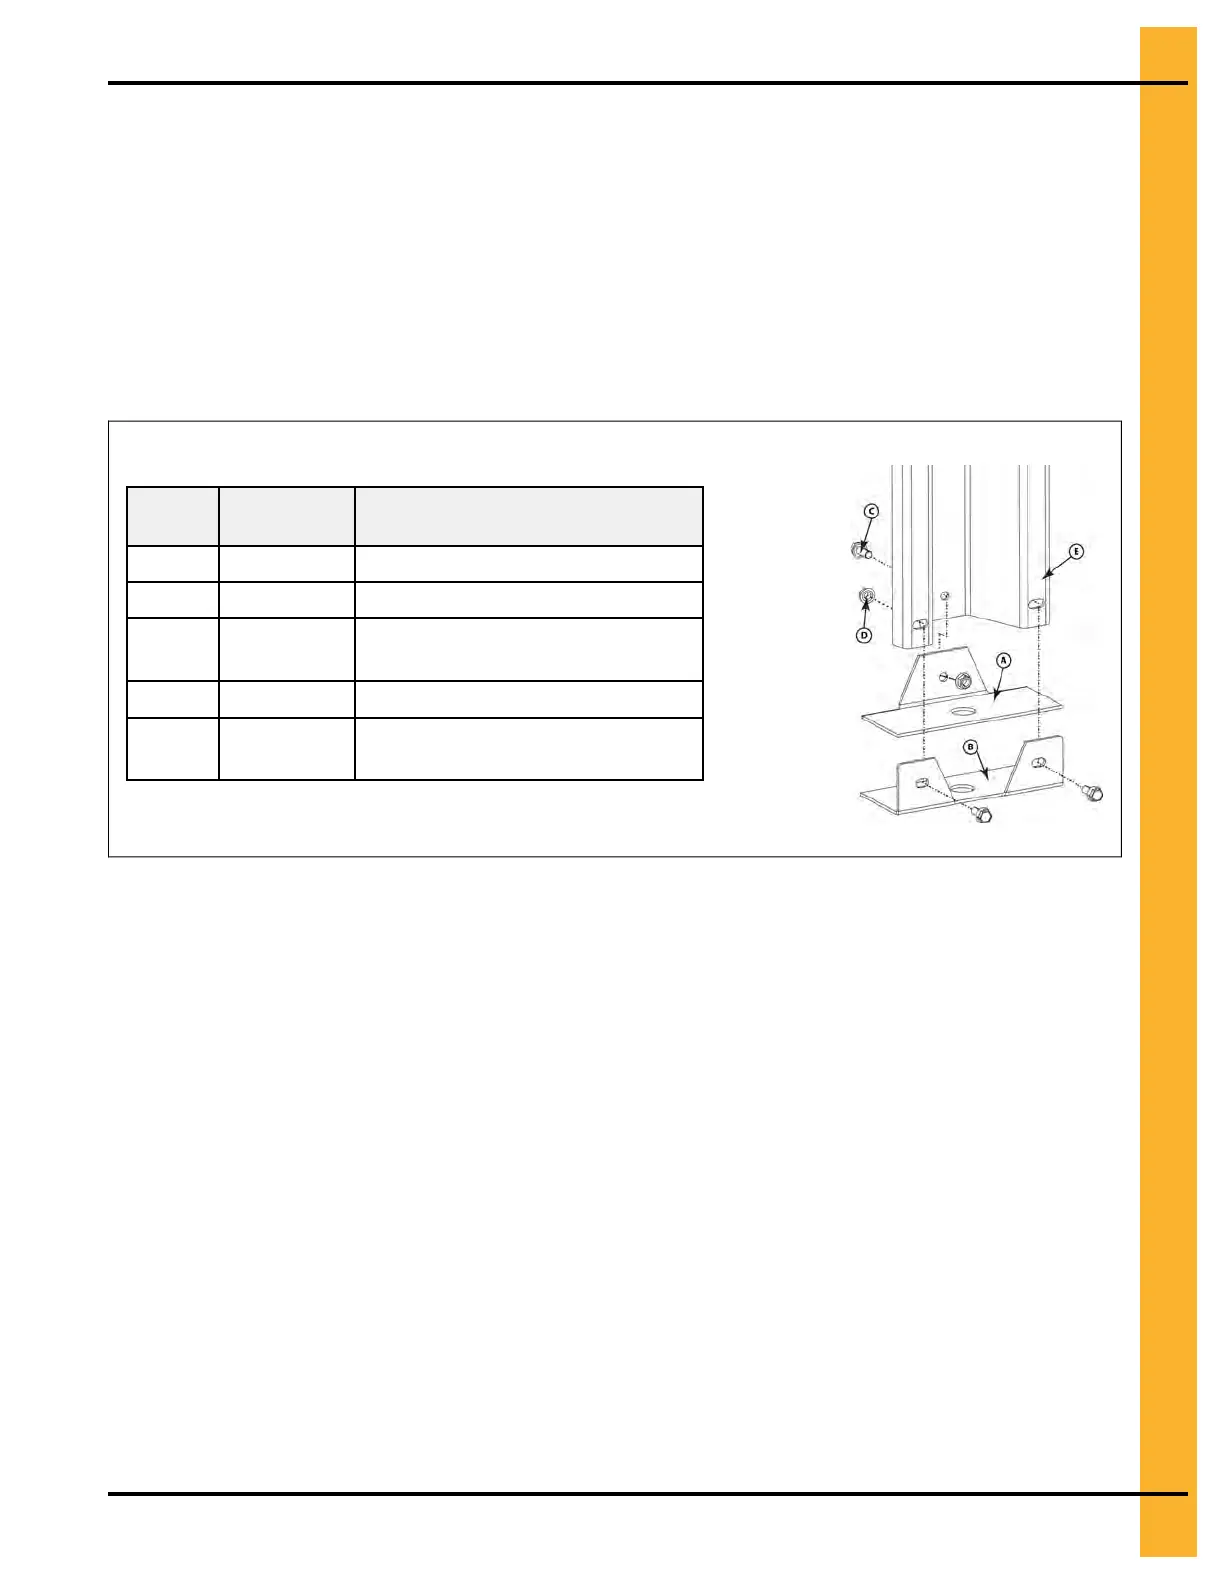
To secure the dryer, you must install the front and rear anchor plates to the leg stand bottoms, thereby
enabling the legs to be anchored to the concrete foundation.
1. Use a flange bolt (C) and a flange nut (D) to attach the rear leg anchor plate (A) to the bottom of the
leg stand (E).
2. Position the front leg anchor plate (B) below the rear leg anchor plate (A), and use two flange bolts
(C) and flange nuts (D) to attach the anchor plate to the front of the leg stand (E).
3. Secure the leg stand (E) to the concrete foundation using concrete anchor bolts (not supplied).
Figure 3-2 Leg anchor plate assembly
Callout
Part
number
Description
A BLK-10057 Rear leg anchor plate
B BLK-10058 Front leg anchor plate
C S-6606 5/16 in. - 18 X 3/4 in. zinc grade 5
flange bolt
D
S-3611 5/16 in. –18 grade 2 flange nut
E D01–xxxx
For leg stand, refer to Leg Stand
Height Options
Installing the Fan and Heater Support Leg
If not using concrete blocks, you must install leg stands to the dryer frame to support the dryer.
What You Should Know
The fan and heater support leg is positioned right before the dryer tongue.
To install the fan and heater support leg:
1. Remove the two existing bolts and nuts from the dryer frame corner (B and C).
2. Align the holes in the fan and heater support leg (A) with the holes in the dryer frame corner, and
fasten in place using the bolts and nuts that were previously removed (E and F).
3. Align the holes in the fan and heater support leg (A) with the hole in the basket corner leg (G).
4. Fasten the fan and heater support leg (A) to the frame using bolts (B) and nuts (C).
PNEG–2088 Quiet Portable Dryer
25
 Loading...