
W
williamselizabethSep 9, 2025
How to fix Power-On-Self-Test vacuum leak error on Haemonetics Laboratory Equipment?
- JJeffery GallegosSep 9, 2025
If a vacuum leak was detected during POST, turn the power off and then back on to reboot the analyzer.
How to fix Power-On-Self-Test vacuum leak error on Haemonetics Laboratory Equipment?
If a vacuum leak was detected during POST, turn the power off and then back on to reboot the analyzer.
What to do if Haemonetics Laboratory Equipment instrument has unexpectedly been reset during a Test?
If the analyzer was unexpectedly reset while a test was running, turn the power off and then back on to reboot the system. Remove the cartridge and rerun the test using a new cartridge.
What to do if sample has evaporated in one or more channels of Haemonetics Laboratory Equipment?
If sample evaporation occurred during a test, remove the cartridge and rerun the test using a new cartridge.
What to do if sample initial fill level is out of range for one or more channels in Haemonetics Laboratory Equipment?
If too little sample was delivered to the cartridge rings, remove the cartridge and rerun the test using a new cartridge. This may indicate issues with optics, pressure or cartridge.
What to do if there is a data processing error in one or more channels of Haemonetics Laboratory Equipment, indicated by sudden optical sensor output change?
If there is an unexpected change from the optical sensor, remove the cartridge and rerun the test using a new cartridge.
What should I do if the Haemonetics Laboratory Equipment shows 'Cartridge Store Table update required'?
Contact the System Administrator for assistance in downloading a new Cartridge Store Table. The QC cartridge may be expired, and an update to the Cartridge Store Table is required to determine the expiration date.
What to do if firmware update failed on Haemonetics Laboratory Equipment?
If there is a mismatch between the existing firmware and the updated firmware, which causes the automatic update to fail, turn the power off and then back on to reboot the system. If the problem persists, update the firmware again or reset the system to the previous firmware revision.
What does 'Front panel LED failure' mean for Haemonetics Laboratory Equipment?
The analyzer will continue to operate correctly if the front panel LED failed. Report the failure to the local Haemonetics representative.
What to do if there is a regulated vacuum error in the cartridge of Haemonetics Laboratory Equipment?
If the regulated vacuum was out of range when the cartridge was clamped, remove the cartridge and rerun the test using a new cartridge.
What to do if there is a pressure leak in the cartridge of Haemonetics Laboratory Equipment?
If there was a pressure leak in the cartridge, remove the cartridge and rerun the test using a new cartridge.
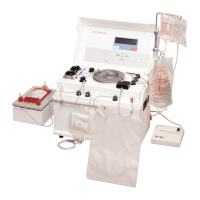
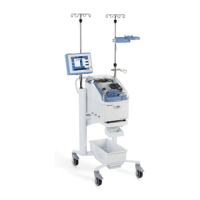
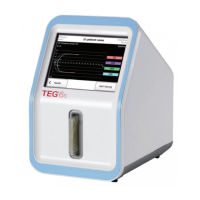
Introduction to the manual and system components, including the TEG 6s analyzer.
Important safety and operational warnings for users to follow during operation.
Information on training, repair, and contact details for Haemonetics support.
Explanation of document and analyzer icons and their meanings.
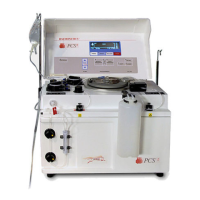
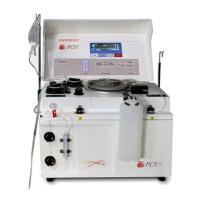
General introduction to the TEG 6s analyzer system and its components.
Details of the analyzer's LCD touchscreen and cartridge slot.
Details of the analyzer's carrying handle, cooling fan, and ports.
Description of test cartridges, including sample port and barcode.
Guidelines for unpacking, placement, and safe storage of the analyzer.
Key safety warnings for electrical shock and handling bloodborne pathogens.
Precautions for handling glass tubes and vials to prevent injury.
Introduction to chapter topics covering analyzer setup and operation.
Principles and operation of the TEG analyzer.
Initial setup, power connection, and user login procedures.
Navigation of the user interface, including the home screen and icons.
How to read numerical and graphical test data on the results screen.
Understanding superimposed and individual channel tracing views.
Adjusting date, time, timezone, and network settings on the analyzer.
Introduction to the analyzer's operational procedures.
Handling, insertion, and verification of disposable assay cartridges.
Proper collection and handling of blood samples for testing.
Step-by-step guide for performing patient tests on the analyzer.
Procedures for manually stopping an ongoing test.
Accessing and reviewing historical patient test results.
Running QC tests to verify analyzer performance and accuracy.
Accessing and reviewing historical quality control results.
Descriptions of common error, warning, and critical alert messages.
Procedures for cleaning and disinfecting the analyzer surfaces.
Specific instructions for cleaning the analyzer's air filter.
Physical, environmental, and electrical characteristics of the analyzer.
Recommended printer for use with the TEG analyzer.
FCC compliance and product warranty details.
| Power Supply | 100-240 V AC, 50/60 Hz |
|---|---|
| Sample Type | Whole blood |
| Display | Touchscreen LCD |
| Connectivity | USB, Ethernet |
| Parameters Measured | R, K, Angle, MA, LY30 |
| Sample Volume | 360 μL |
| Operating Temperature | 15-30°C |
| Technology | Thromboelastography |
| Channels | 1 |
| Operating Humidity | 20% to 80% non-condensing |
| Test Cartridge Type | TEG Cartridge |