E6 - Adjust/Replace UP/DOWN Micro Switch Assembly
Use extreme caution when performing internal servicing on the lift.
Ensure that the battery has been disconnected before starting.
The UP/DOWN micro switch assembly controls numerous safety functions and maintains an
absolute control over the polarity logic of the entire system. The primary functions are to control
the UP limit, Down limit, monitor “slack tape” condition and prevent the motor from winding the
lift tape in the wrong direction.
1. Remove the lift cover, per section B1, Getting Inside the UK-840 lift.
2. Remove the strap if required following steps 1 to 5 in section M1.
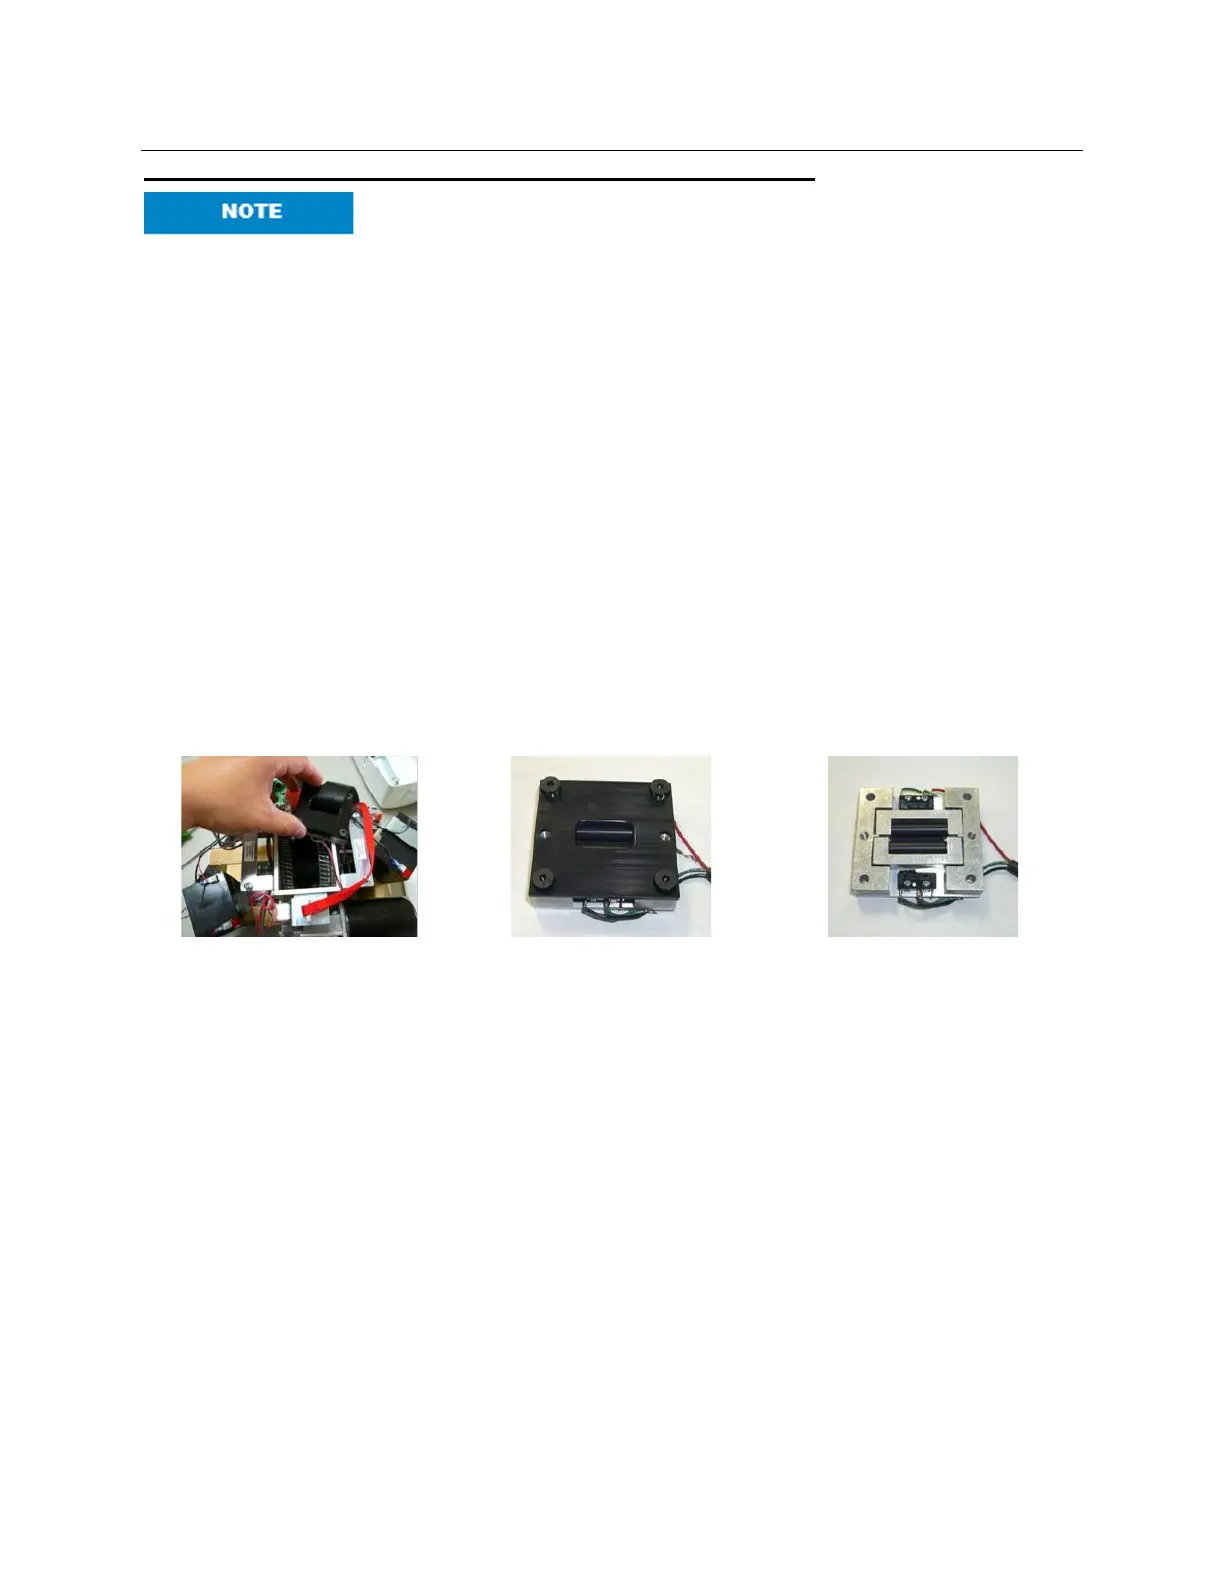
3. Using a 1/8” Allen Key remove the 4, #10-32 flat head cap screws holding the tape
switch assembly to the gearbox and remove the assembly. See picture 1.
4. Using a 1/8” Allen Key remove the 4, #10-32 flat head cap screws from the top of the
tape switch assembly. See picture 2. After removing the screws lift off the top plate.
5. At this point make sure that nothing is jammed inside the assembly and that both rollers
can rotate. Verify that the roller blocks are activating the micro switches. See picture 3.
6. Using a Phillips screwdriver remove both micro switches and replace the whole micro
switch wire harness. Be very careful when handling this part as the micro switch can be
easily damaged.
7. Reassemble lift and test.