Puma 20/4042 | Service instructions
5.2.2 Puma 20 / Puma 40 Carrier
Converting Puma 20/40 front wheel drive (FWD) to rear wheel drive (RWD) and vice versa.
Preparation
• Switch off the wheelchair via the remote control.
• Be sure that the freewheel switch is in ‘drive’ mode. If
the freewheel switch is in ‘push’ mode this will make
loosening the bolts impossible.
• Remove the leg rests.
• Remove the entire seating unit (incl. electrical lift,
electrical tilt or mechanical tilt) from the carrier. Two
people are needed to carry out this operation.
Instructions
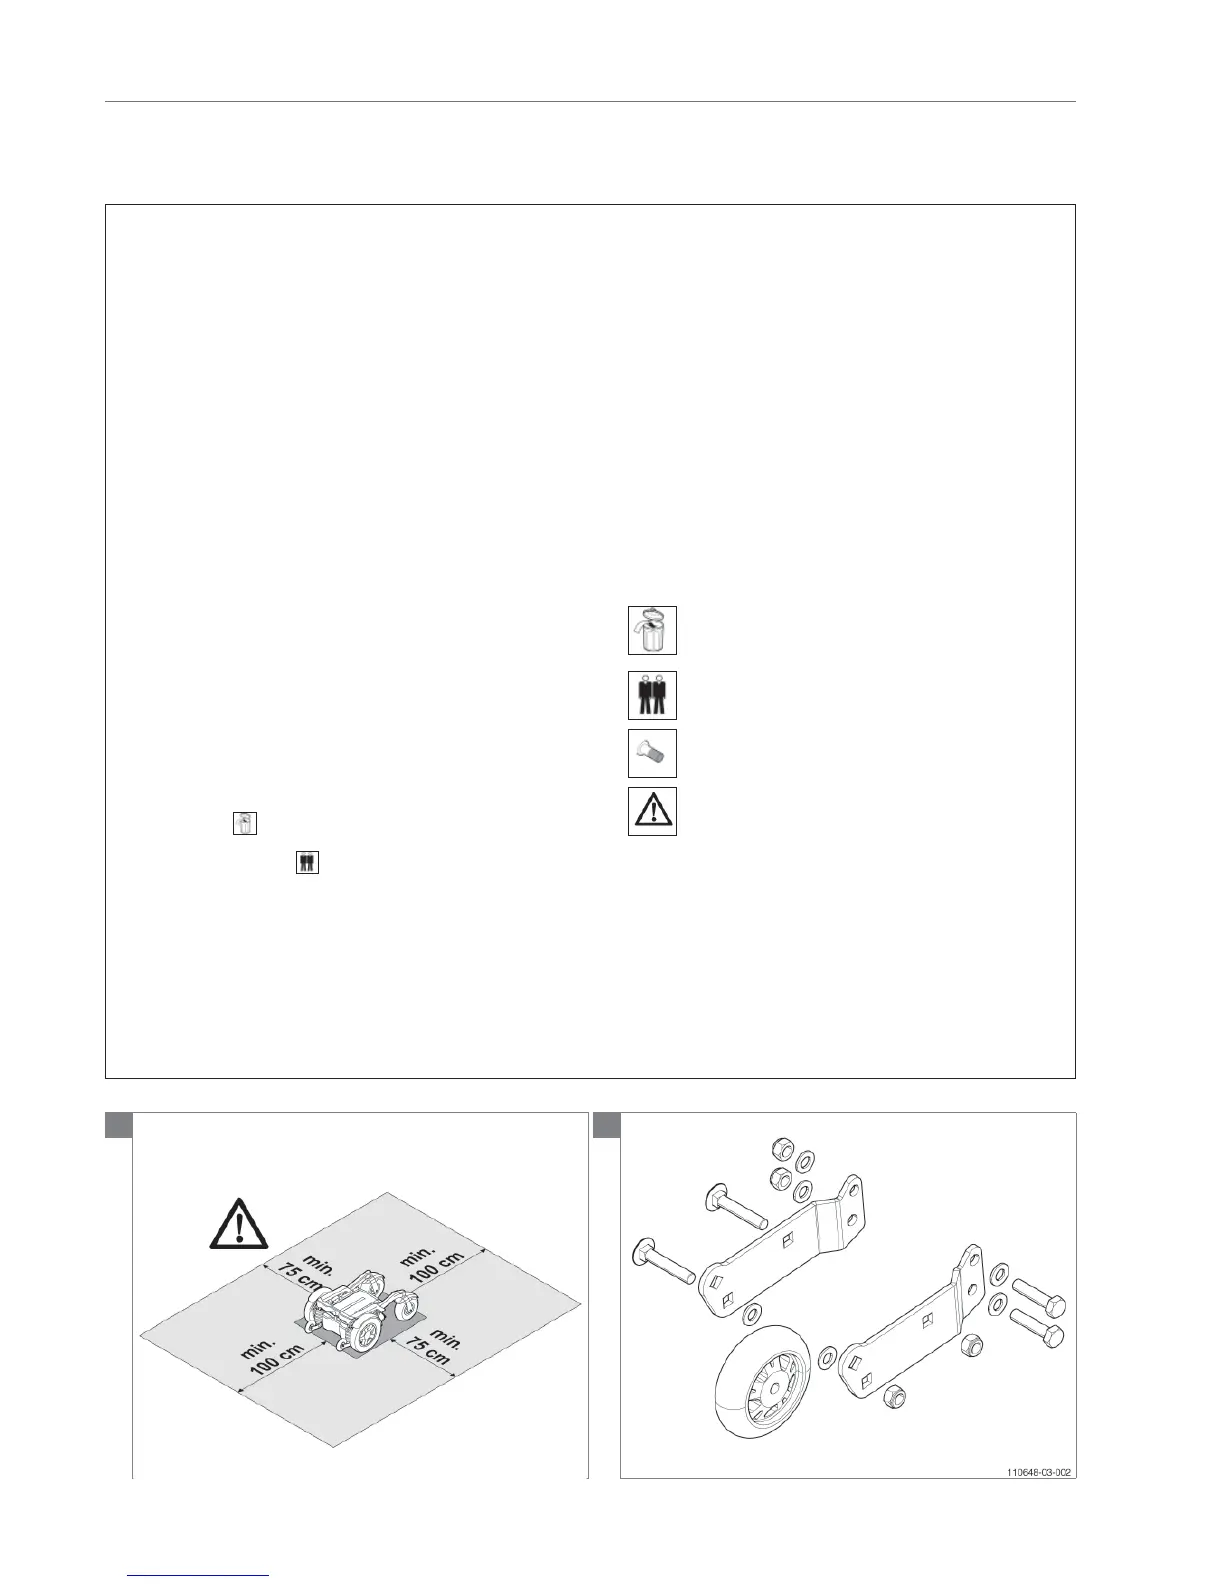
Note! Suitable work area required!
The following operations are required to convert the Puma
20/40:
• Change the direction of drive wheels and the mudguards
(only Puma 40).
• Replace the anti-tip wheels and the anti-tip brackets
(RWD wheels and brackets into FWD wheels and
brackets).
• Remount the interface and seating.
• Reprogram the wheel chair.
Note! The visual instructions show all actions only on one
side. Carry out all actions also on the other side of the
carrier!
Notice
• Use a lifting device to raise the wheelchair / Puma 20/40
carrier.
• Some parts need to be replaced; the replacement is
indicated by
symbol.
• Some operations have to be carried out by two persons;
this is indicated by a
symbol.
Relevant article numbers
• 9005962 P2040 Anti-Tip RWD Complete Service
• 9005963 P2040 Anti-Tip FWD Complete Service
• For more information see the eletrical diagrams at § 7.3.
Tools used
• Lifting device
• Allen key, 6 mm
• Open ended or ring spanners, 13 mm, 2x
• Torx key T30
• Screwdriver, medium, 5 mm
• Hammer (plastic)
• Chaser
• Torque wrench, socket, 13 mm
• Pair of wire-cutters
• Water pump pliers
• Tie wraps
Icons
•
Dispose of waste parts in accordance with local
regulations.
•
Action must be carried out by two persons!
• Bolts are provided with Loctite thread locker!
• Note! Be aware of the issue!
Step 1 Preparation.
1
Note! Suitable work area required!
2
Conversion set for converting FWD to RWD.





 To Next Page