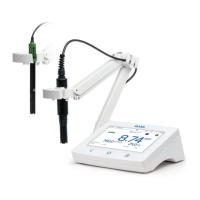
12.1. AUTOMATIC LOGGING
1. From Measurement screen, tap
(Measurement Menu).
2. Tap Reading tab and tap to select stability criteria (Accurate, Medium, or Fast).
3. Tap Logging tab and select Automatic logging type.
4. Scroll to select Sampling Period.
5. Tap (Home key) to reenter Measurement screen.
6. From Measurement screen, tap symbol to start/stop logging.
7. During active logging, users can track and log notes.
To add a new log note:
• Tap .
• Use on‑screen keypad to enter text.
• Tap to log entered note.
Log Recall view, and .CSV log indicate the added log notes.
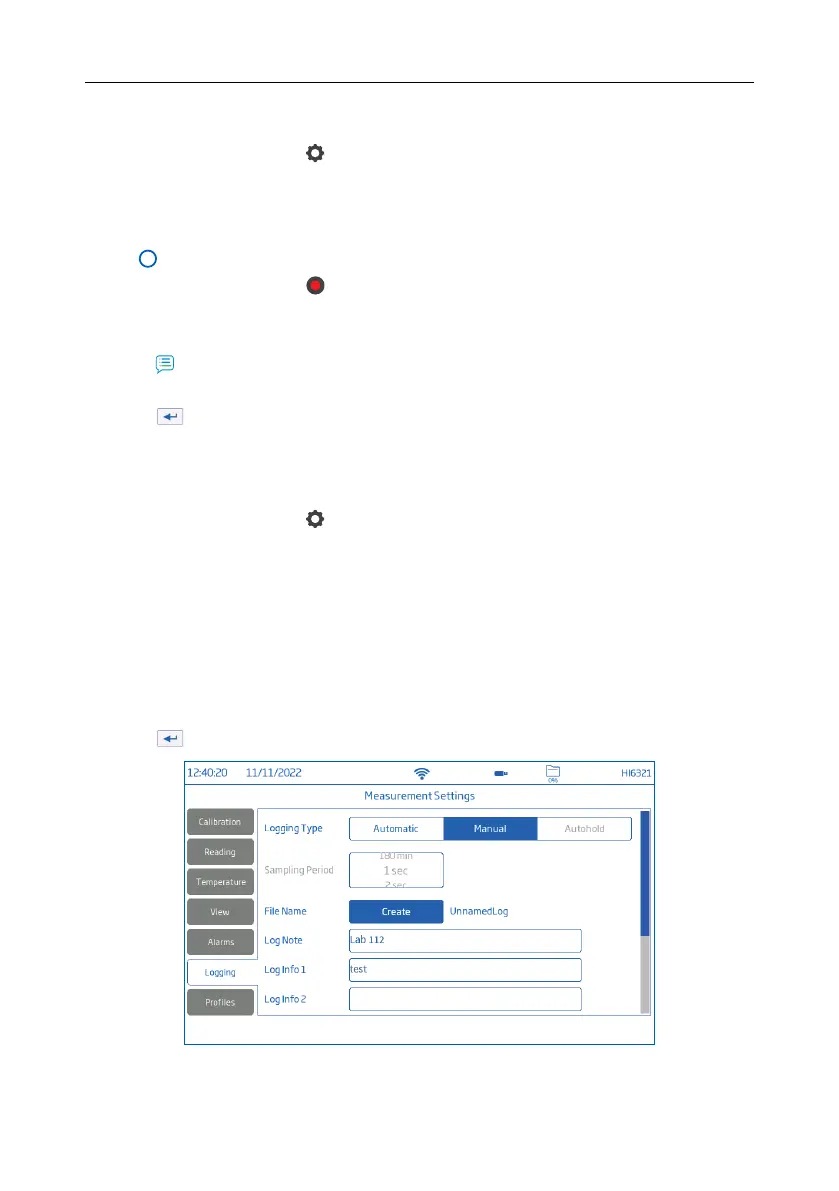
12.2. MANUAL LOGGING
1. From Measurement screen, tap
(Measurement Menu).
2. Tap Reading tab then select stability criteria (Accurate, Medium, or Fast).
Note: Manual logging doesn’t use this criteria for logging. Setting this is only for the user to note the stability
of the reading.
3. Tap Logging tab and select Manual logging type.
4. See option to create file name:
• Tap Create.
• Use on‑screen keypad to enter file name.
• Tap to save new name.
55 Logging