-CS -41
5-16
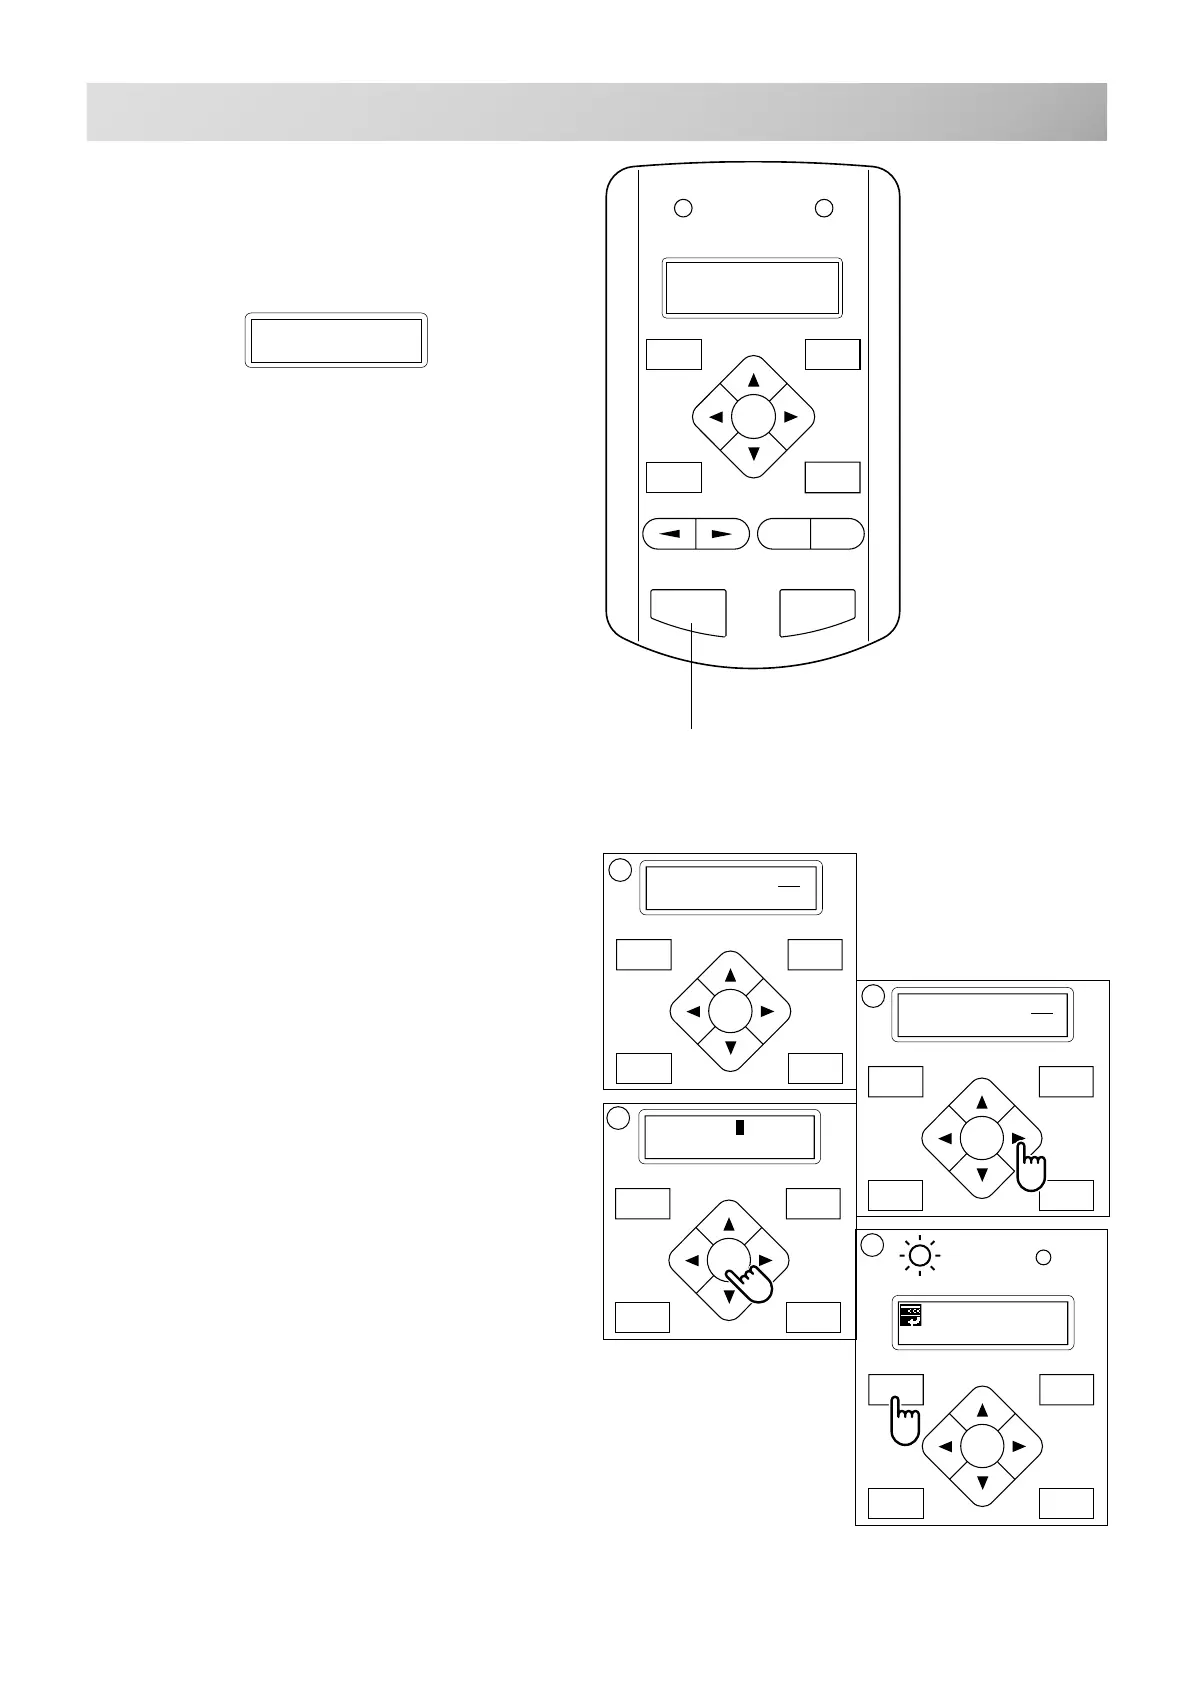
SETTING AUTOMATIC COLOR CHANGE
5_16 D610
P.FOOT T.CUT
MENU
FORWARD
ENT.
P.FOOT T.CUT
MENU
FORWARD
ENT.
P.FOOT T.CUT
MENU
FORWARD
ENT.
To set a color change stop
When a color change stop is set to a color
number, the machine will stop after it finishes
sewing the marked needle number.
The following message will be shown.
FORWARD
P.FOOT T.CUT
MENU
ENT.
ID: 2 Nd: 4
0
G
[NDL] 1: 4
2: 4
[NDL] 1: 4*
2: 4
2
[NDL] 1: 4*
2: 4
3
4
Start button
1. Follow the steps in order from 1. thorough 5
above.
2. After selecting the needle #, press the
”Right" arrow button.
A " * " mark will be shown on the side of the color
number.
If you press the “Left” arrow button, it will
remove the setting.
3. Press the "ENT. button".
You can repeat these steps for each color you
want to stop after.
4. Finally, Press the "MENU" button until a
green lamp shows on control box (Drive
Mode).
When a green lamp is showing you are in the
Drive mode and you can start the embroidery.
>>Change Stop
When you wish to start again, press the start
button.
FORWARD
MENU
P.FOOT
T.CUT
ENT.
START STOP
+
-