QuickStart Guide REX 200/250 | Version 5 | 26.05.2021 15
1. Download configuration to PC (via USB flash drive). The configuration file is saved on the PC and
can subsequently be transferred to the REX 200/250 using a USB stick (subsequent procedure de-
scribed in chapter 6.1).
2. Synchronize (recommended for subsequent modifications). If the router has already been config-
ured and a connection with the portal is established, each subsequent change to the configuration
can be carried out via the existing VPN remote connection (further procedure described in Section
6.2).
3. Transfer configuration to the device (with LAN connection, only possible via shDIALUP). For this
configuration option, the REX 200/250 must be accessible directly in the LAN from the PC. The PC
must also be logged in on the Internet via the shDIALUP dial-up client using your myREX24 ac-
count at the same time.
The transfer via USB stick (point 1) is explained in this Quick Start Guide, and how retroactive changes
can be transferred via the function “Synchronization” (Point 2).
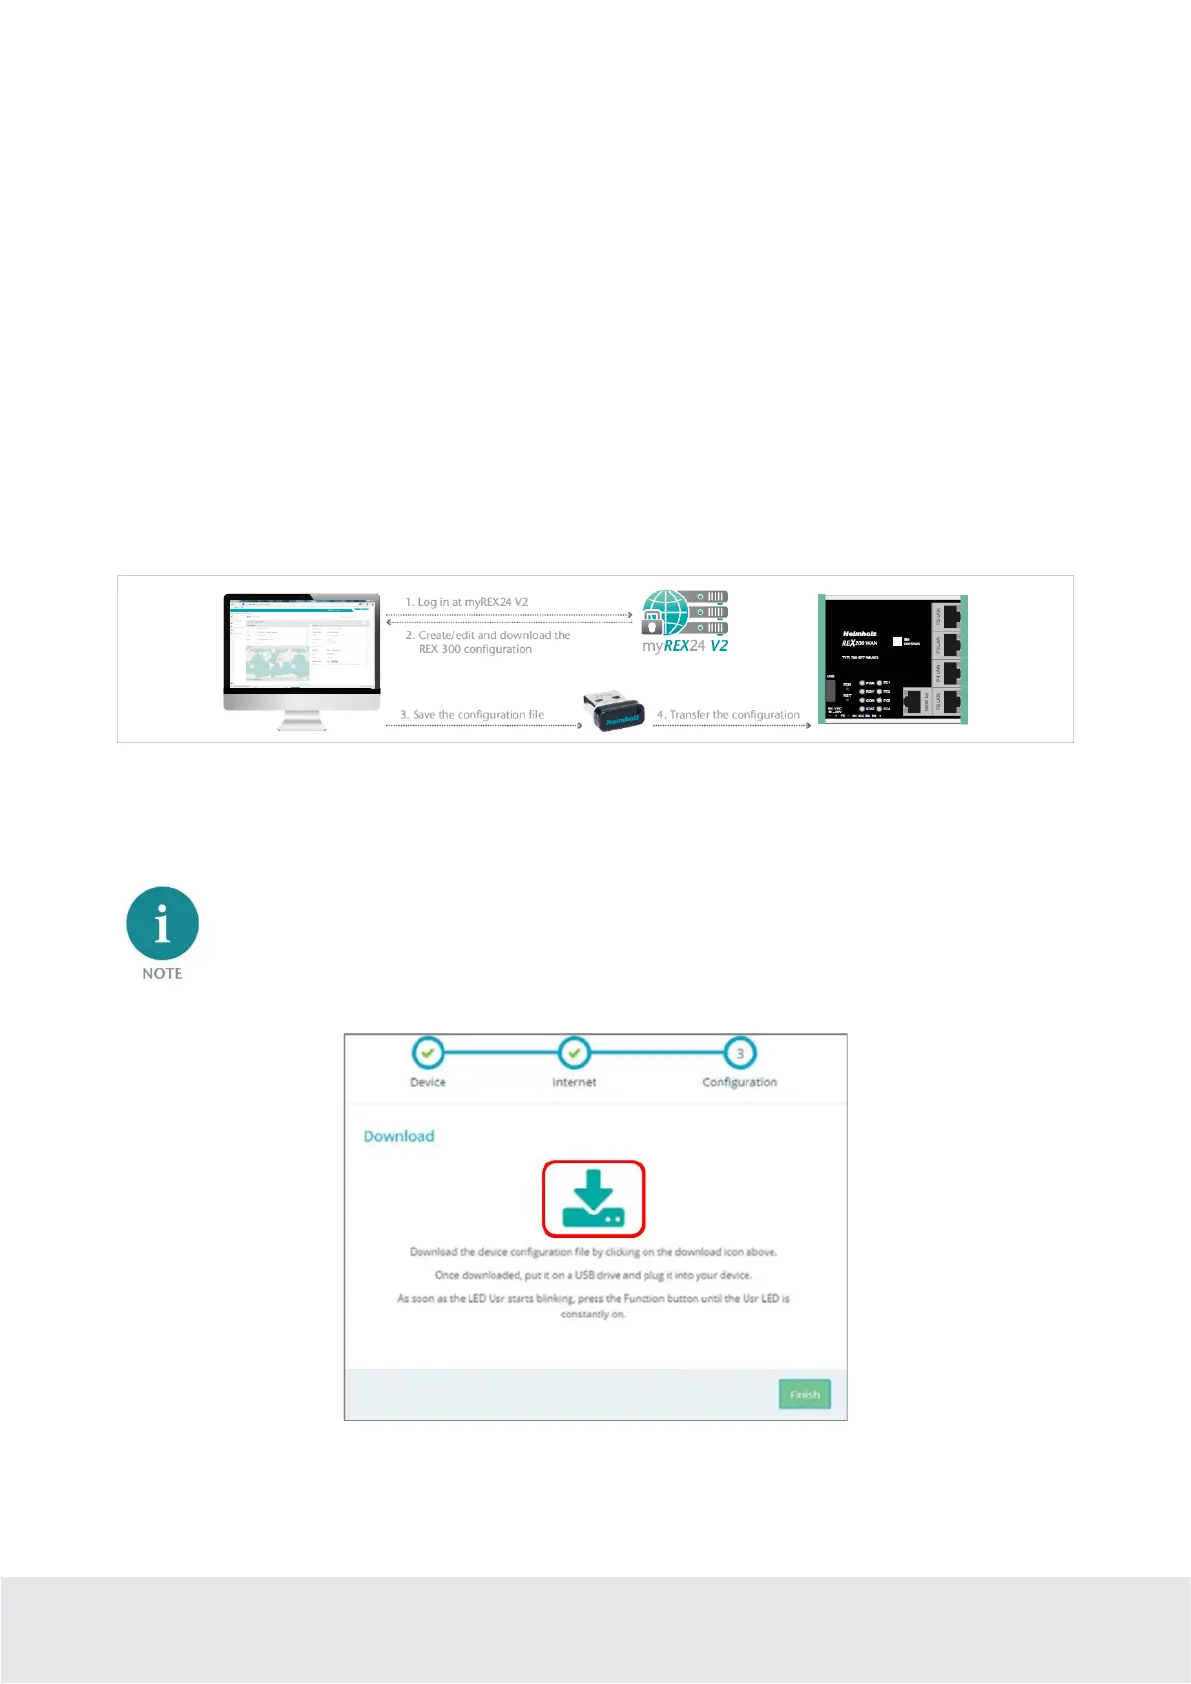
6.1 Transferring the configuration using a USB flash drive
Ensure that the power supply is connected to the REX 200/250. Download the configuration file provid-
ed through the myREX24 portal to the FAT-formatted USB flash drive connected to your PC using the
download symbol.
The myrex24.mbn(x) configuration file must be stored in the root directory of your USB flash drive
and may not be renamed.
Now carry out the steps described in chapter 15 “Load configuration/ firmware update from the USB
stick”.