QuickStart Guide REX 200/250 | Version 5 | 26.05.2021 24
10
Setting up the MPI/PROFIBUS interface
(REX 250 only)
The following steps are necessary to maintain an S7 MPI/PROFIBUS PLC remotely with the REX 250:
10.1 Installing driver
The current version can be downloaded at any time free of charge from www.helmholz.de. Install the
NETLink®-S7-NET driver on the remote maintenance PC where the engineering tool is already installed.
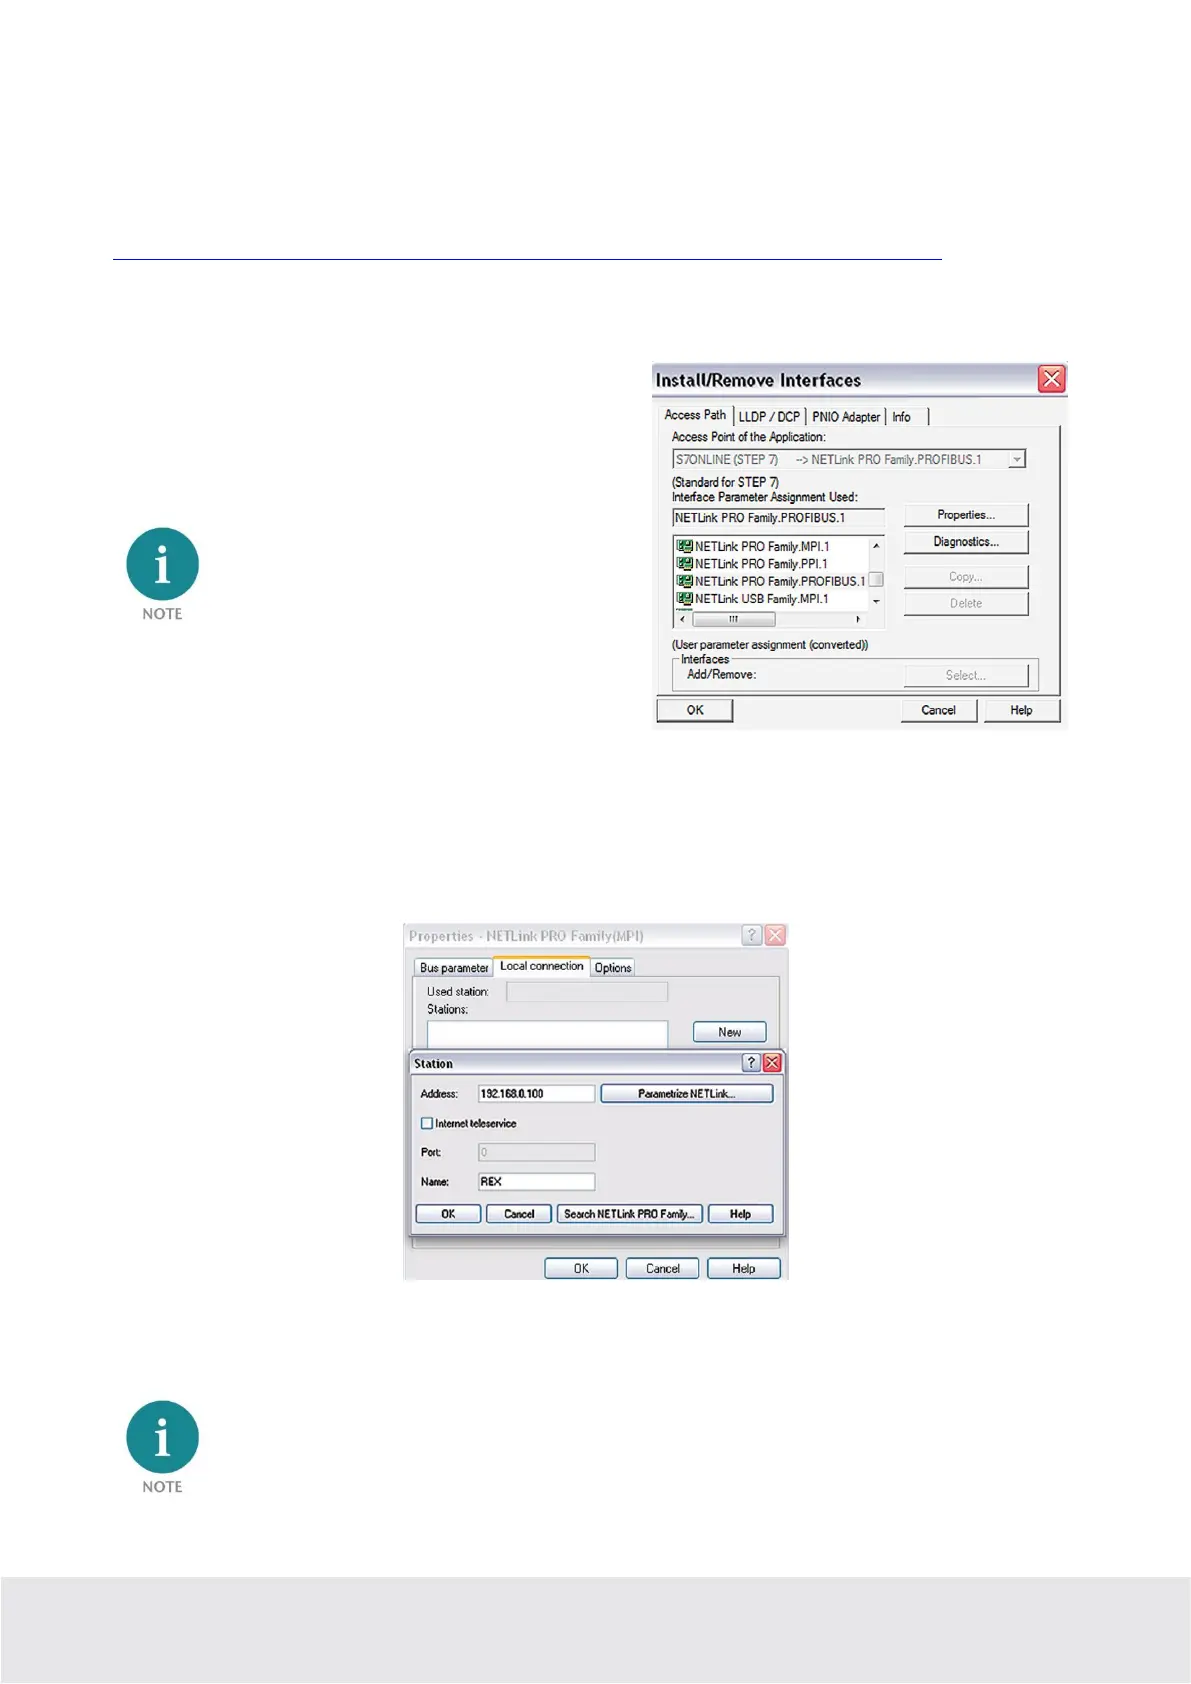
10.2 Creating a station
Following successful installation, the access paths of the
“NETL ink® PRO Family” are available in the PG/PC in-
terface.
For the TIA Portal as well, the general assign-
ments must first be carried out in the PG/PC
interface (accessible via the Windows Control
Panel).
Select a configuration (MPI, PPI or PROFIBUS) and open the “Properties…” page.
10.3 Assingning an IP-Adresse and name
Click the
“New”
button under the
“Local Connection”
tab to add the REX 250. Enter the LAN IP address
and the name of the router into the corresponding input fields.
The internal communications adapter can be accessed with these settings both locally via LAN and via
VPN. Then confirm with “OK”.
Please note that the port required by the REX 250 unit to communicate using the driver will be ena-
bled by default. The “Internet teleservice” function may not be activated!