49
• Check the rear shock absorber by pushing
hard downwards on rear grip while the
vehicle is not parked on stand. The
suspension action should be smooth and
there should be no oil leakage.
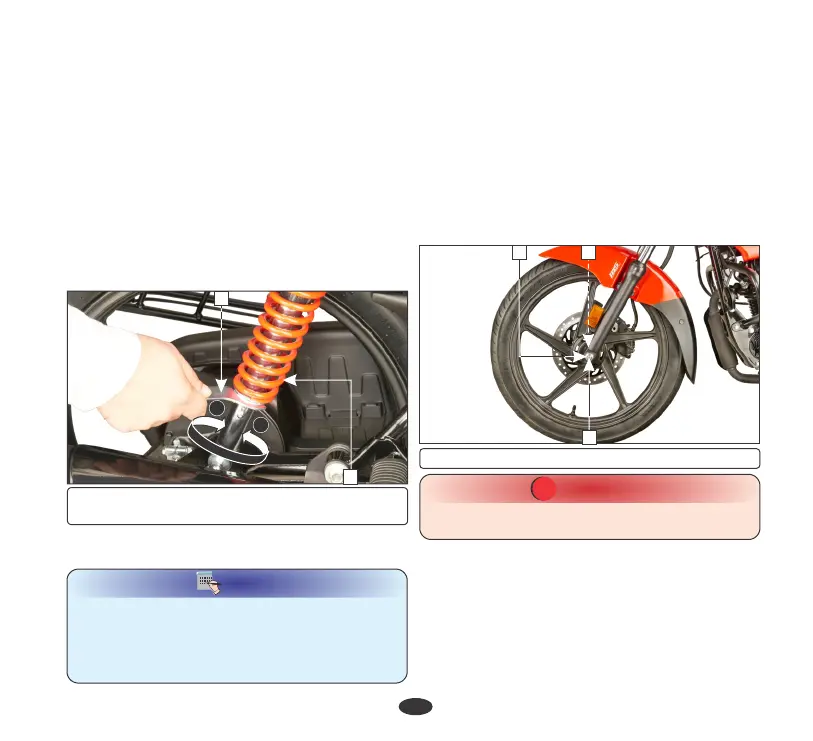
Rear shock absorber adjustment
Rear shock absorber adjustment can be made
in any position from 1st to 5th according to the
load/road conditions or owner’s requirement.
Recommend adjustment
• Solo rider : 2nd position
• Rider + Pillion: 5th position
B
A
(1) Rear shock absorber (2) Pin spanner
(A) Stiffer (B) Softer
2
1
NOTE
Always adjust both the rear shock absorbers to
the same position. To adjust the rear shock
absorber (1), use the rear shock absorber
adjustment tool (Pin spanner) (2) available in
the tool kit.
(a) Front wheel (Disc type)
•
Remove the front axle nut (1).
WHEEL
Removal
•
Support the vehicle securely on the main
stand and raise the front wheel off the
ground.
•
Remove the axle (2) and the wheel.
•
Remove the side collar (3) from the wheel.
• In direction B: Softer
• In direction A: Stiffer
CAUTION
!!
Do not operate front brake lever when the
wheel is removed.
(1) Axle nut (2) Axle (3) Side collar
1 3
2
Installation
•
Install the side collars (1) to both sides of
the wheel hub
•
Position the front wheel between the fork
legs by aligning the slot with lug on the fork
leg and the disc between the brake pads to
avoid damage to the pads. Insert the axle