DS-7700NI-SP/9000/9600 Series HDVR/NVR User’s Manual
45
7) Set the video quality using the Video Quality slider. Increasing the video quality will also
increase the max. bit rate recommended. The max. bit rate can be adjusted according to this
recommend.
8) Select the max. bit rate mode in the Max. Bitrate Mode dropdown menu. The options for the
camera max. bit rate mode include General and Customize (32-8192kbps).
9) Check the checkbox of record audio to enable or disable audio while recording.
10) Select the Video Stream to choose different kind of stream as recording stream. The options
for the video stream include main stream and substream.
11) Click the Apply button to save the settings.
12) Click the Copy button to copy the settings to other channels if the same settings can also be
used for other channels.
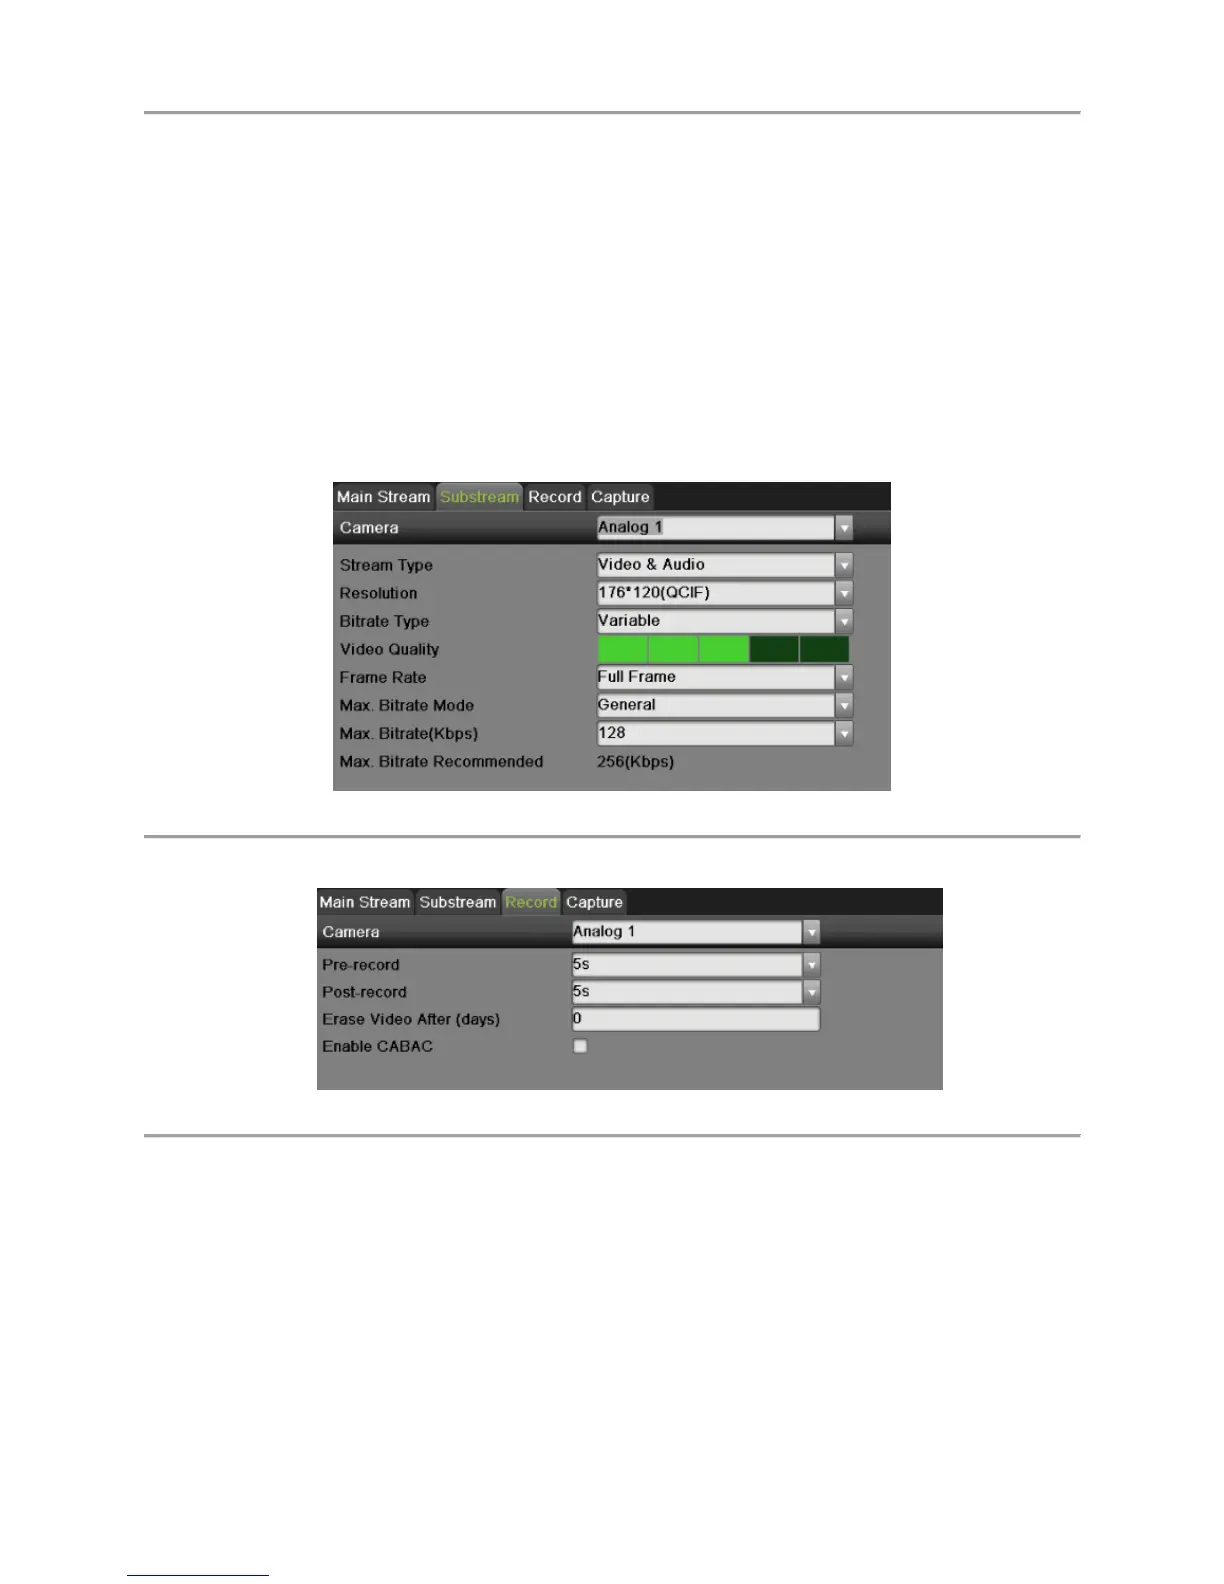
3. Select Substream tab, as shown in Figure 37, to configure the parameters of sub stream. The steps
are the same as main stream configuration.
Figure 37 Substream Settings Menu
4. Select record tab, as shown in Figure 38, to configure some parameters of recording.
Figure 38 Record Settings Menu
1) Select the Pre-record time. The pre-record time is the time in seconds to record before a
recording is triggered. Setting the pre-record time to MAX will allow the DVR to use up to
the maximum available buffer space for recording.
2) Select the Post-record time. The post-record time is the time in seconds to also record after a
recording has ended.
3) Enter the Erase Video After. The Erase Video After time denotes the amount of days that
files will be deleted after its initial recording. Setting the time to 0 will allow the DVR to
only delete and overwrite files when the HDD is full.
4) If check the Enable CABAC checkbox, DVR will reduce the bit rate to improve the quality
of image. This feature is supported by analog cameras only.

 Loading...