Do you have a question about the HIKVISION DS-TCG405-E and is the answer not in the manual?
Provides information on the manual's content, updates, and usage guidelines.
Lists Hikvision's trademarks and those of other companies.
Outlines limitations of liability and warranty for the product and manual.
Details FCC compliance, limits for digital devices, and potential interference.
States the two conditions under which the device complies with FCC Part 15.
Confirms compliance with EU directives for EMC, LVD, and RoHS.
Reiteration of regulatory compliance and user responsibilities for safe operation.
Emphasizes compliance with local laws and regulations for product usage.
Guidelines for safe and proper usage of the device's power supply.
Instructions for safe handling, operation, and storage of the device.
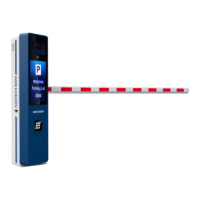
Overview of the Entrance and Exit Capture Camera and its applications.
Highlights the main functionalities and capabilities of the device.
Process of activating the device by setting an admin password.
Provides default IP address and username for device access.
Steps to activate the device using the SADP software tool.
Instructions for activating the device using a web browser interface.
Procedure for logging into the device via web browser for configuration.
Guides on setting basic parameters for quick capture setup.
Details on configuring fundamental parameters for capture operations.
Instructions for adjusting lens and image settings for optimal capture.
Advanced settings for customizing capture behavior and parameters.
Configuration of the device's operational mode for specific capture scenarios.
Fine-tuning parameters related to license plate recognition and capture.
Configures parameters for recognizing license plates from vehicles.
Adjusts settings for the supplement light to improve image quality.
Configures parameters for recognizing specific vehicle features like color or logos.
Adjusts resolution and compression settings for captured images.
Customizes the information overlaid on captured images.
How to view live captured images and associated license plate information.
Procedure for searching and exporting captured pictures from storage.
Connects the device to a barrier gate for access control.
Manages lists of license plates allowed or blocked by the barrier gate.
Configures how the barrier gate operates based on camera recognition.
Configures parameters for the device's LCD display.
Configures the network IP address for device connectivity.
Establishes connection between the device and a management platform.
Details the process of connecting the device to the ISUP platform.
Instructions for connecting the device to the Guarding Vision platform.
Configures Dynamic DNS for remote network access using a domain name.
Enables port-based network access control for enhanced security.
Configures network ports used by the device for communication.
Configures where video and picture files are stored.
Guides on formatting and managing the memory card for storage.
Configures the device to upload captured files to an FTP server.
Sets up a host to receive device alarm information and pictures.
Configures cloud storage for extended storage of captured data.
Defines storage allocation ratios for video and picture data.
Configures automatic video recording based on a time schedule.
Sets live view parameters and saving paths for local storage.
Adjusts video encoding settings for live view and recording quality.
Fine-tunes image settings like brightness, contrast, and sharpness.
Configures the Infrared Cut-Filter (ICR) mode for day/night switching.
Sets up Region of Interest (ROI) for focused encoding on specific areas.
Customizes On-Screen Display (OSD) information shown on video feeds.
Manages user accounts and their permissions for device access.
Configures rules to allow or deny IP addresses for device access.
Locks the IP address after multiple failed login attempts to enhance security.
Disables the SSH service to improve network security.
Configures HTTPS for secure encrypted communication.
Guides on generating and installing a self-signed SSL certificate.
Displays basic information and status of the device.
Manages system logs for troubleshooting and security auditing.
Activates the service for collecting and uploading system audit logs.
Allows searching and analyzing system log files for specific events.
Procedure for updating the device's firmware or system software.
Instructions for restarting the device via the software interface.
Restores device settings to default or factory configurations.
Synchronizes the device's clock with an external time source.
Configures Daylight Saving Time (DST) settings for the device.
Exports device configuration settings for backup or transfer.
Imports configuration settings from a file to the device.
Exports debug files for troubleshooting and technical support.
| Model | DS-TCG405-E |
|---|---|
| Category | Security System |
| Camera | 2 MP |
| Power Supply | 12 V DC |
| Interface | USB 2.0 |