16
Installation of the Projector
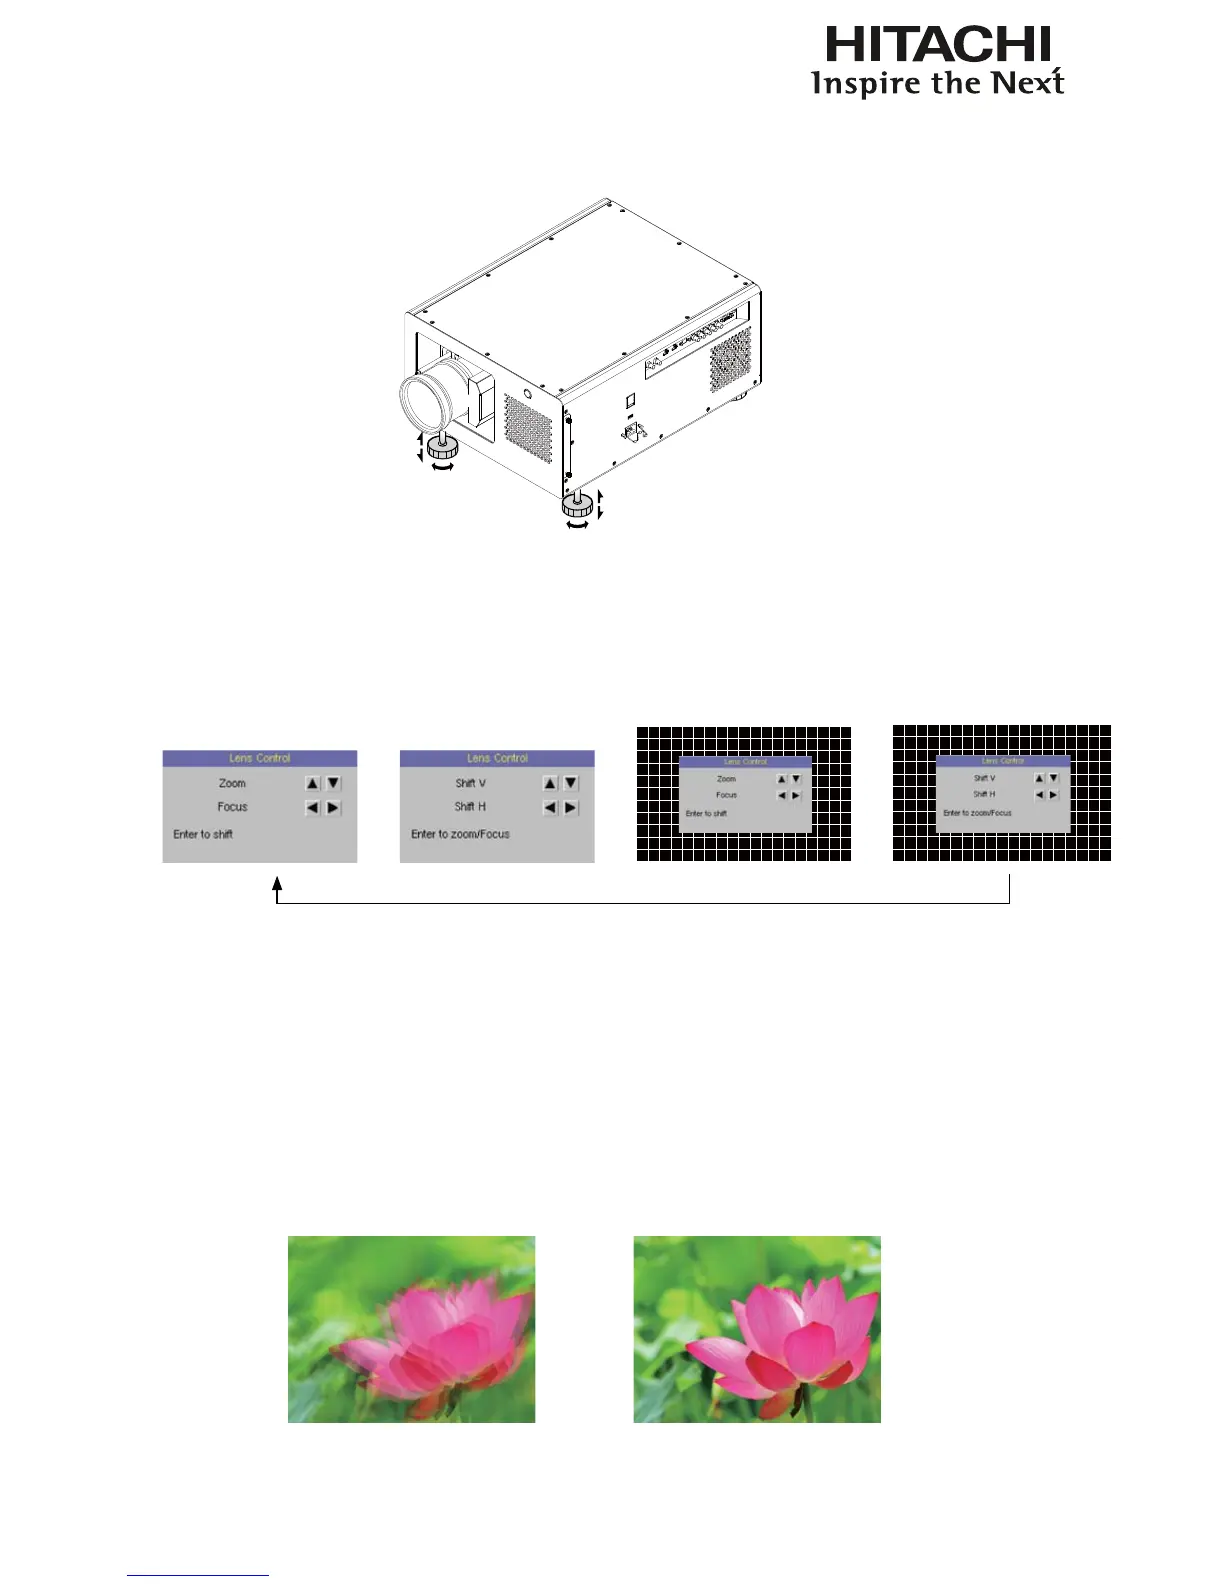
5. Adjusting the projector's angle
a. Please use the adjustable feet to change the angle of the projector in order to achieve the most
suitable angle for projection on the screen.
b. Adjusting the lens by horizontal and vertical lens shift
Method 1: Press the ENTER button on the remote control to access Lens Control adjustment
screen before pressing ENTER once again to access the menu and use the ()()
buttons to adjust the horizontal or vertical position of the lens.
Press ENTER once to adjust
zoom and focus
Press ENTER once to adjust
zoom and focus with cross
line
Press ENTER once to Adjust
Lines shift with cross line
Enter
Enter
Enter
Enter
Press ENTER again
to adjust vertical and
horizontal lens
shift
Method 2: Press the MENU button on the remote control and choose Alignment
Lens Control; then use the ()
)
(
buttons to adjust the horizontal or
vertical position of the lens.
6. Adjusting focus and zoom.
a. Press the MENU button on the remote control and choose Alignment Lens Control
to activate the Lens Control OSD, press enter to go through “Zoom/Focus”, “Lens
Shift”, “Zoom/Focus with Grid test pattern”, “Lens Shift with Grid test pattern” OSD
Cyclically. Stop at either “Zoom/Focus” or “Zoom/Focus” with Grid test pattern” OSD
; then use the *+ buttons to adjust the lens' focus (clarity).
 Loading...