3 PREPARATION
23
Setting up the lawn mower
4-
4
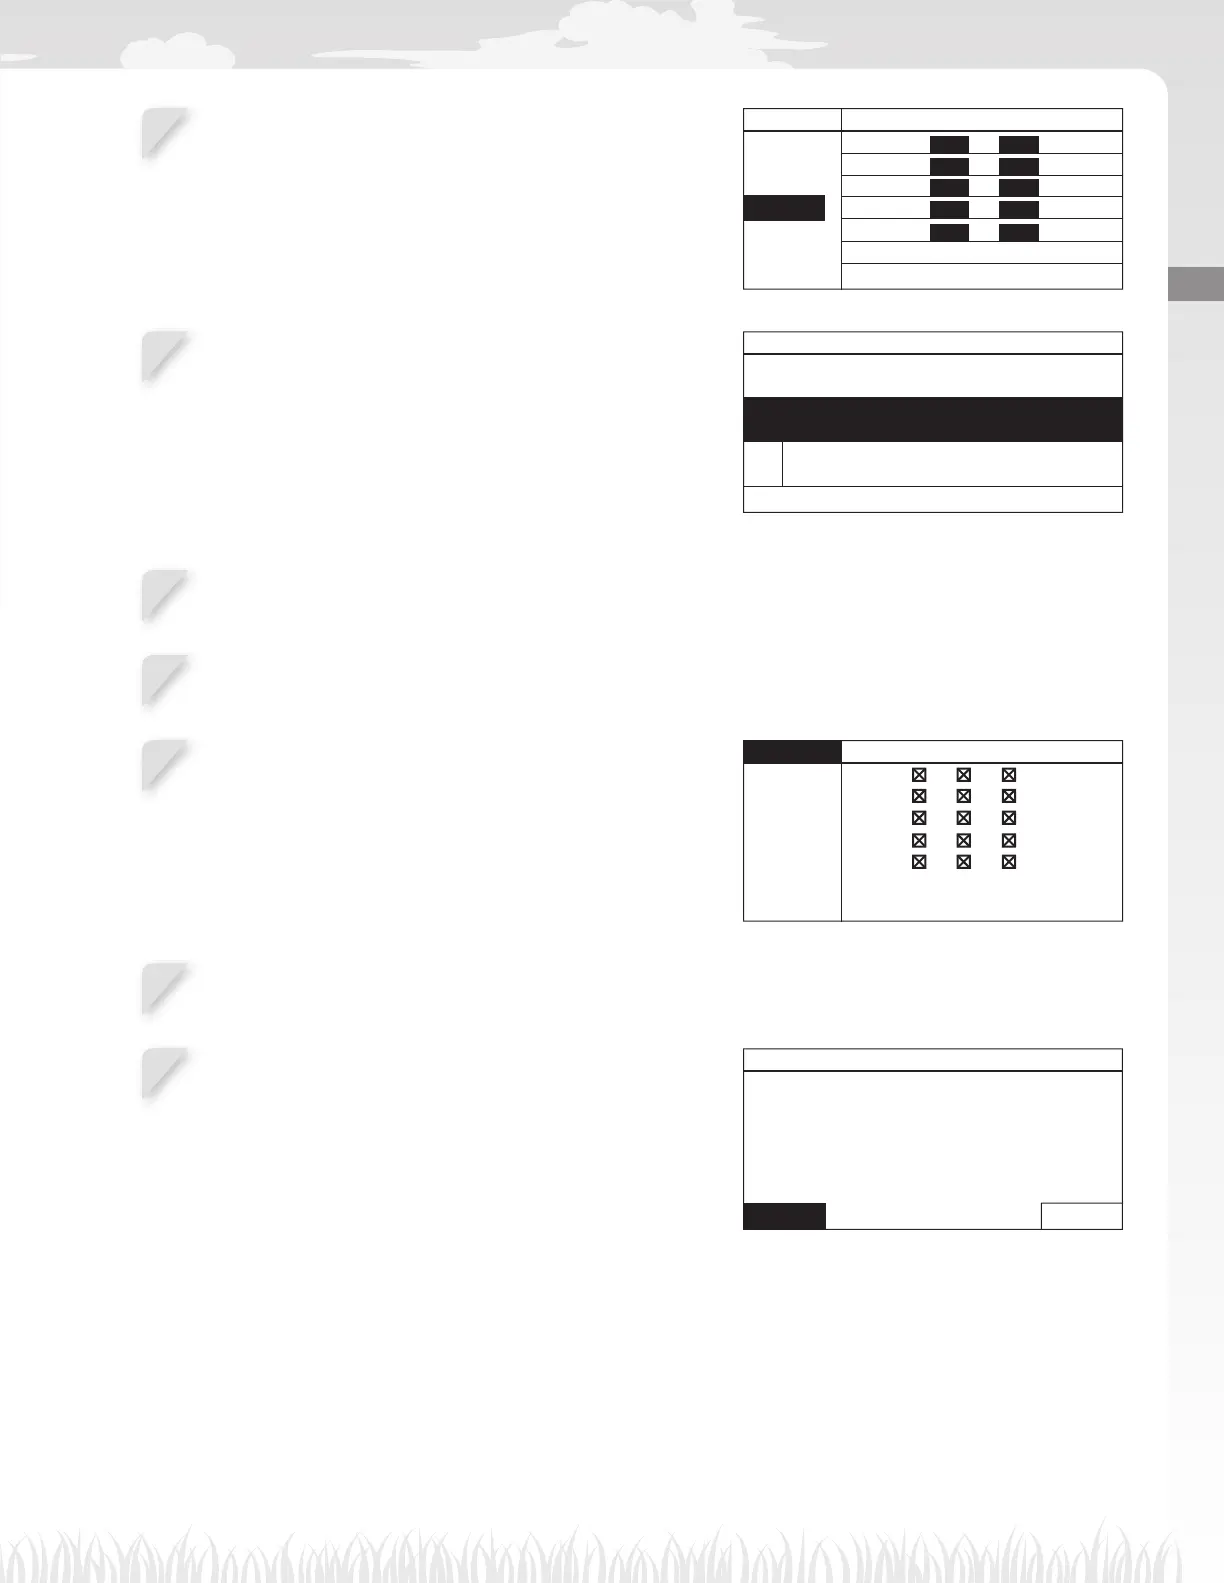
If you select [1.Auto fi ll up timer] in step 4-2, confi rm the
days that are automatically confi gured referring to the
boundary wire length and lawn size.
If you want to change the work time, select the day and
press the H button to change the work time of the lawn
mower.
If you select [2.Manual setup] in step 4-2, select the day
and press the H button to change the work time of the
lawn mower.
OK 0 6 12 18 24
MON
TUE
WED
THU
FRI
SA
T
SUN
4-
5
Enter a start time and an end time in 24-hour format for
[1]. If necessary, also enter a start time and an end time
in 24-hour format for [2].
NOTE:
- If selecting [Copy to week] and pressing the H
button, you can copy the settings to the other
days. For details on this operation, see “4 MENU
SETTINGS” (M page 25).
Work timer 6/7
From To
0 9 : 0 0 - 1 2 : 0 0
From To
1 8 : 0 0 - 2 2 : 0 0
Copy to week
Monday
1
2
4-
6
Press the G button to return to the previous screen.
4-
7
Select [OK] and press the H button.
4-
8
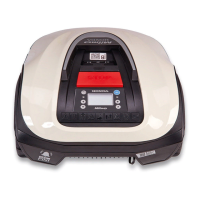
If desired, select start points to be used each day by
pressing the H button to select the start points.
NOTE:
- The check boxes which you confi gured in [2.Mowing
start points] are displayed.
OK Point 1 2 3 4 5
MON
TUE
WED
THU
FRI
SAT
SUN
4-
9
Select [OK] and press the H button.
4-
10
Confi rm the achieved and recommended hours per
week. Select [Yes] or [No] and press the H button.
If you select [Yes], go to step 4-11.
If you select [No], go to step 4-8.
Work timer 6/7
Achieved
90hrs/week
Recommended
100hrs/week
Continue?
Yes No