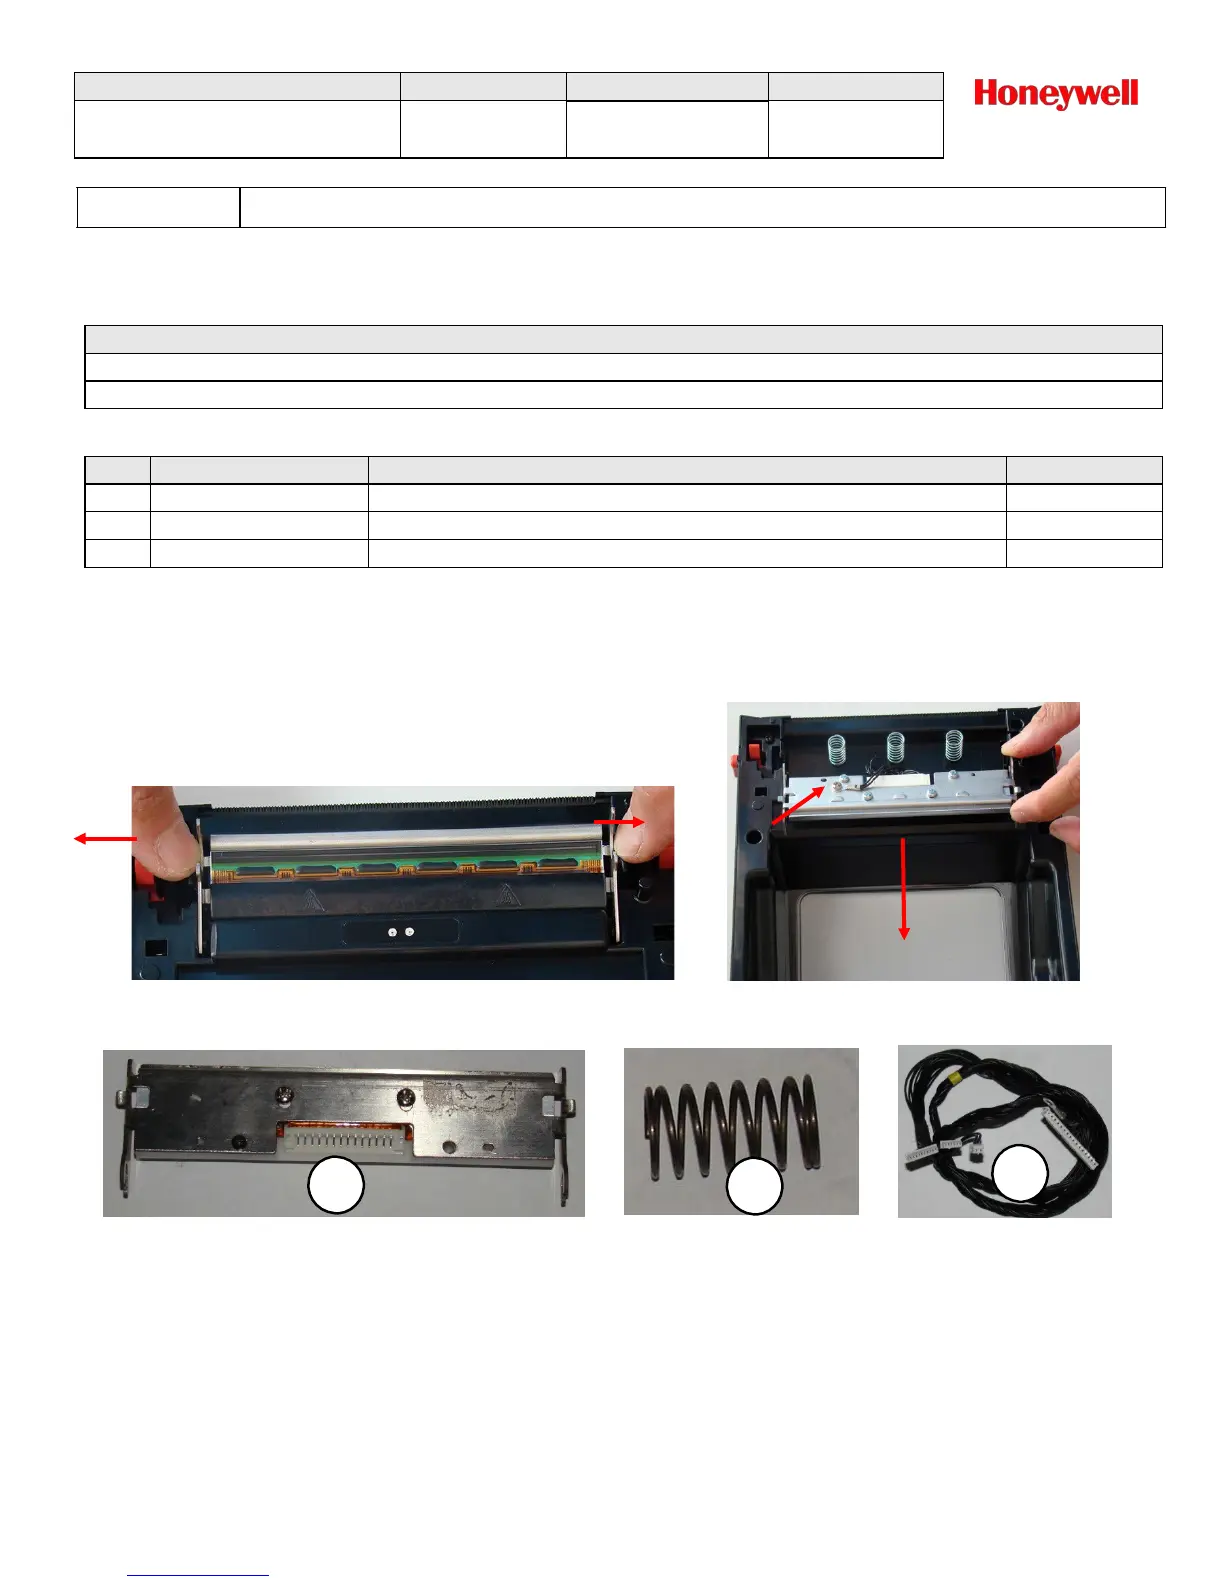
Carefully pull the latching tabs holding the printhead to the chassis assembly and grounding screw.
Tools Required
Parts Required
FRE, Assy, TPH Module, PC42d
FRE, Spring, TPH, 50-Pack
FRE, Cable, TPH and Ground
Printhead Assembly Removal
1. Remove the printhead by releasing the printhead latches on both side. See Figure 5.
2. Remove the printhead ground screw securing the printhead assembly to chasis ground. See Figure 6.
Figure 5 – Printhead Removal Figure 6 – Printhead Ground Screw
Printhead Assembly Printhead Spring Printhead Cable
Printhead Assembly Installation
1. Install in reverse order
2. Tighten printhead grounding screw to grounding scew to 6±0.3kfg/cm.
OPERATION:
PC42d Service Repair Manual PC42d
L3-GLBL-RPR-4260
Page 11 of 25

 Loading...