EasyManuals Logo

Honeywell ST 3000 Installation Guide

Honeywell ST 3000
126 pages
To Next Page IconTo Next Page
To Previous Page IconTo Previous Page
Page #40 background imageLoading...
Page #40 background image
4.1 Mounting ST 3000 Transmitter, Continued
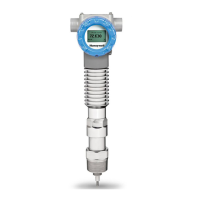
Flush mounting
To mount a flush mounted transmitter model, cut a hole for a 1-inch
standard pipe in the tank or pipe where the transmitter is to be mounted.
Weld the 1-inch mounting sleeve to the wall of the tank or to the hole
cut on the pipe. Insert the meter body of the transmitter into the
mounting sleeve and secure with the locking bolt. Tighten the bolt to a
torque of 8.1 to 13.5 N · m (6 to10 lb-ft). Figure 8 shows a typical
installation for a transmitter with a flush mount on a pipe.
Once the transmitter is mounted, the transmitter
housing can be rotated
to the desired position. See Table 8, step 4.
ATTENTION
On insulated tanks, remove enough insulation to accommodate the
mounting sleeve.
Figure 8 Typical Flush Mounted Transmitter Installation
1” Pipe Mount -
316 SS Weld Nipple
(standard option)
Continued on next page
30 ST 3000 Release 300 Installation Guide 2/05
Table of Contents

Other manuals for Honeywell ST 3000

Questions and Answers:

Question and Answer IconNeed help?

Do you have a question about the Honeywell ST 3000 and is the answer not in the manual?

Honeywell ST 3000 Specifications

General IconGeneral
ManufacturerHoneywell
CategoryTransmitter
Stability±0.01% of URL per year
Operating Temperature-40 to 85°C (-40 to 185°F)
Communication ProtocolHART
Housing MaterialAluminum or Stainless Steel
Enclosure RatingIP66/67, NEMA 4X
Measurement TypeGauge, Absolute, Differential
Output Signal4-20 mA, HART
Process Temperature-40 to 121°C (-40 to 250°F)
Hazardous Area ApprovalsFM, CSA, ATEX, IECEx
Process Connection1/2" NPT
Material316L Stainless Steel, Hastelloy C

Related product manuals